Test post
hello!
hello!
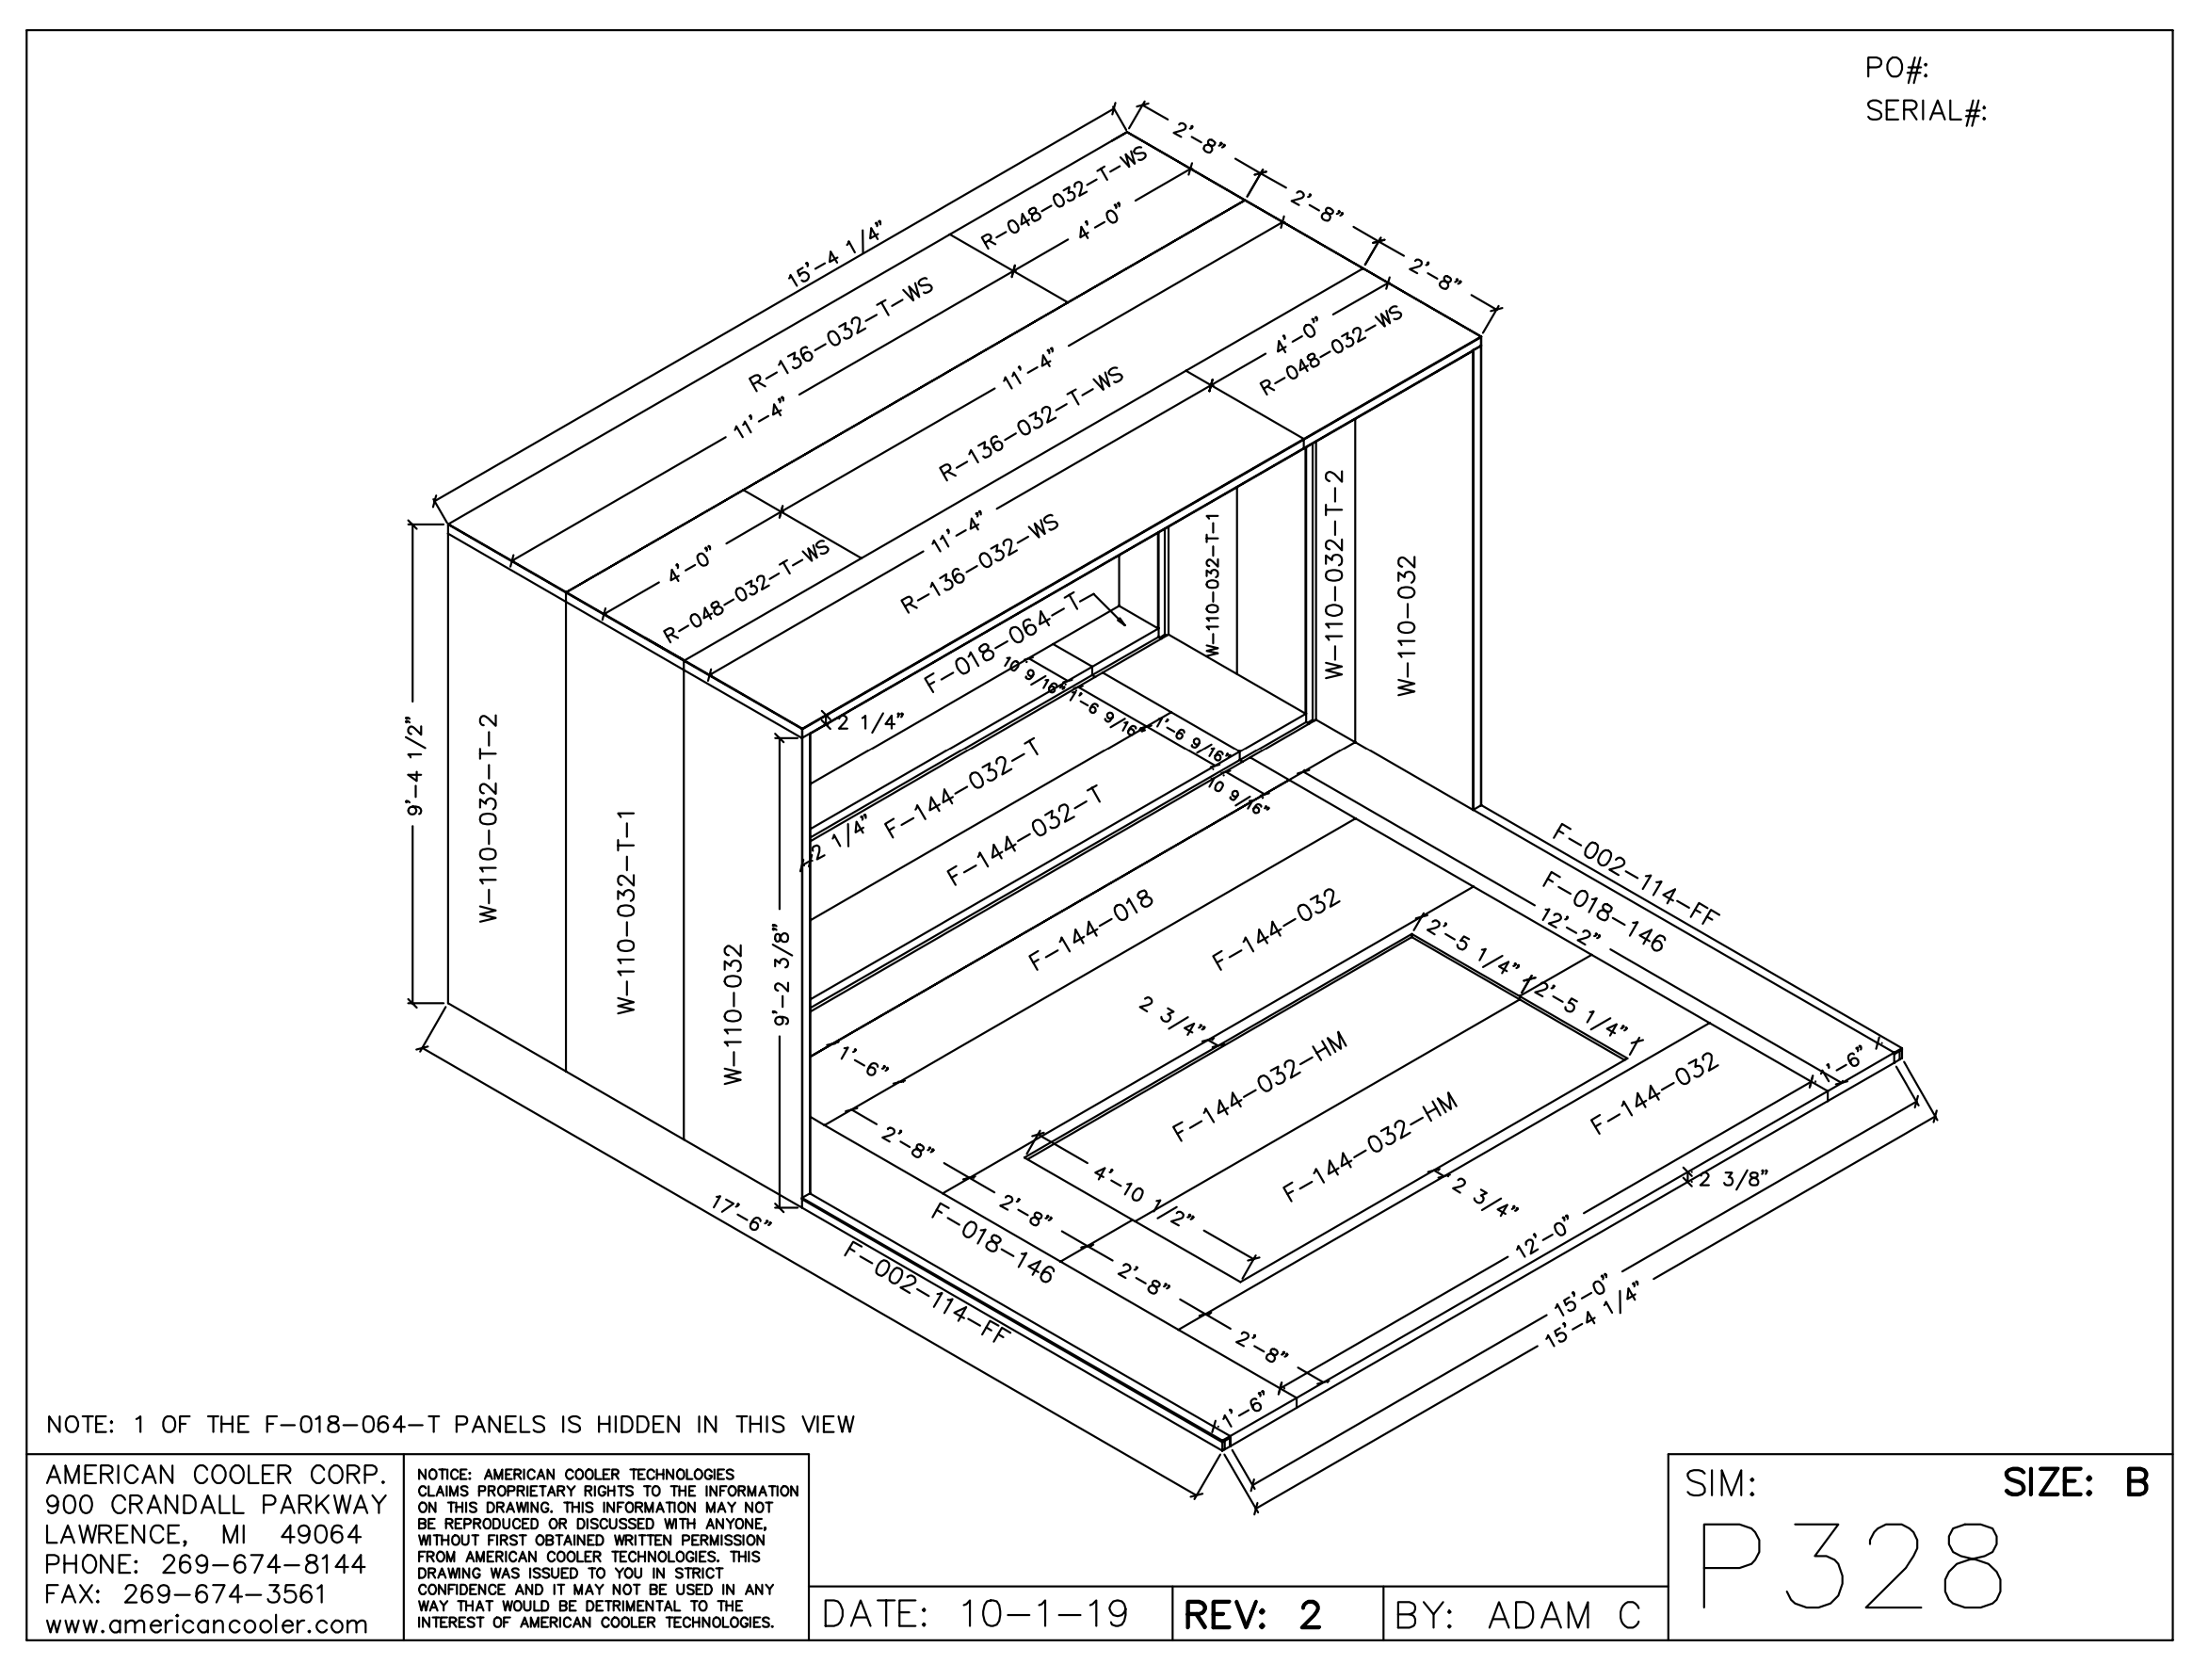
The roof panels for the Sport/Pro 3 Widescreen booths require a new installation method to help reinforce the entire roof. Please read these directions thoroughly before you begin installing the roof.
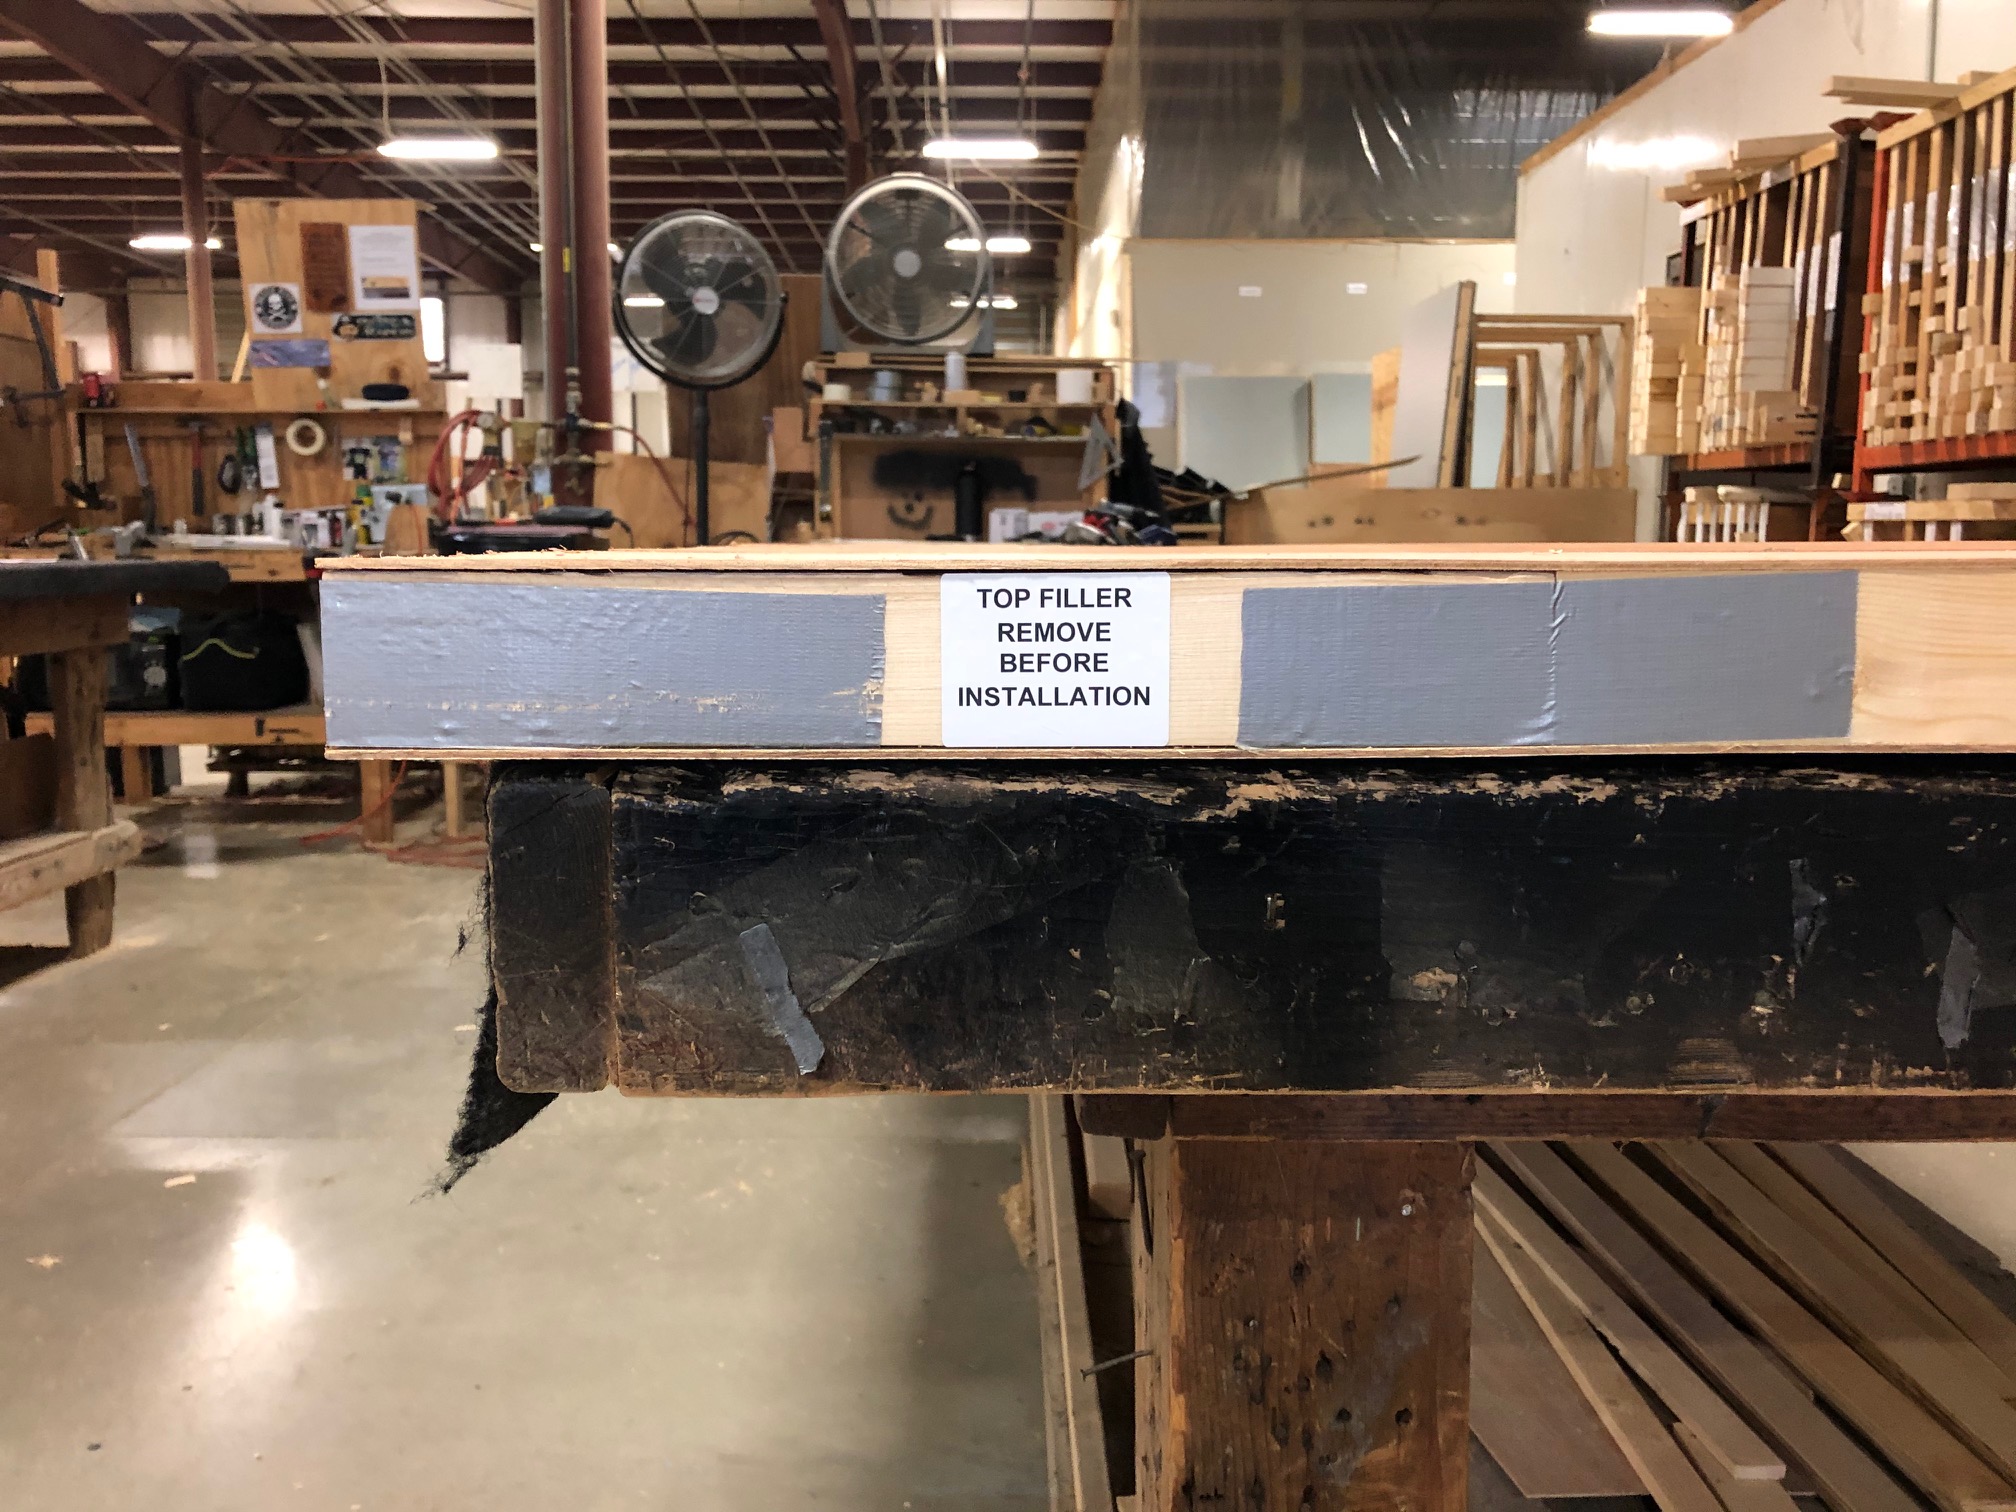
Remove the shipping inserts from the end of roof panels. These are taped in place to protect Lauan plywood during shipment.
BE CAREFUL NOT TO DAMAGE THE THIN PLYWOOD EDGES AFTER REMOVAL!!!
A. Orient panels with interior facing up
B. Lock short and long panels together
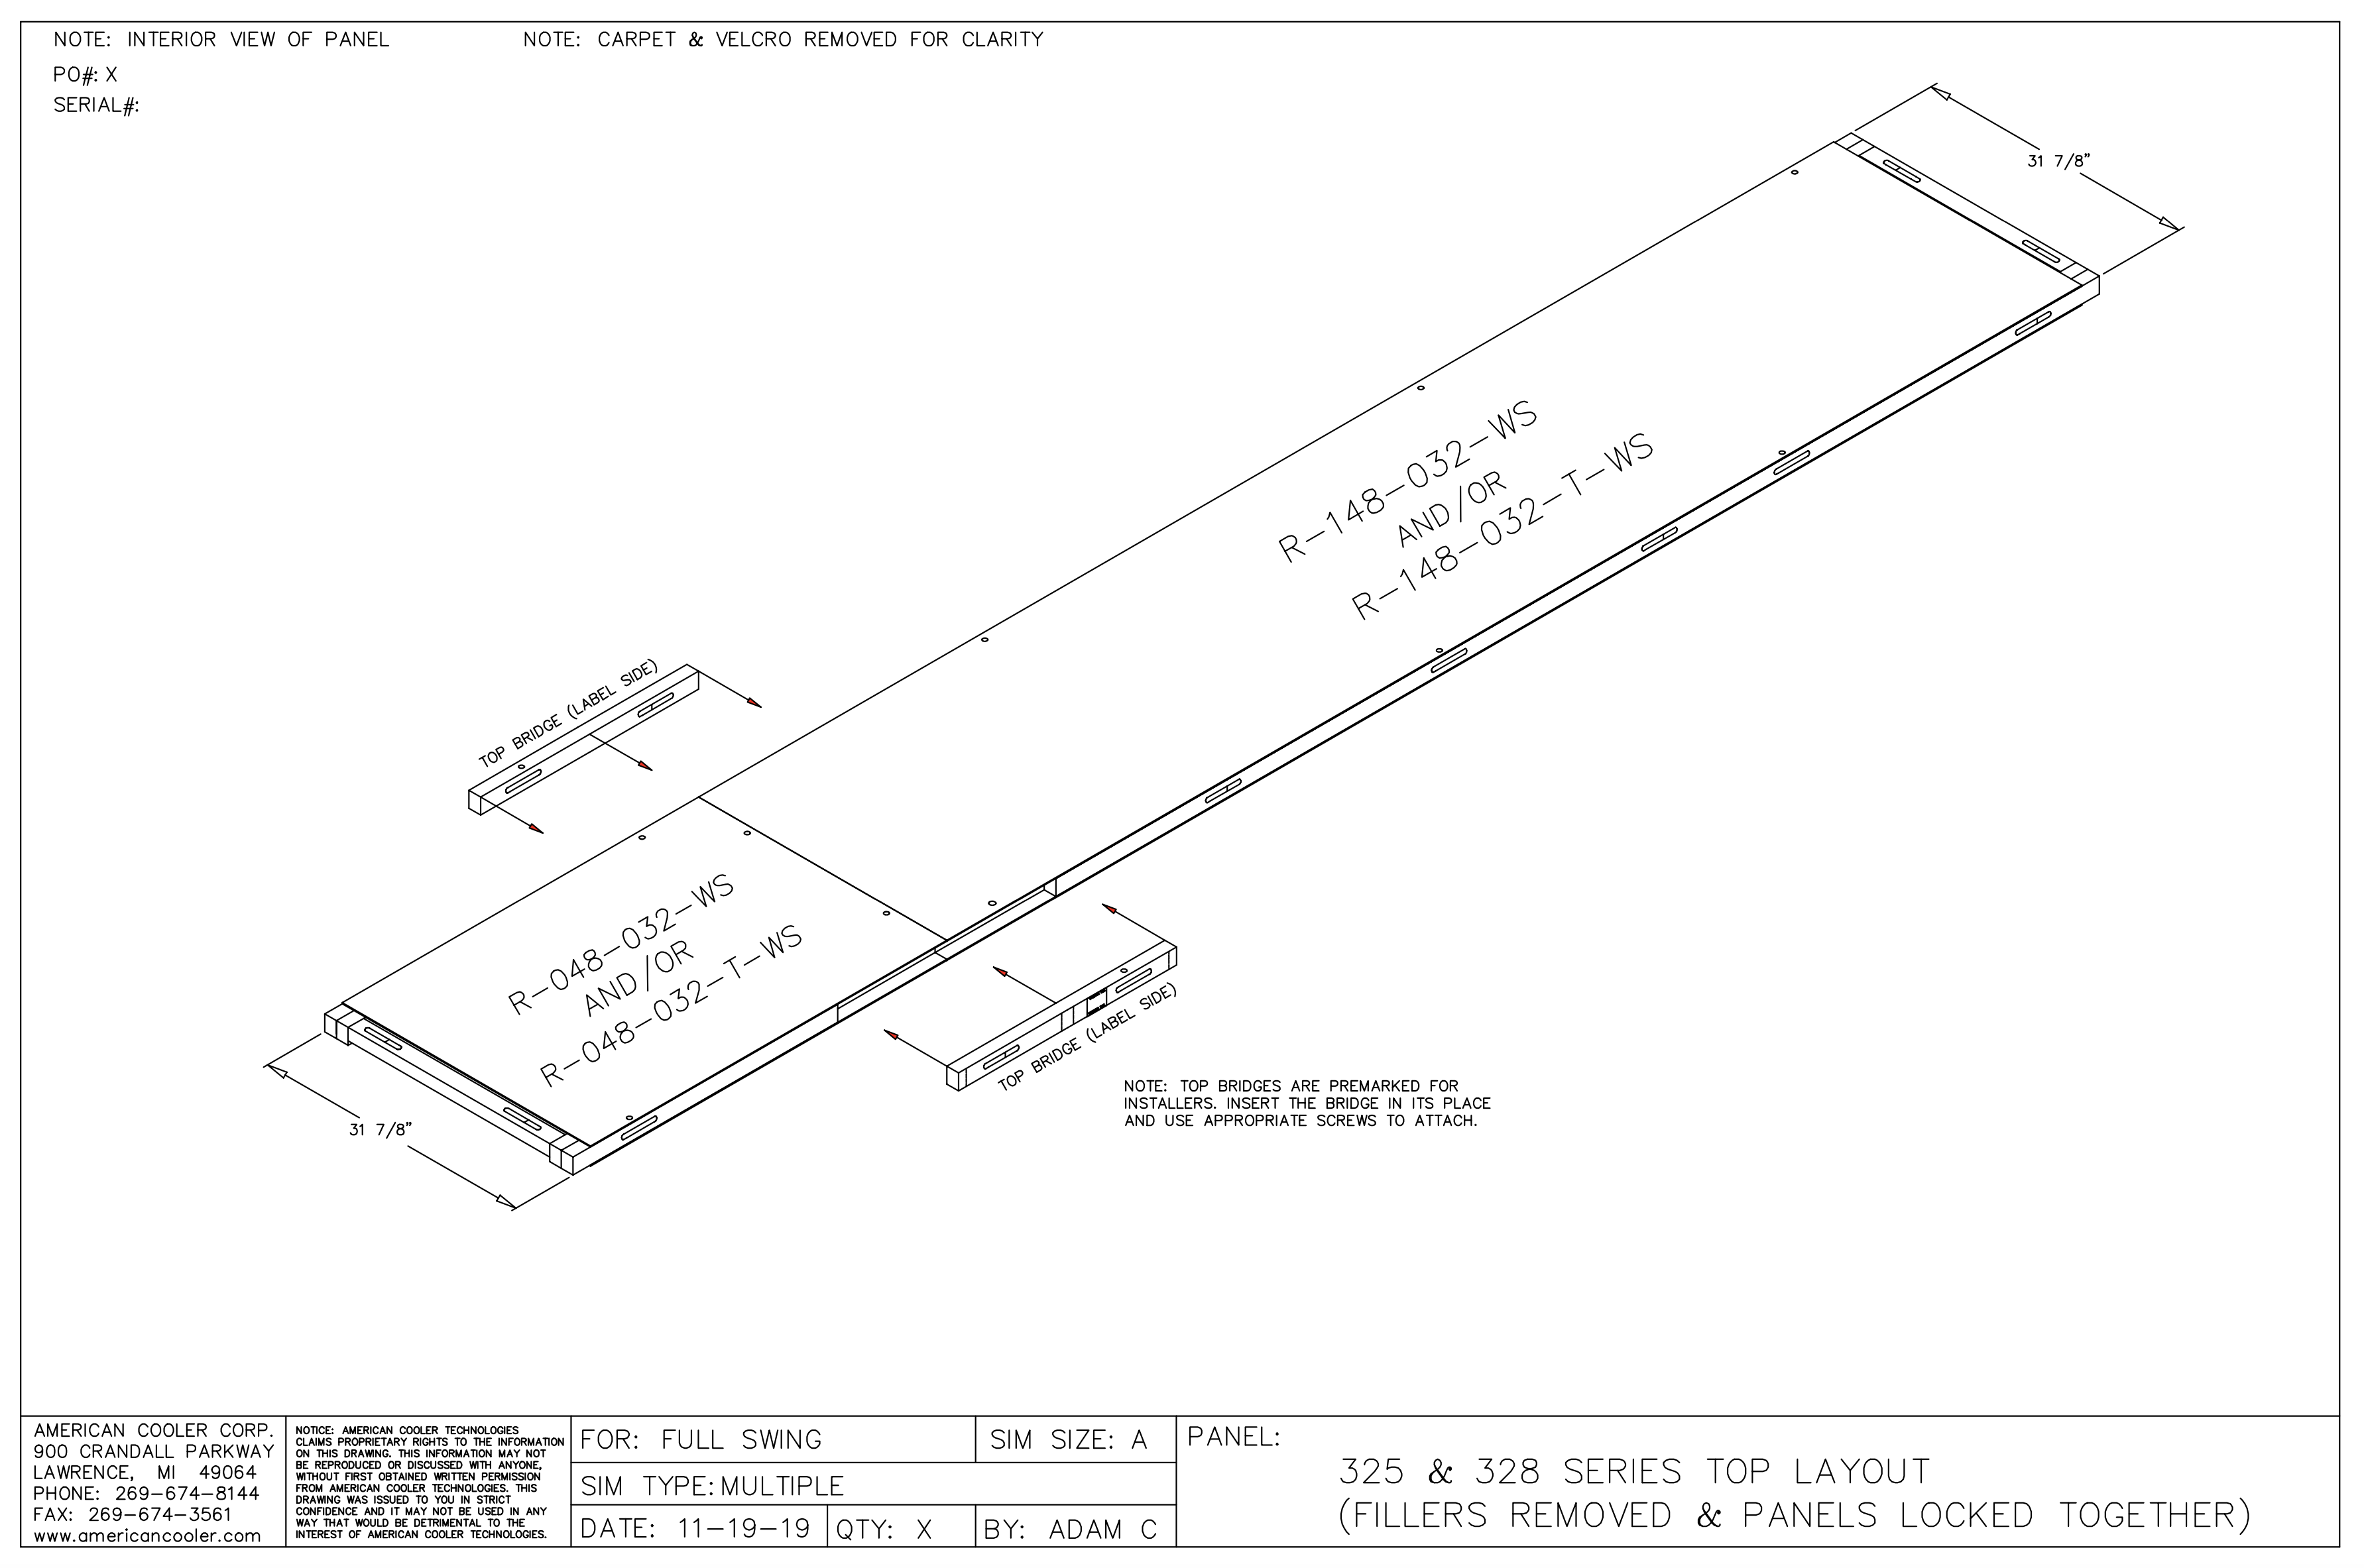
A. Orient Bridge Rails as shown in diagram.
NOTE: Make sure hooks and pins are in the correct locations!
B. Screw bridges across seam of both panels using (6) 3″ drywall screws.
NOTE: You must pre-drill six holes to avoid splitting the bridge pieces!
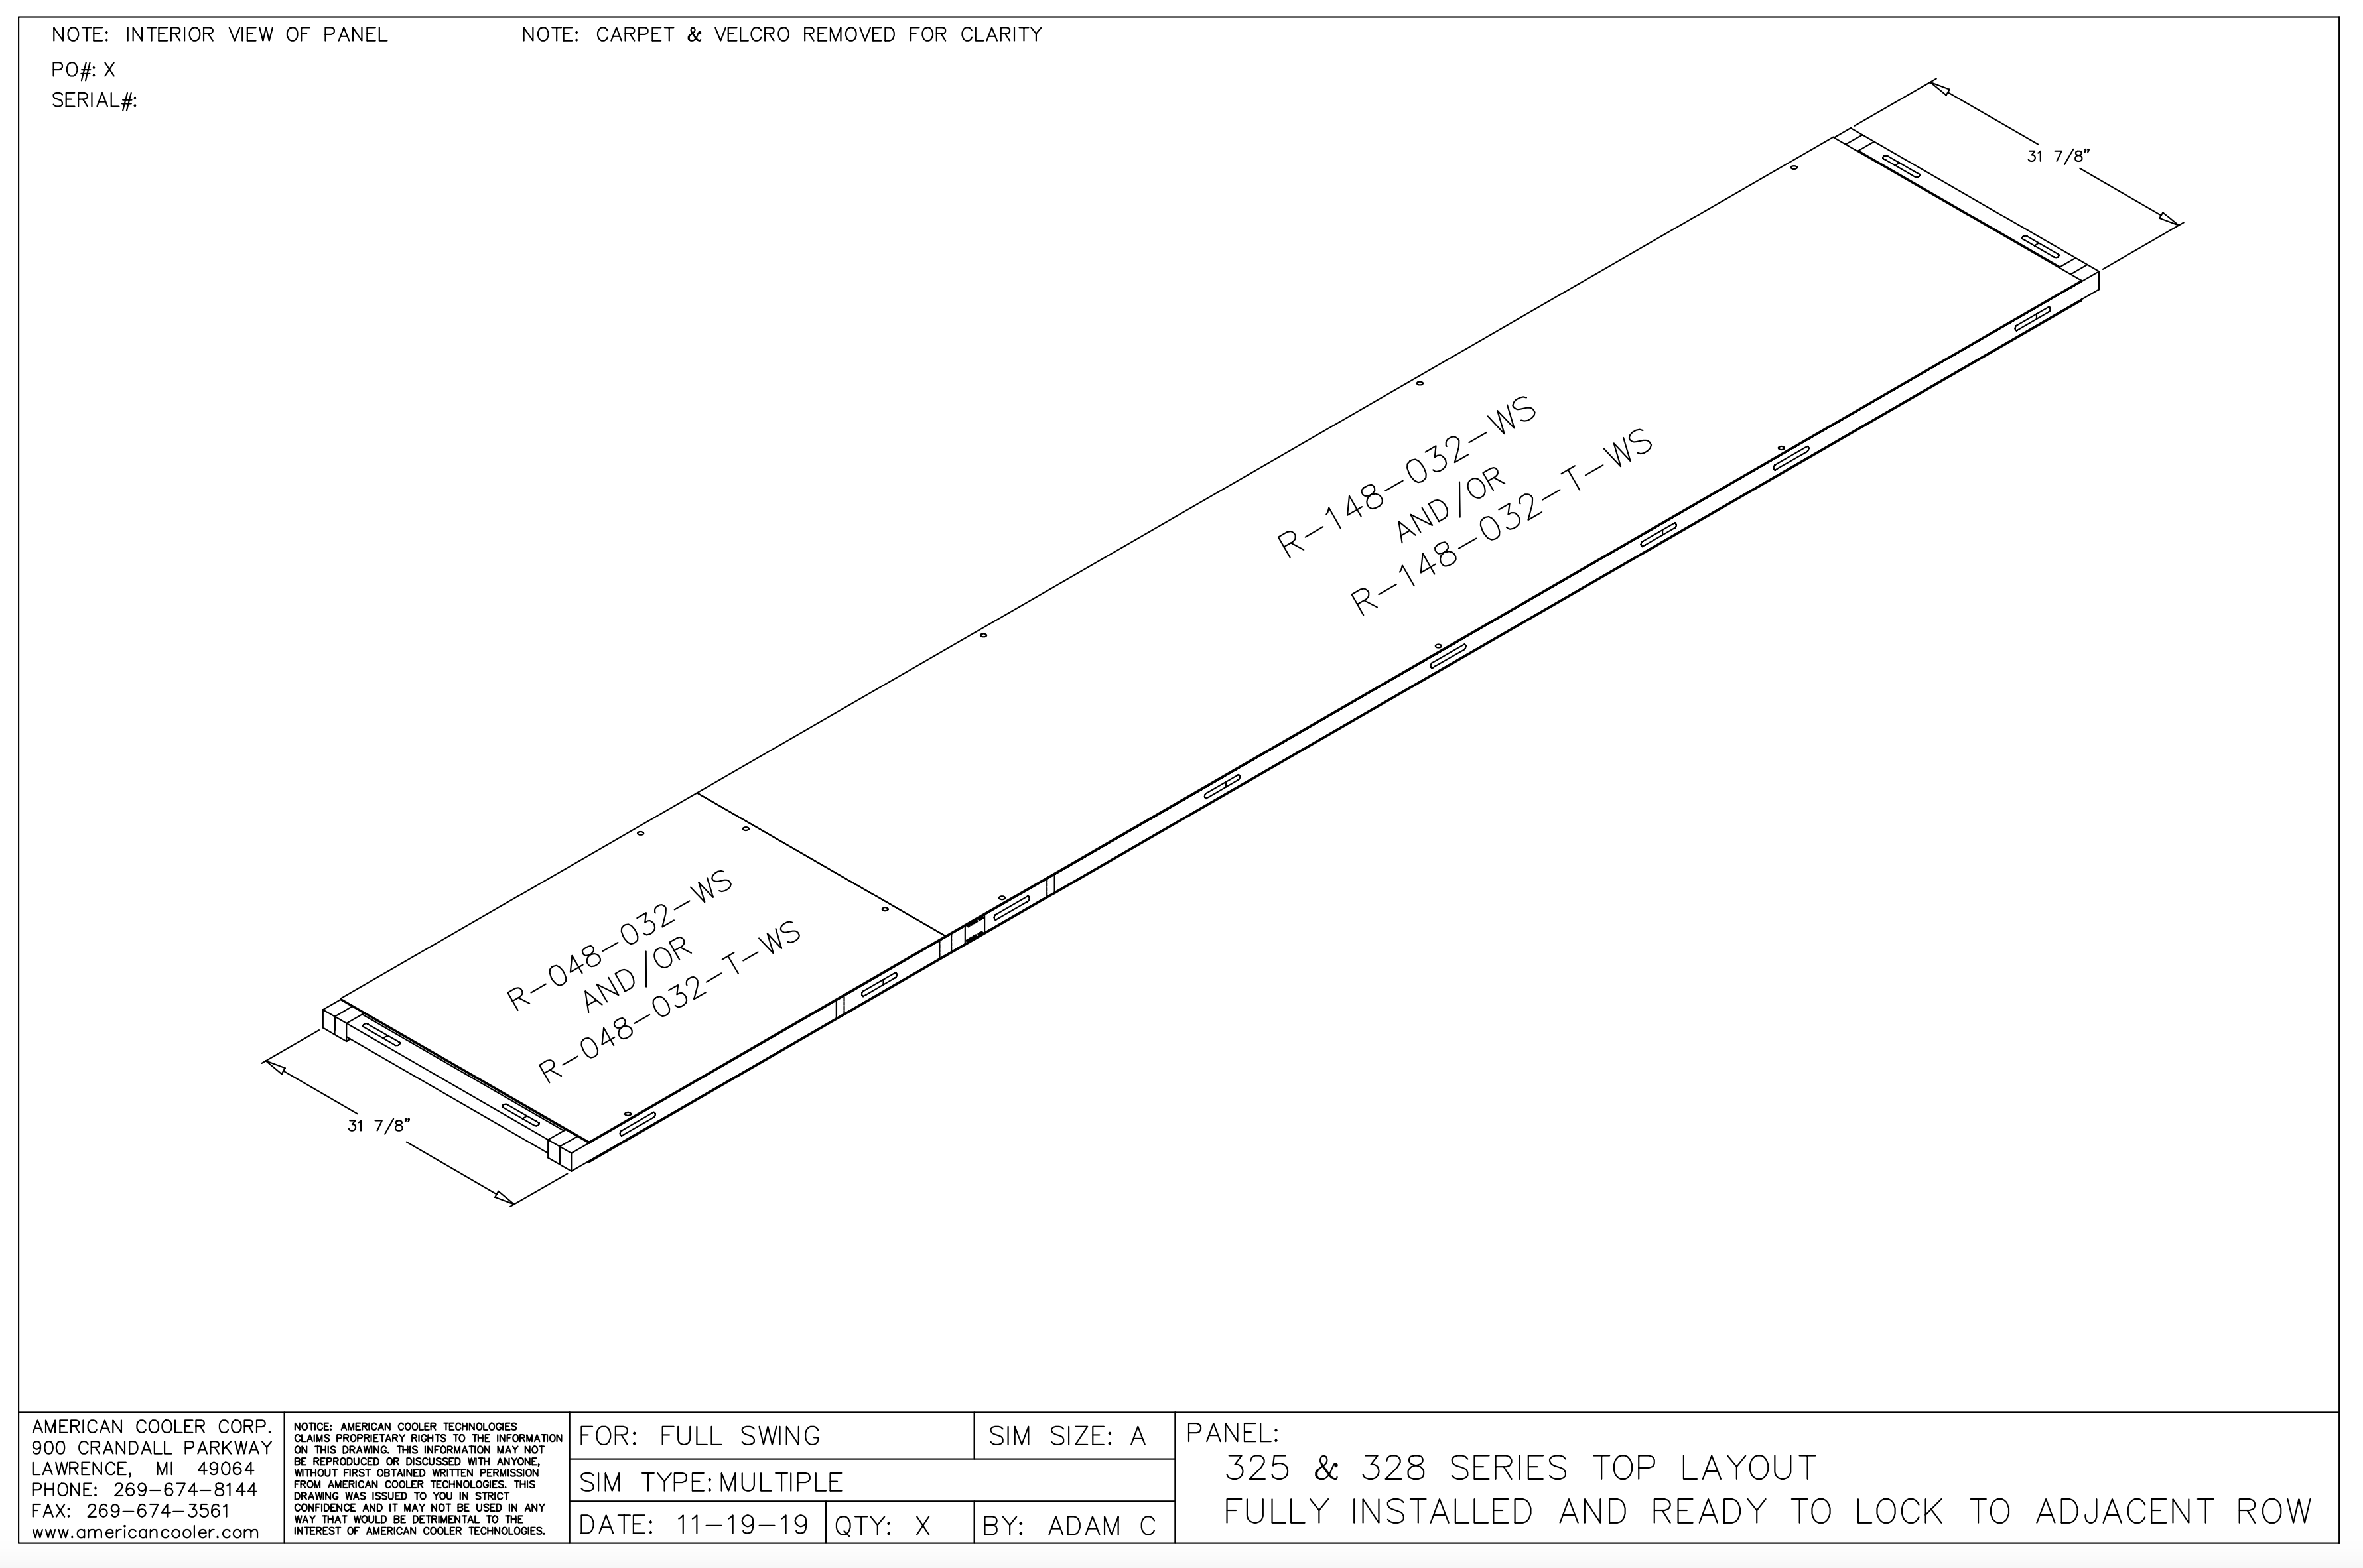
Diagram of two assembled roof panels.
Install roof panels as you normally would on widescreen sims.
NOTE: You must secure roof panels to customer ceiling to prevent sagging. More instructions to follow shortly.
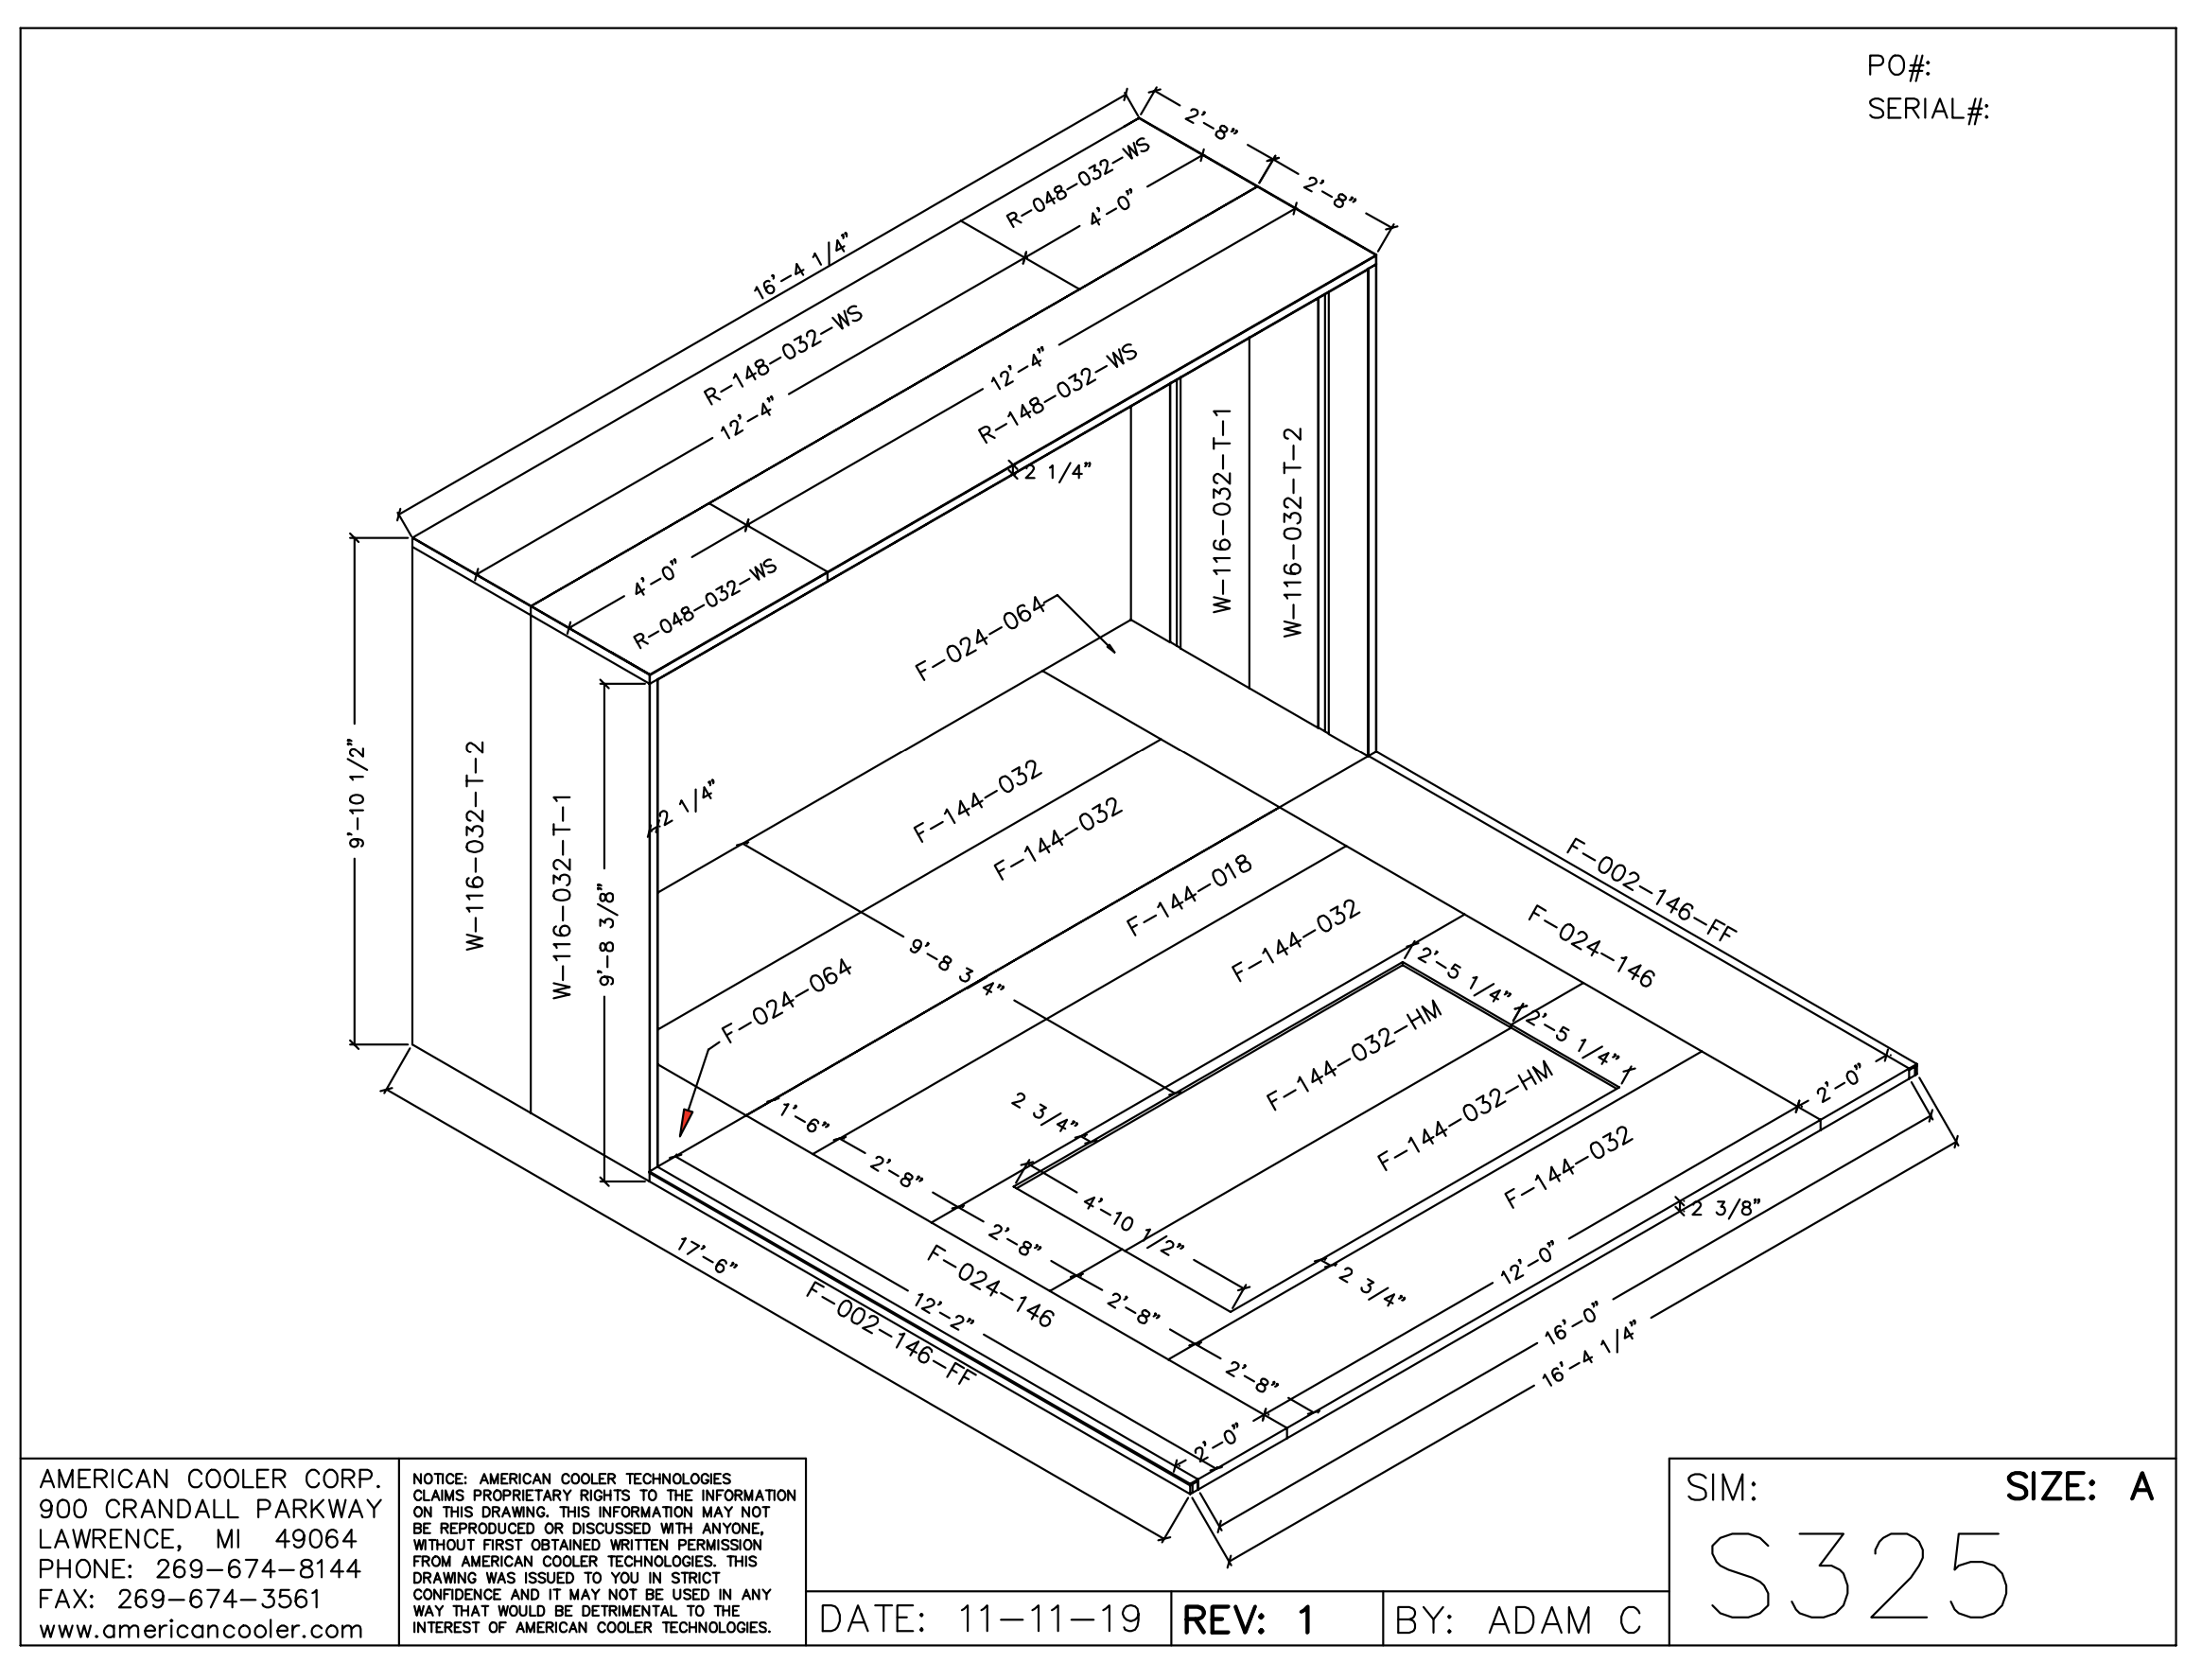
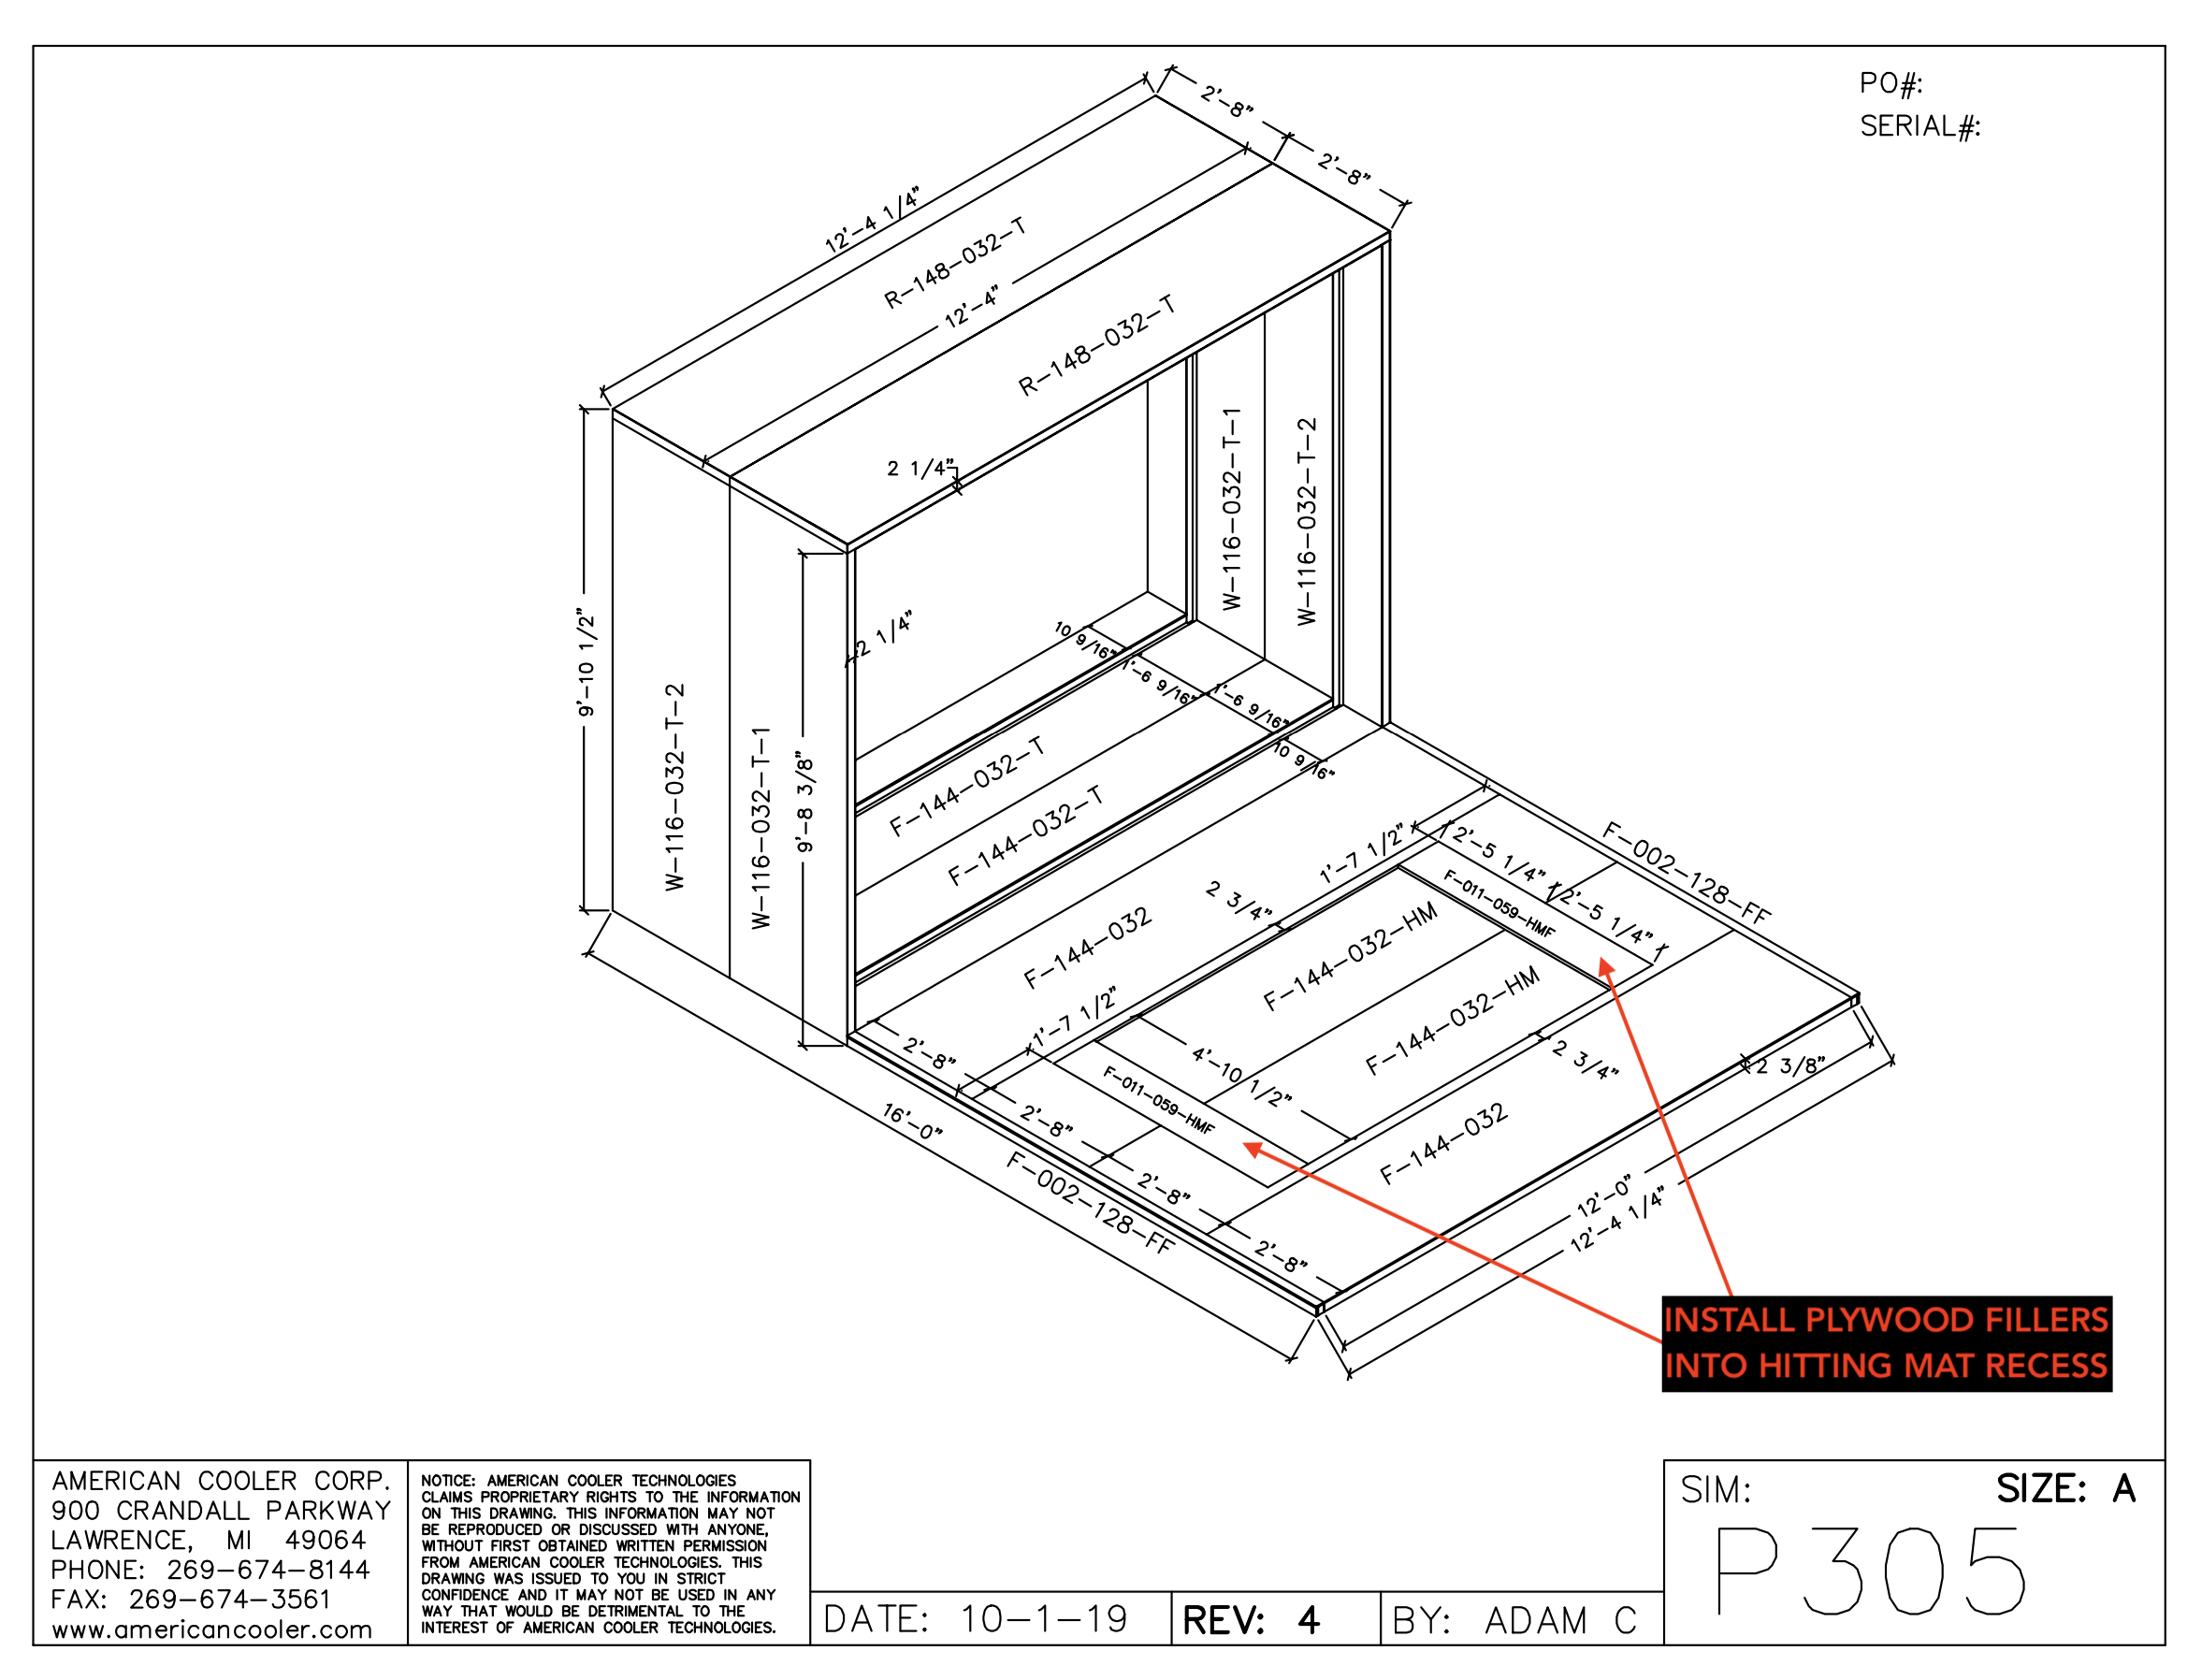
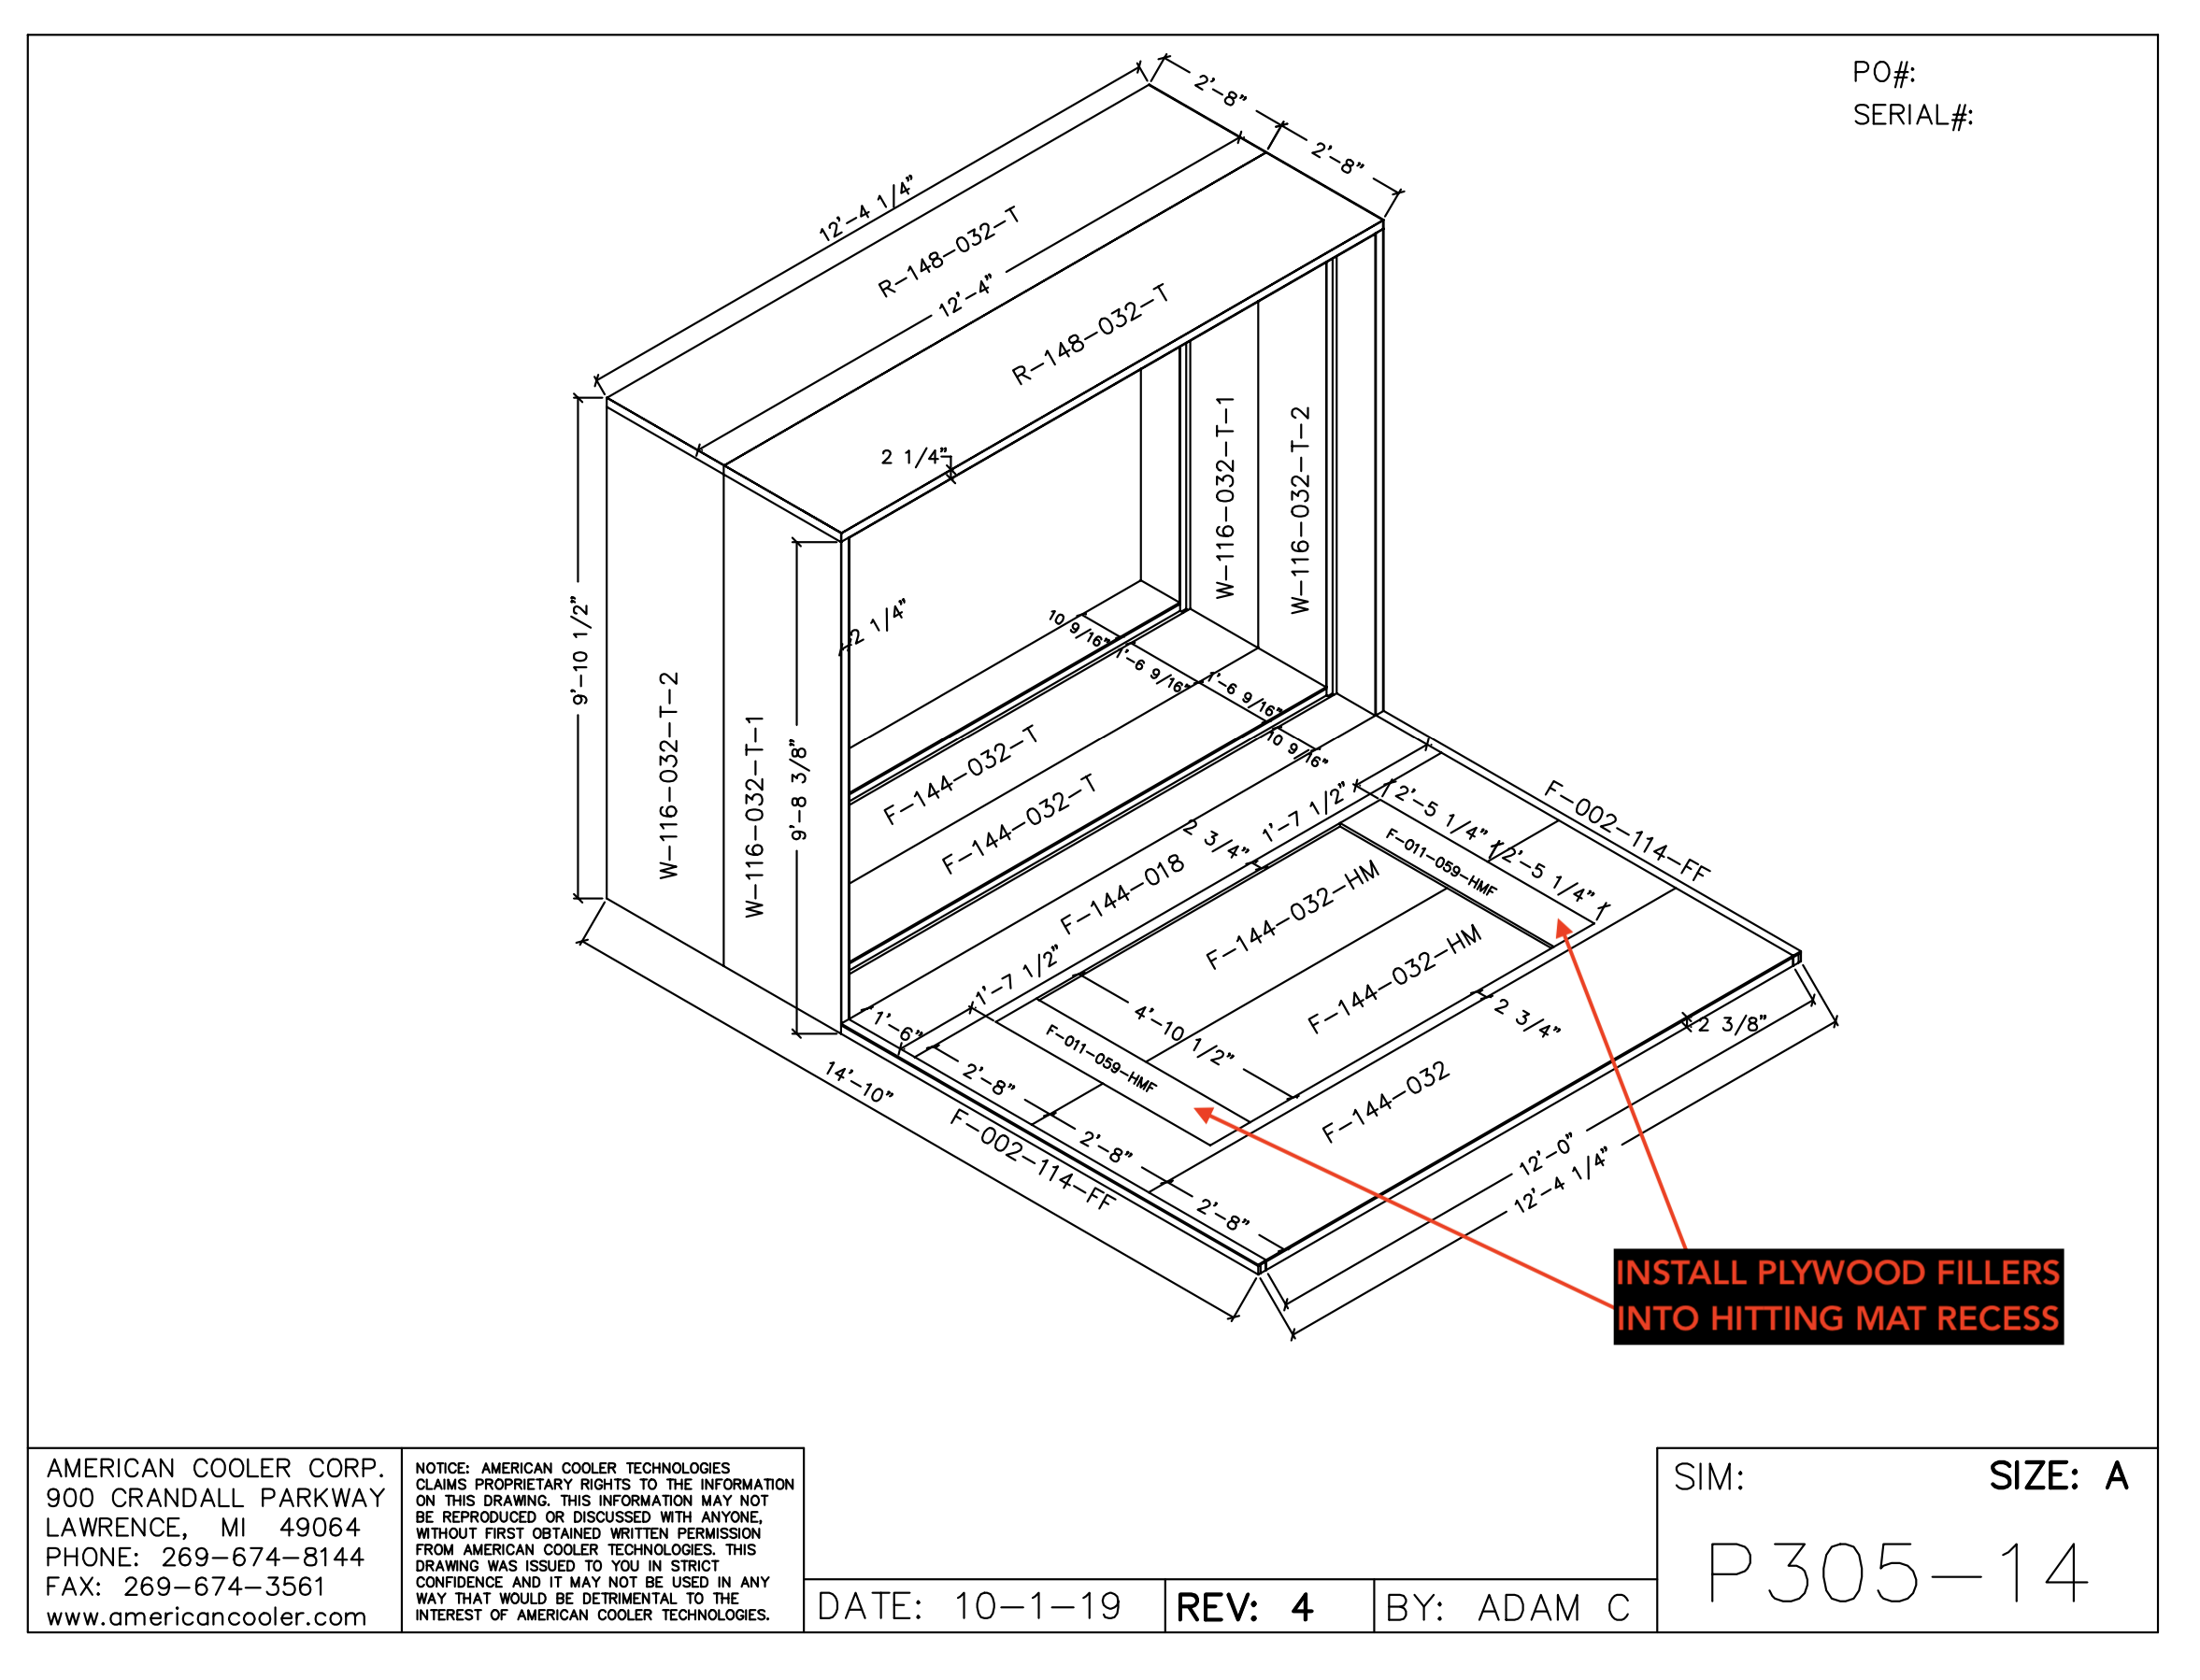
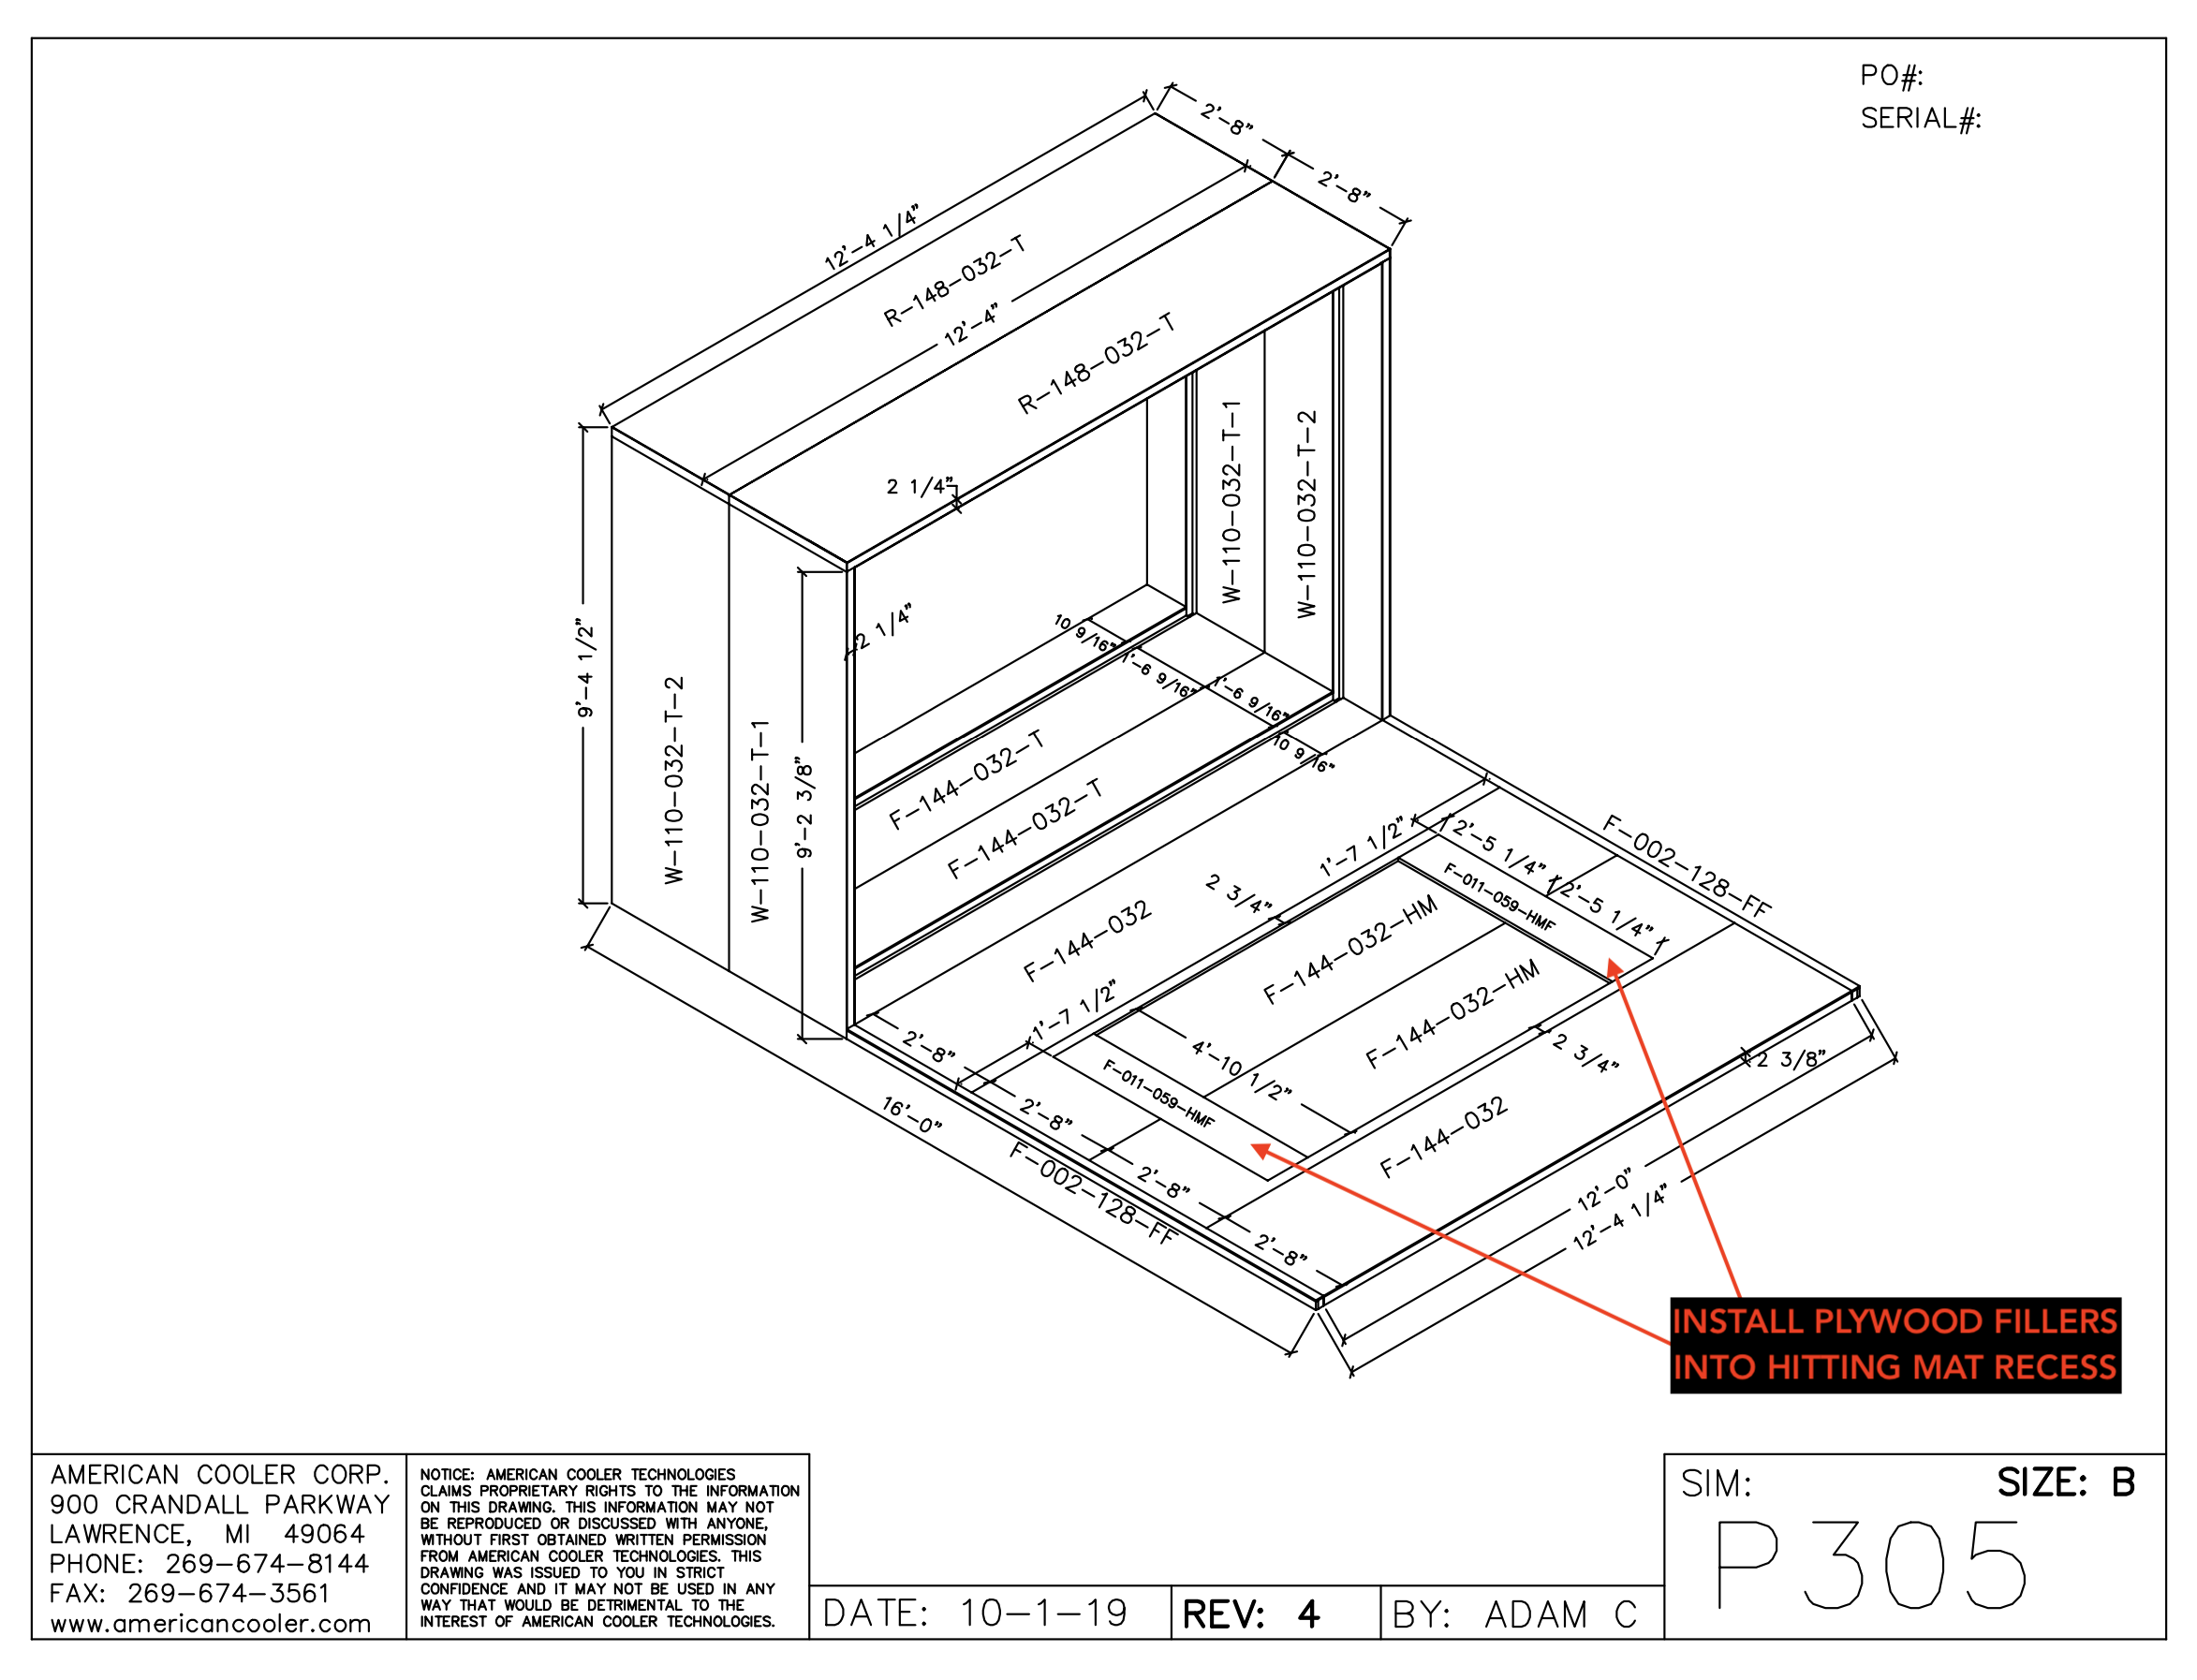
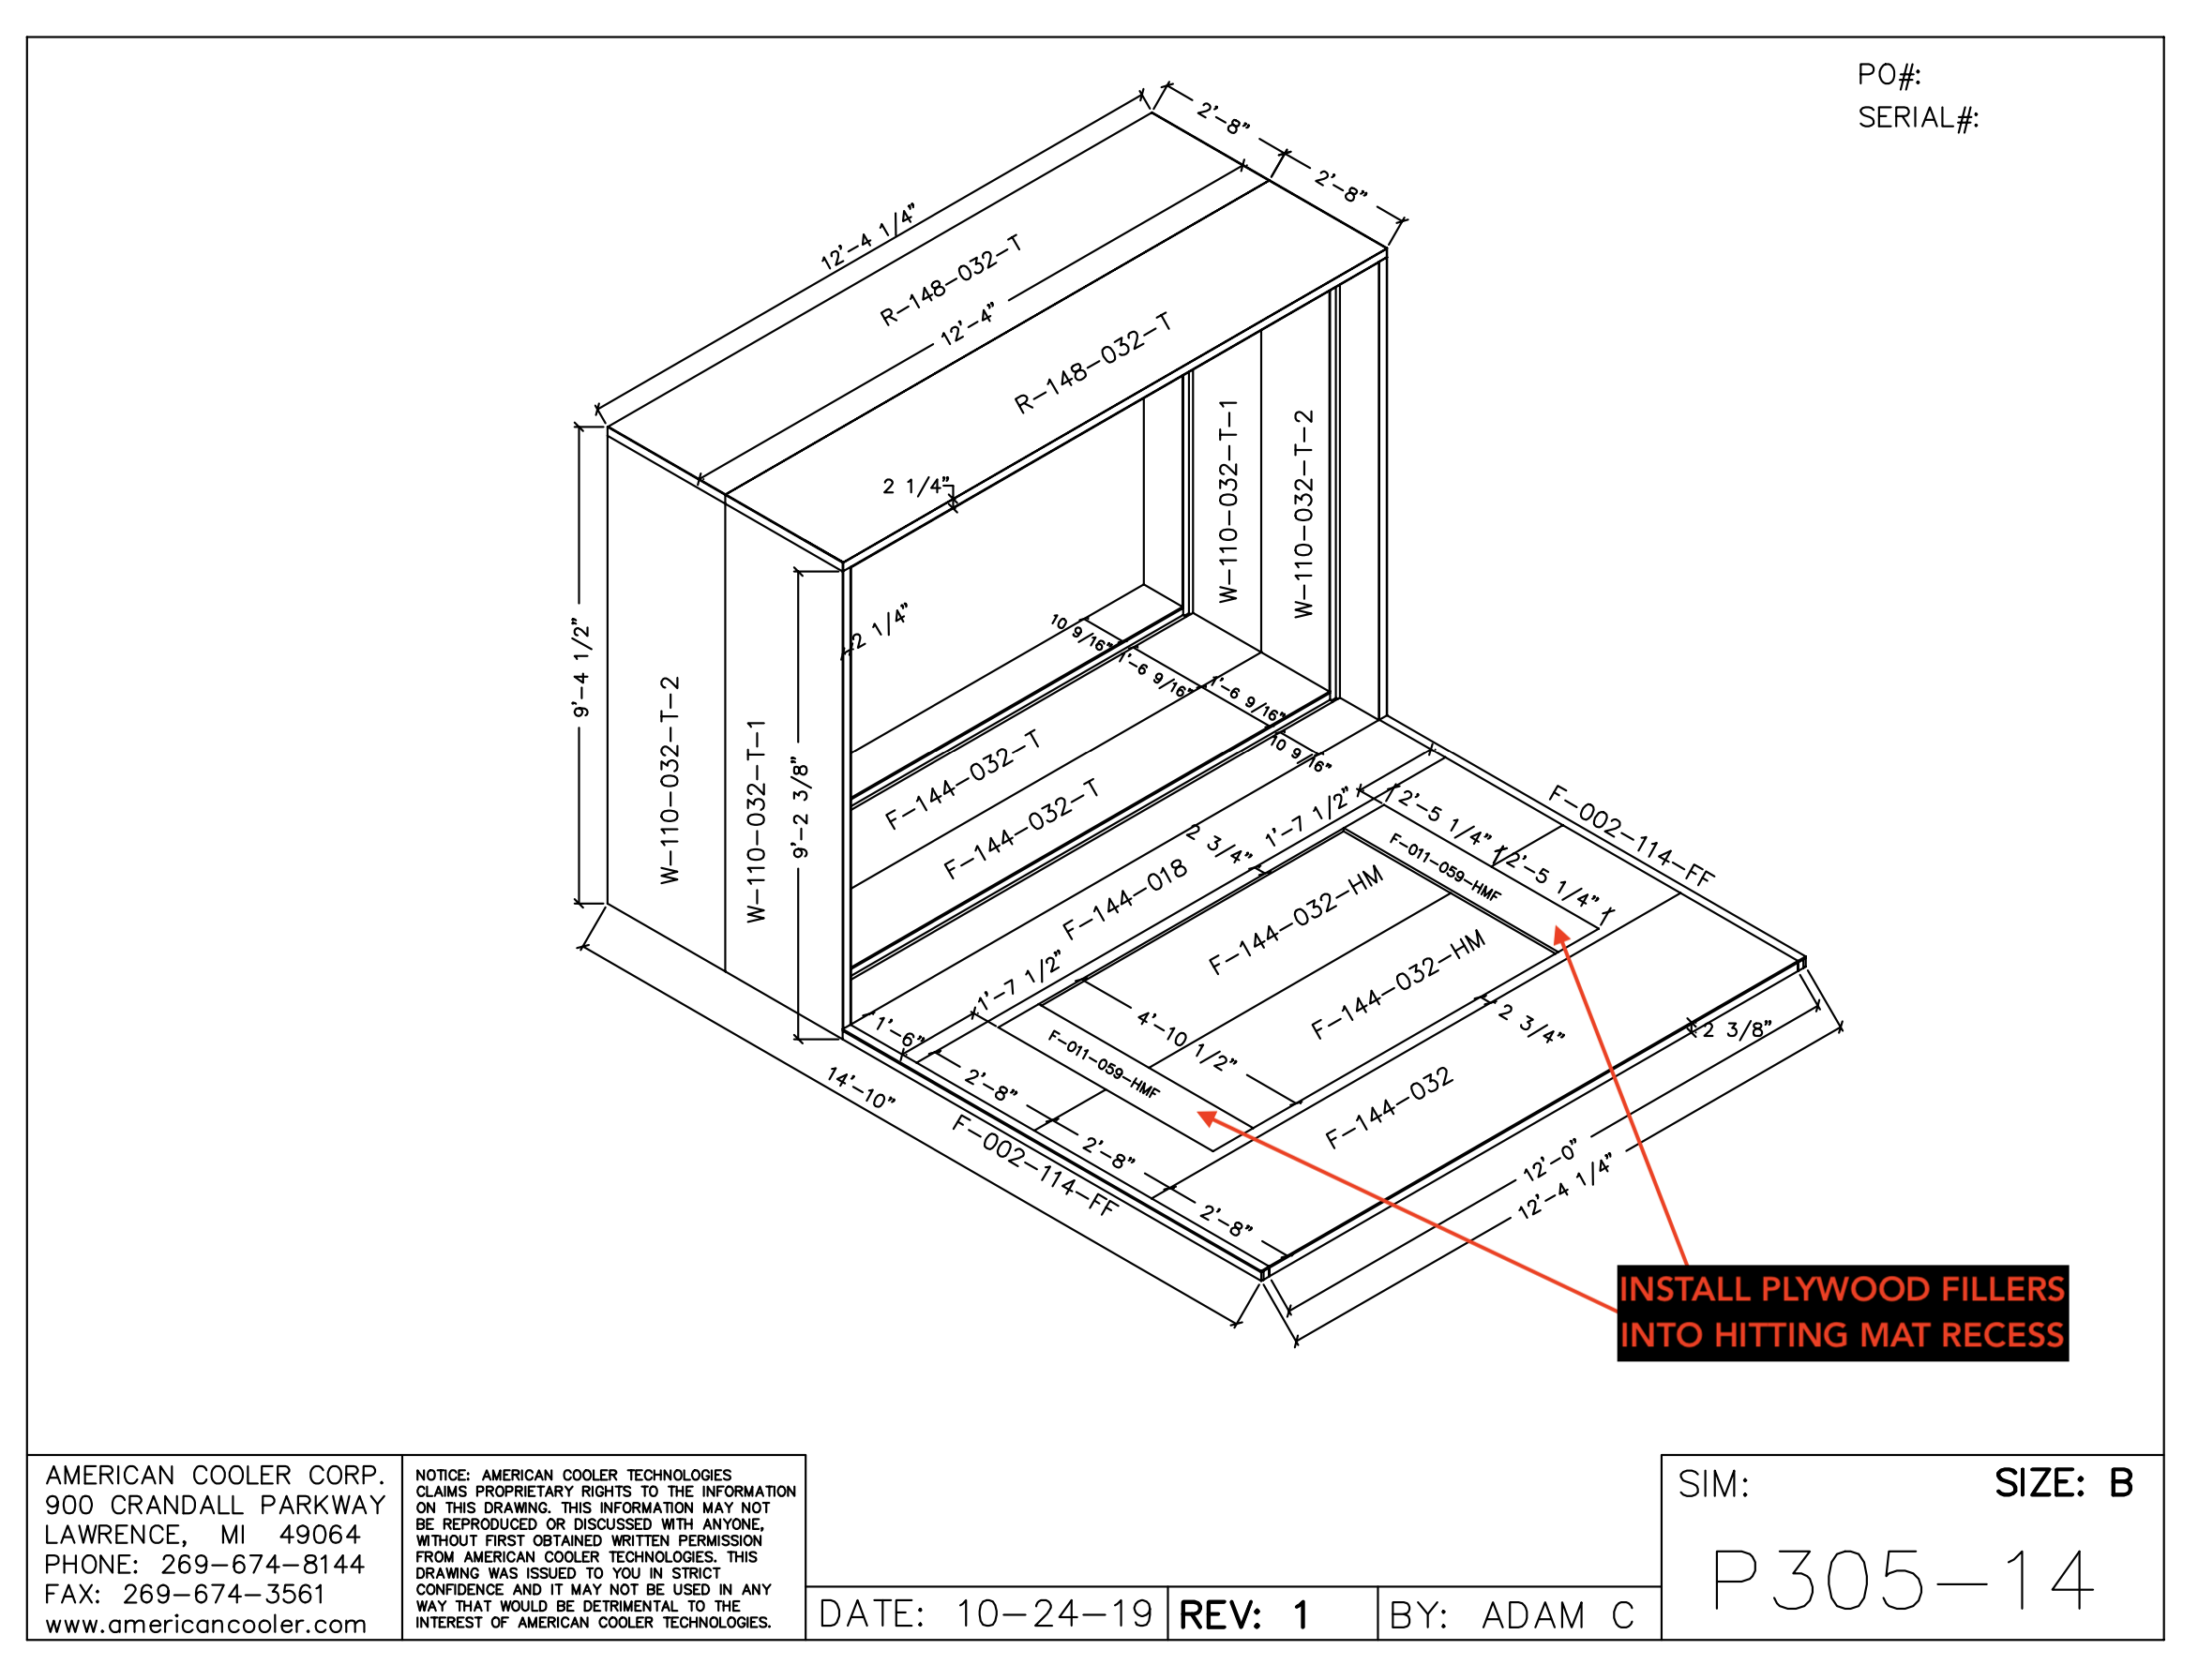
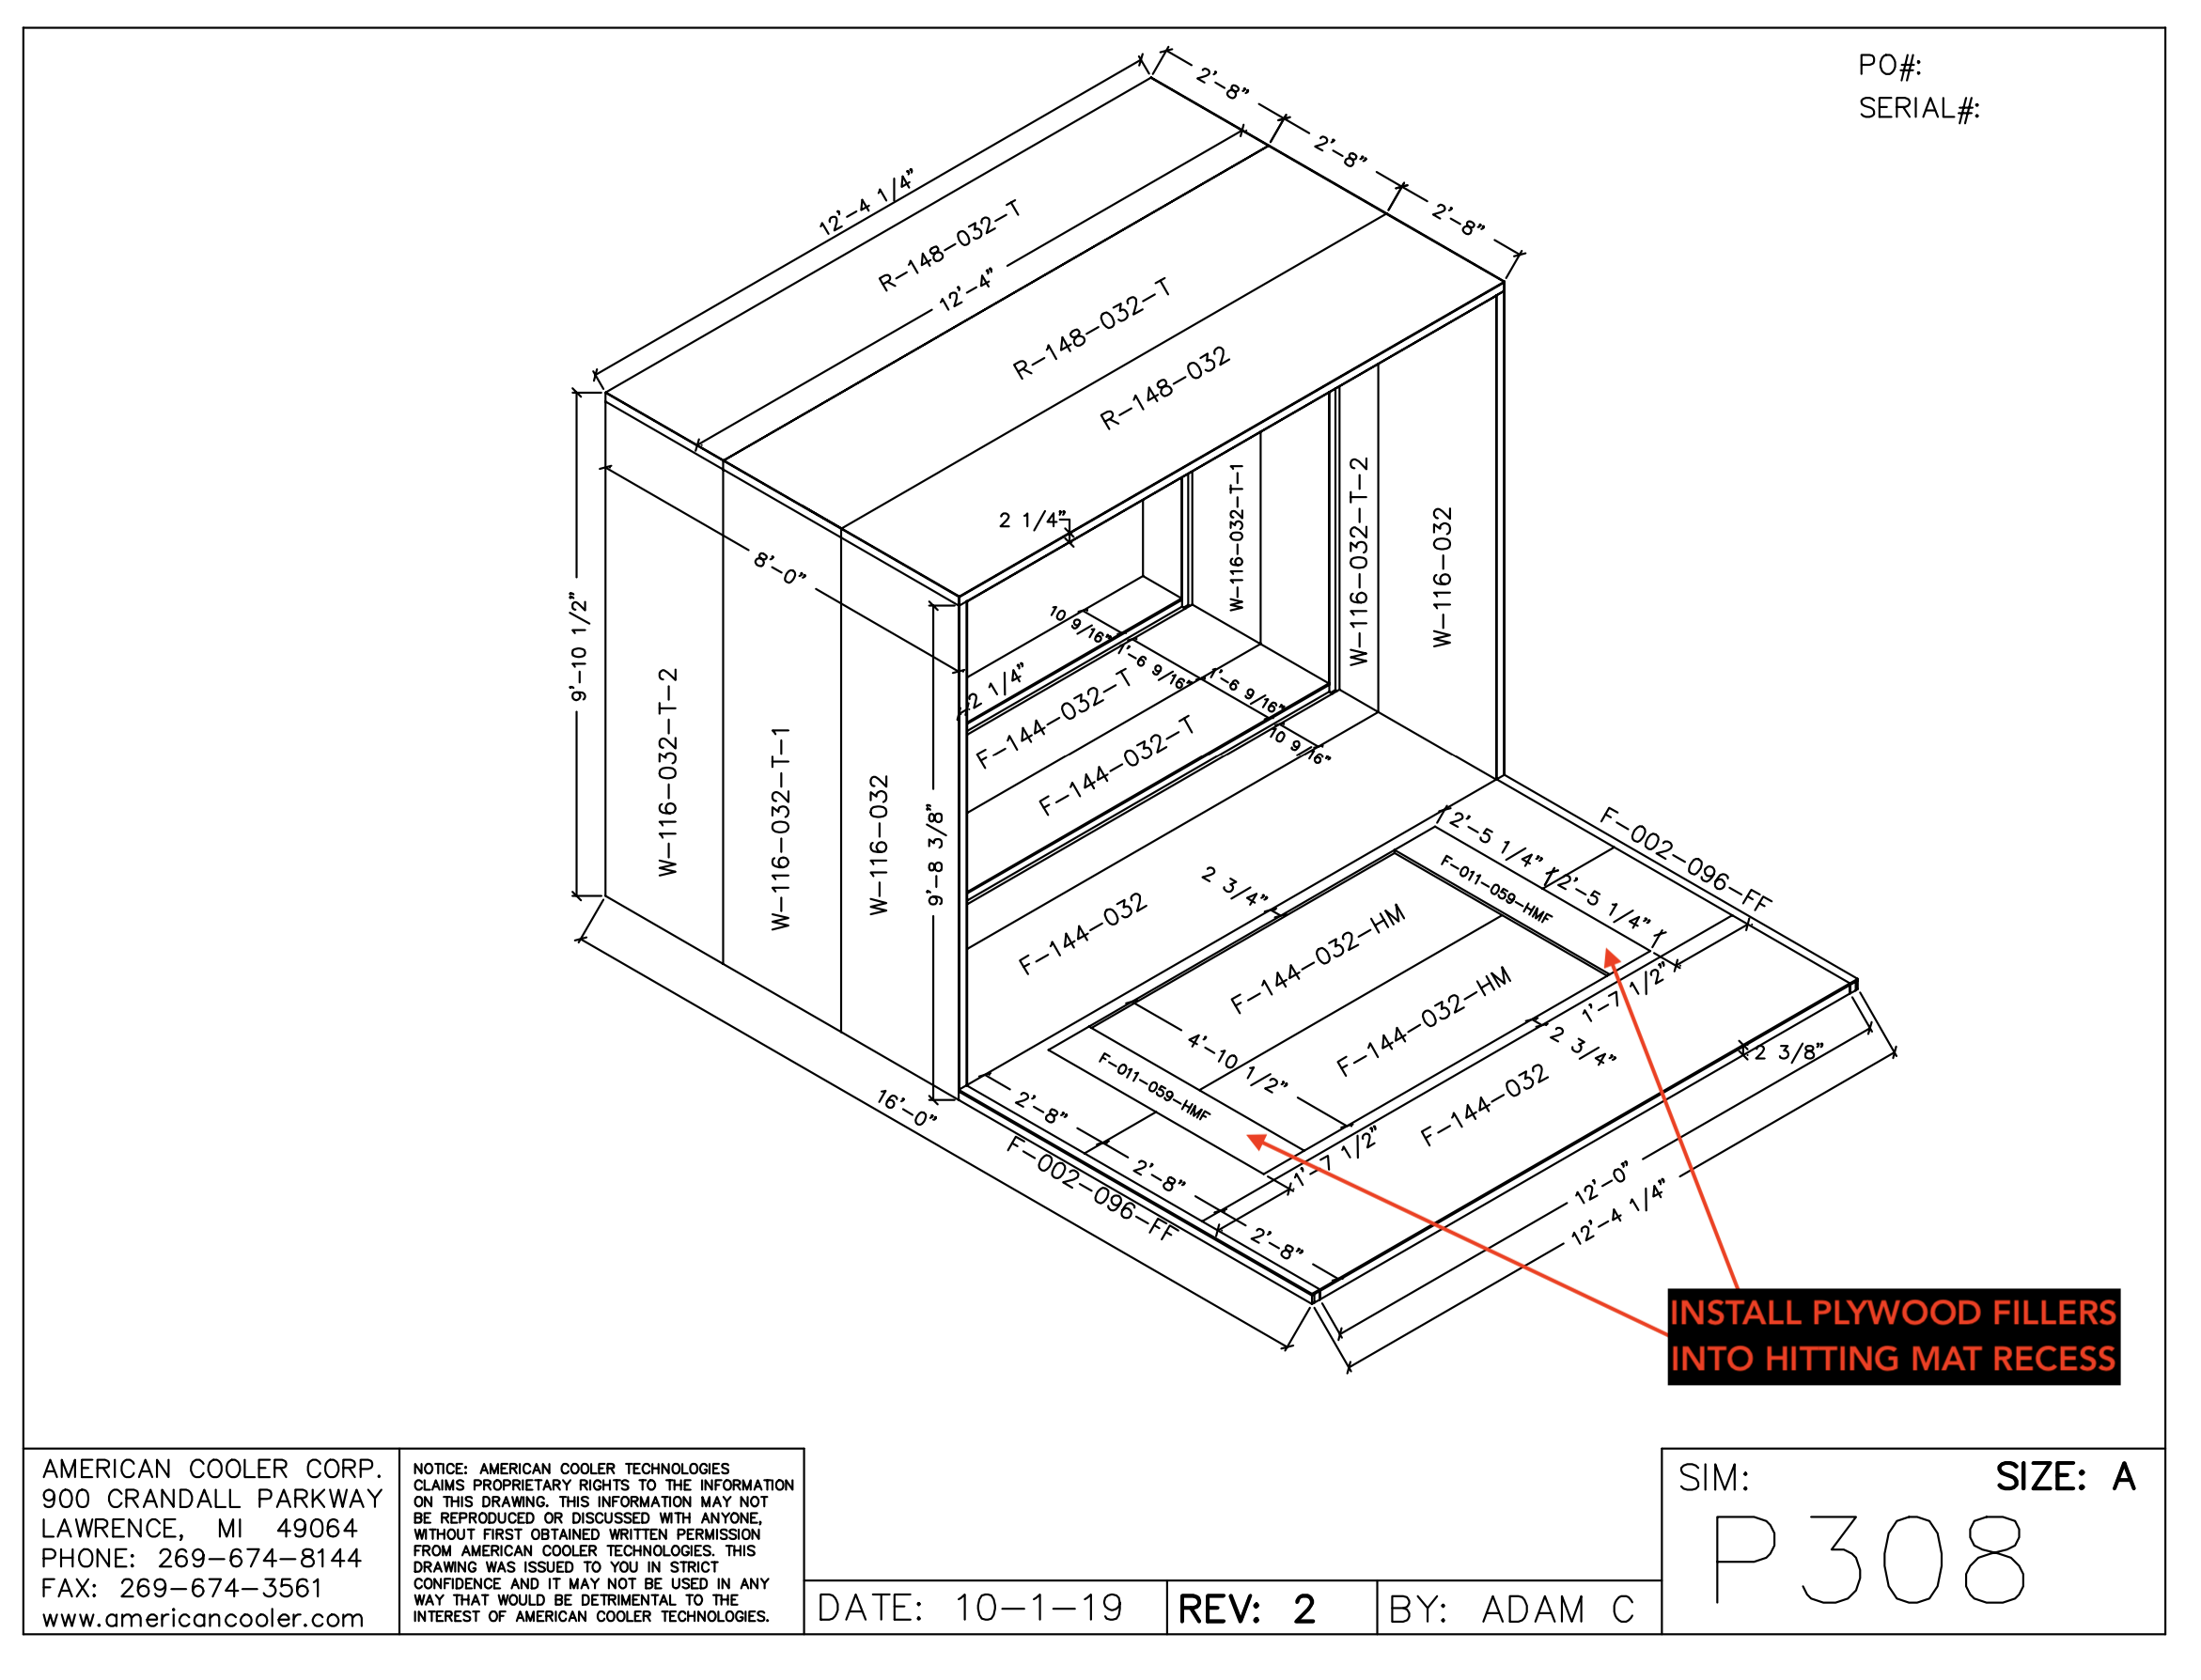
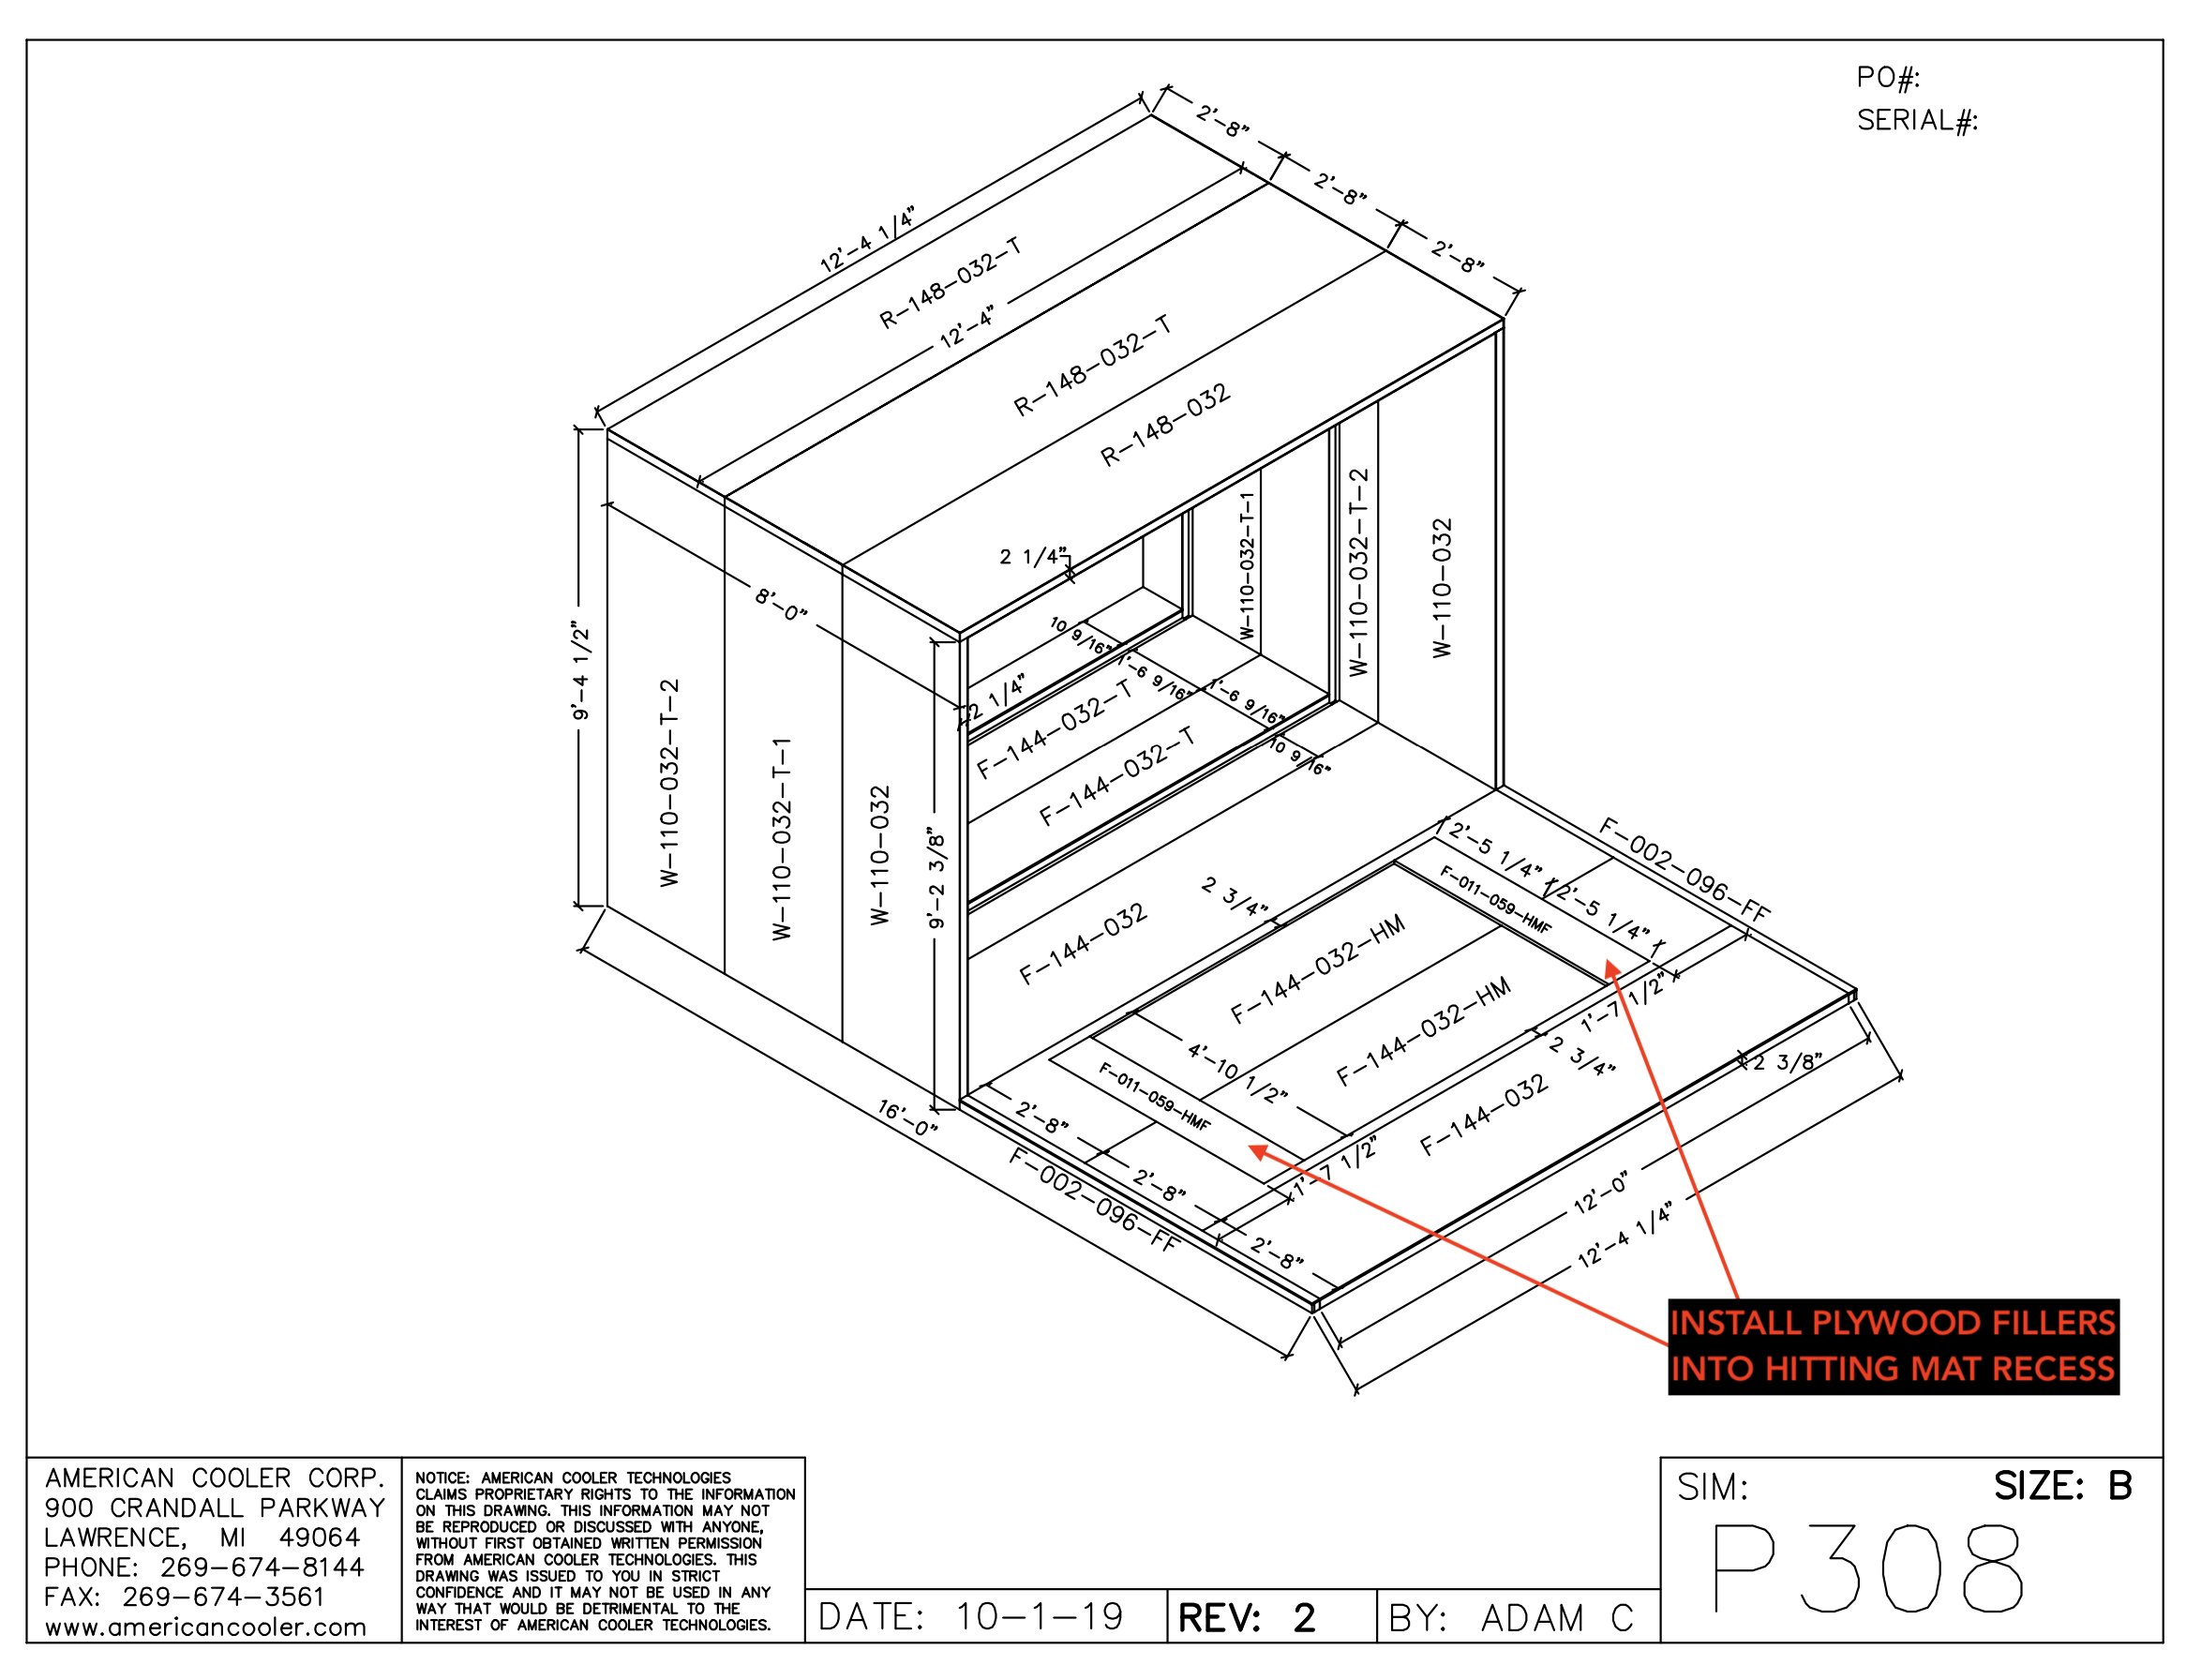
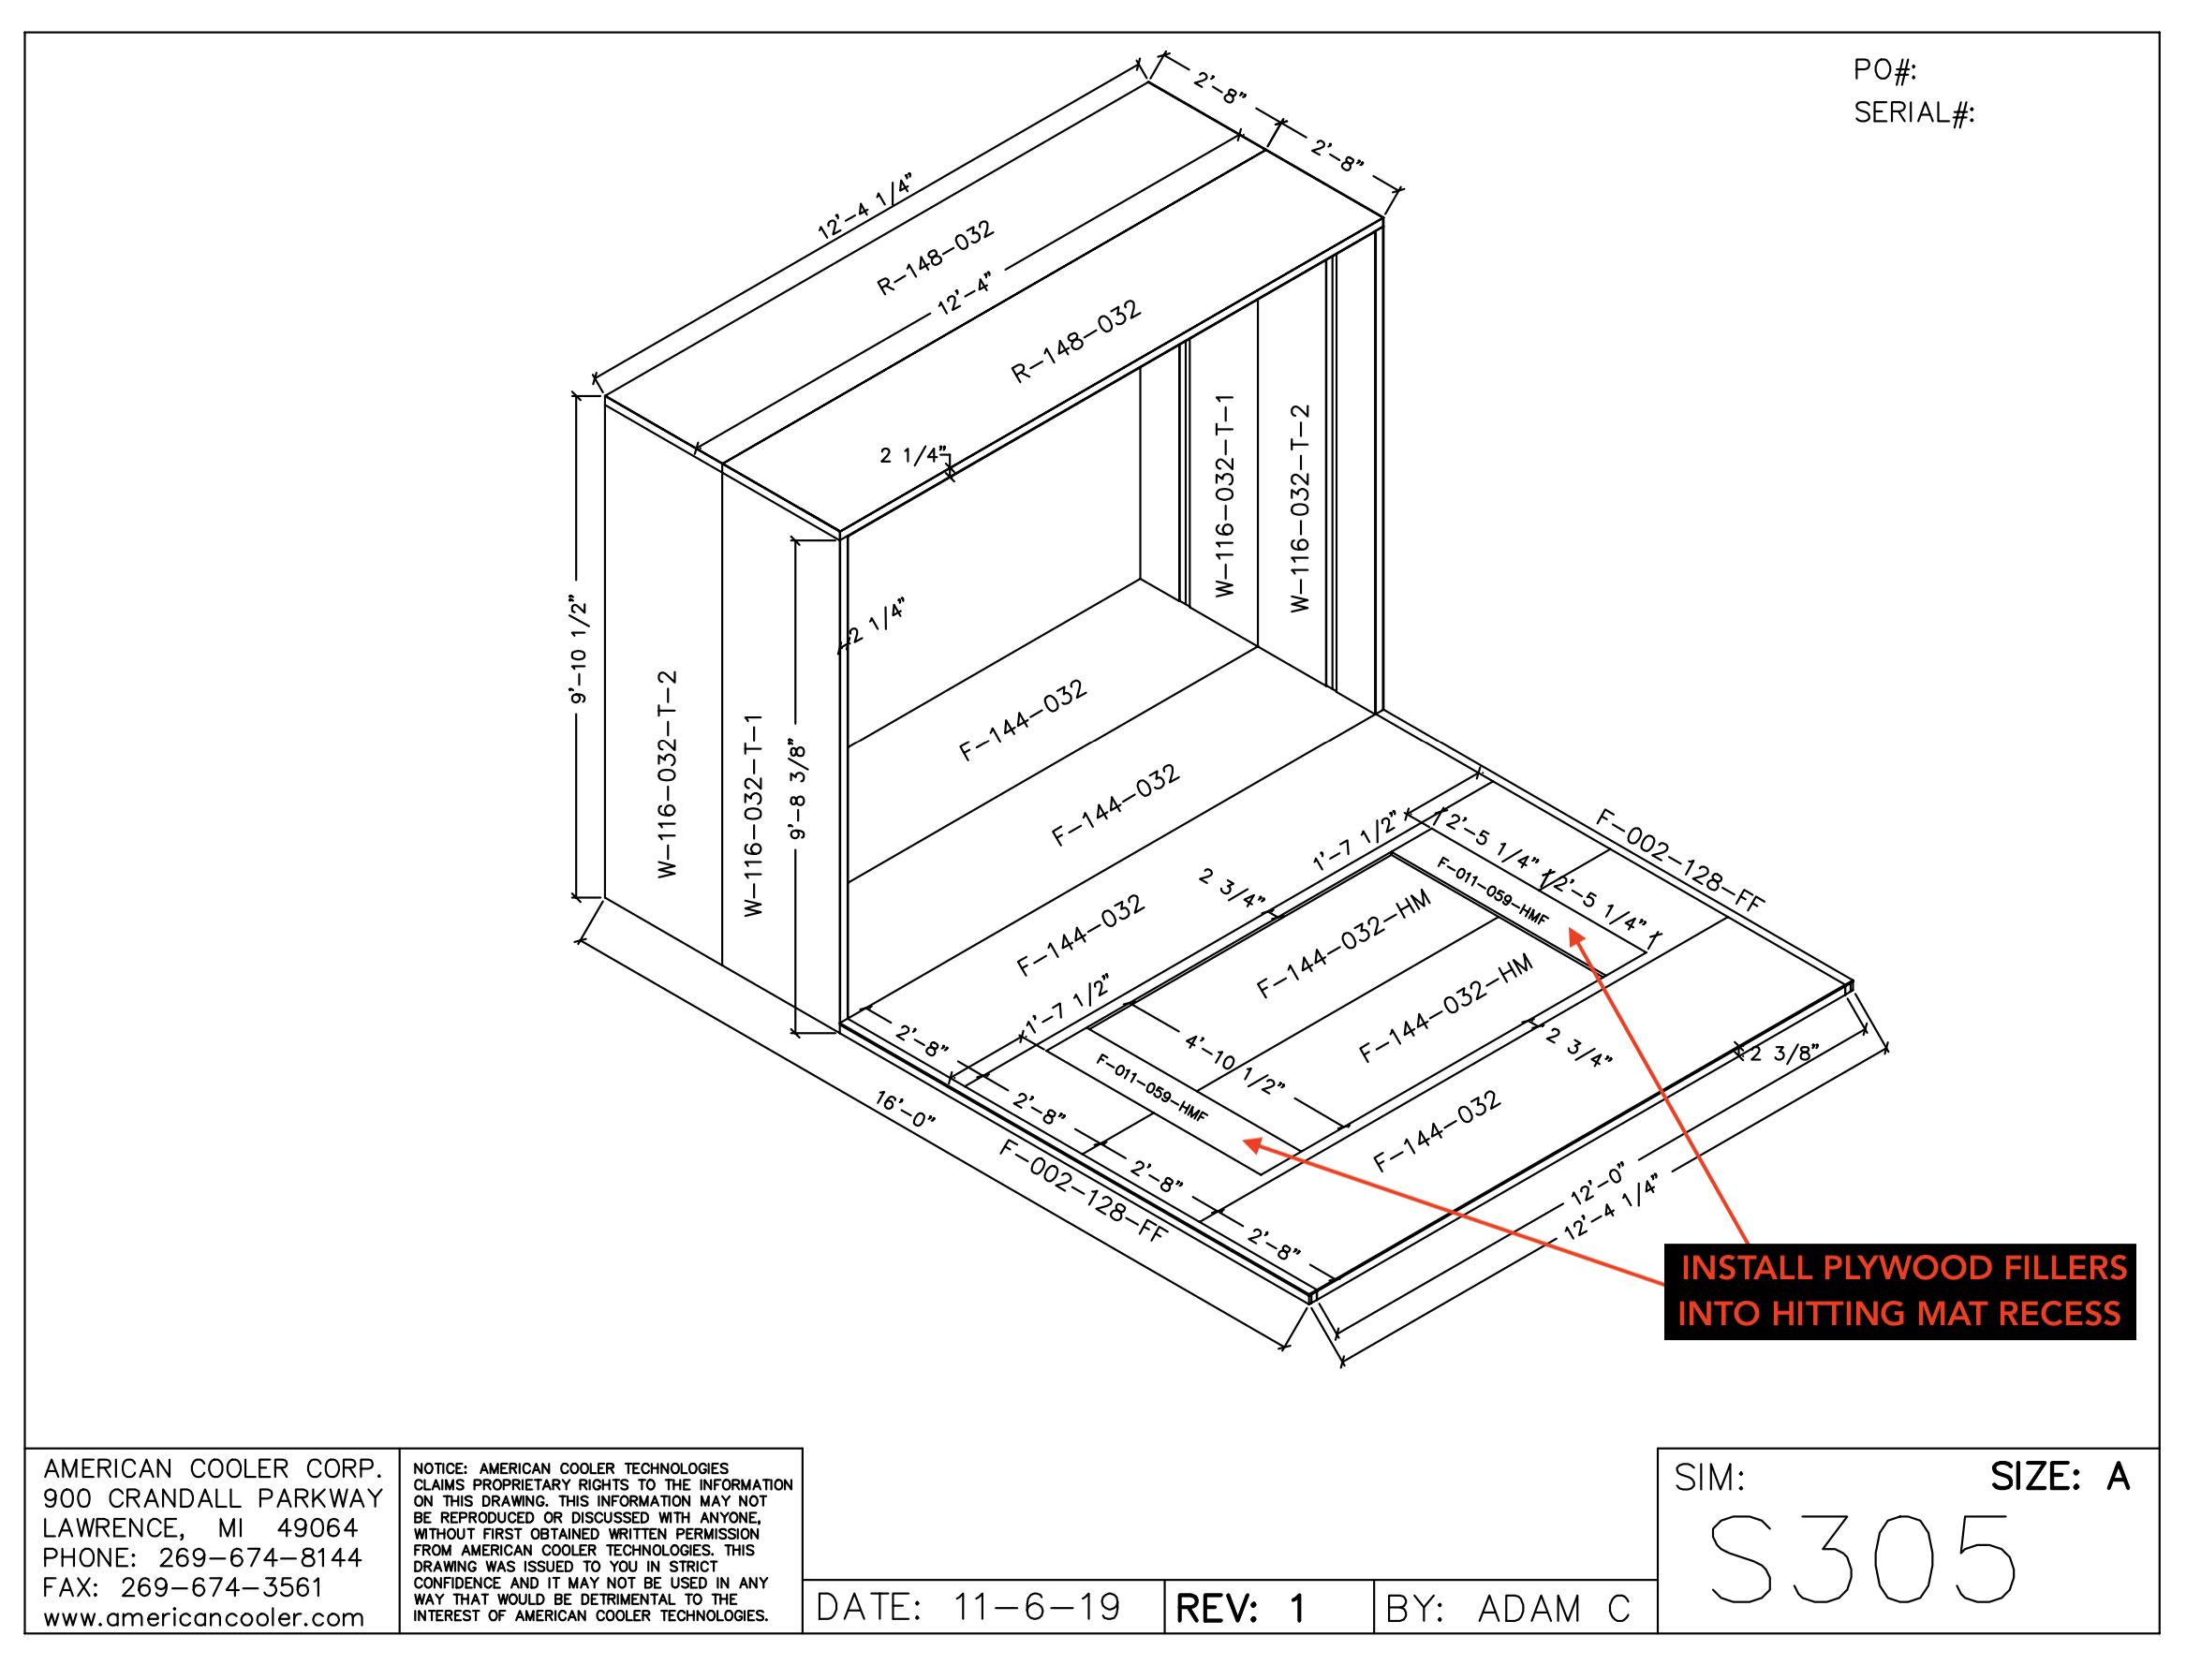
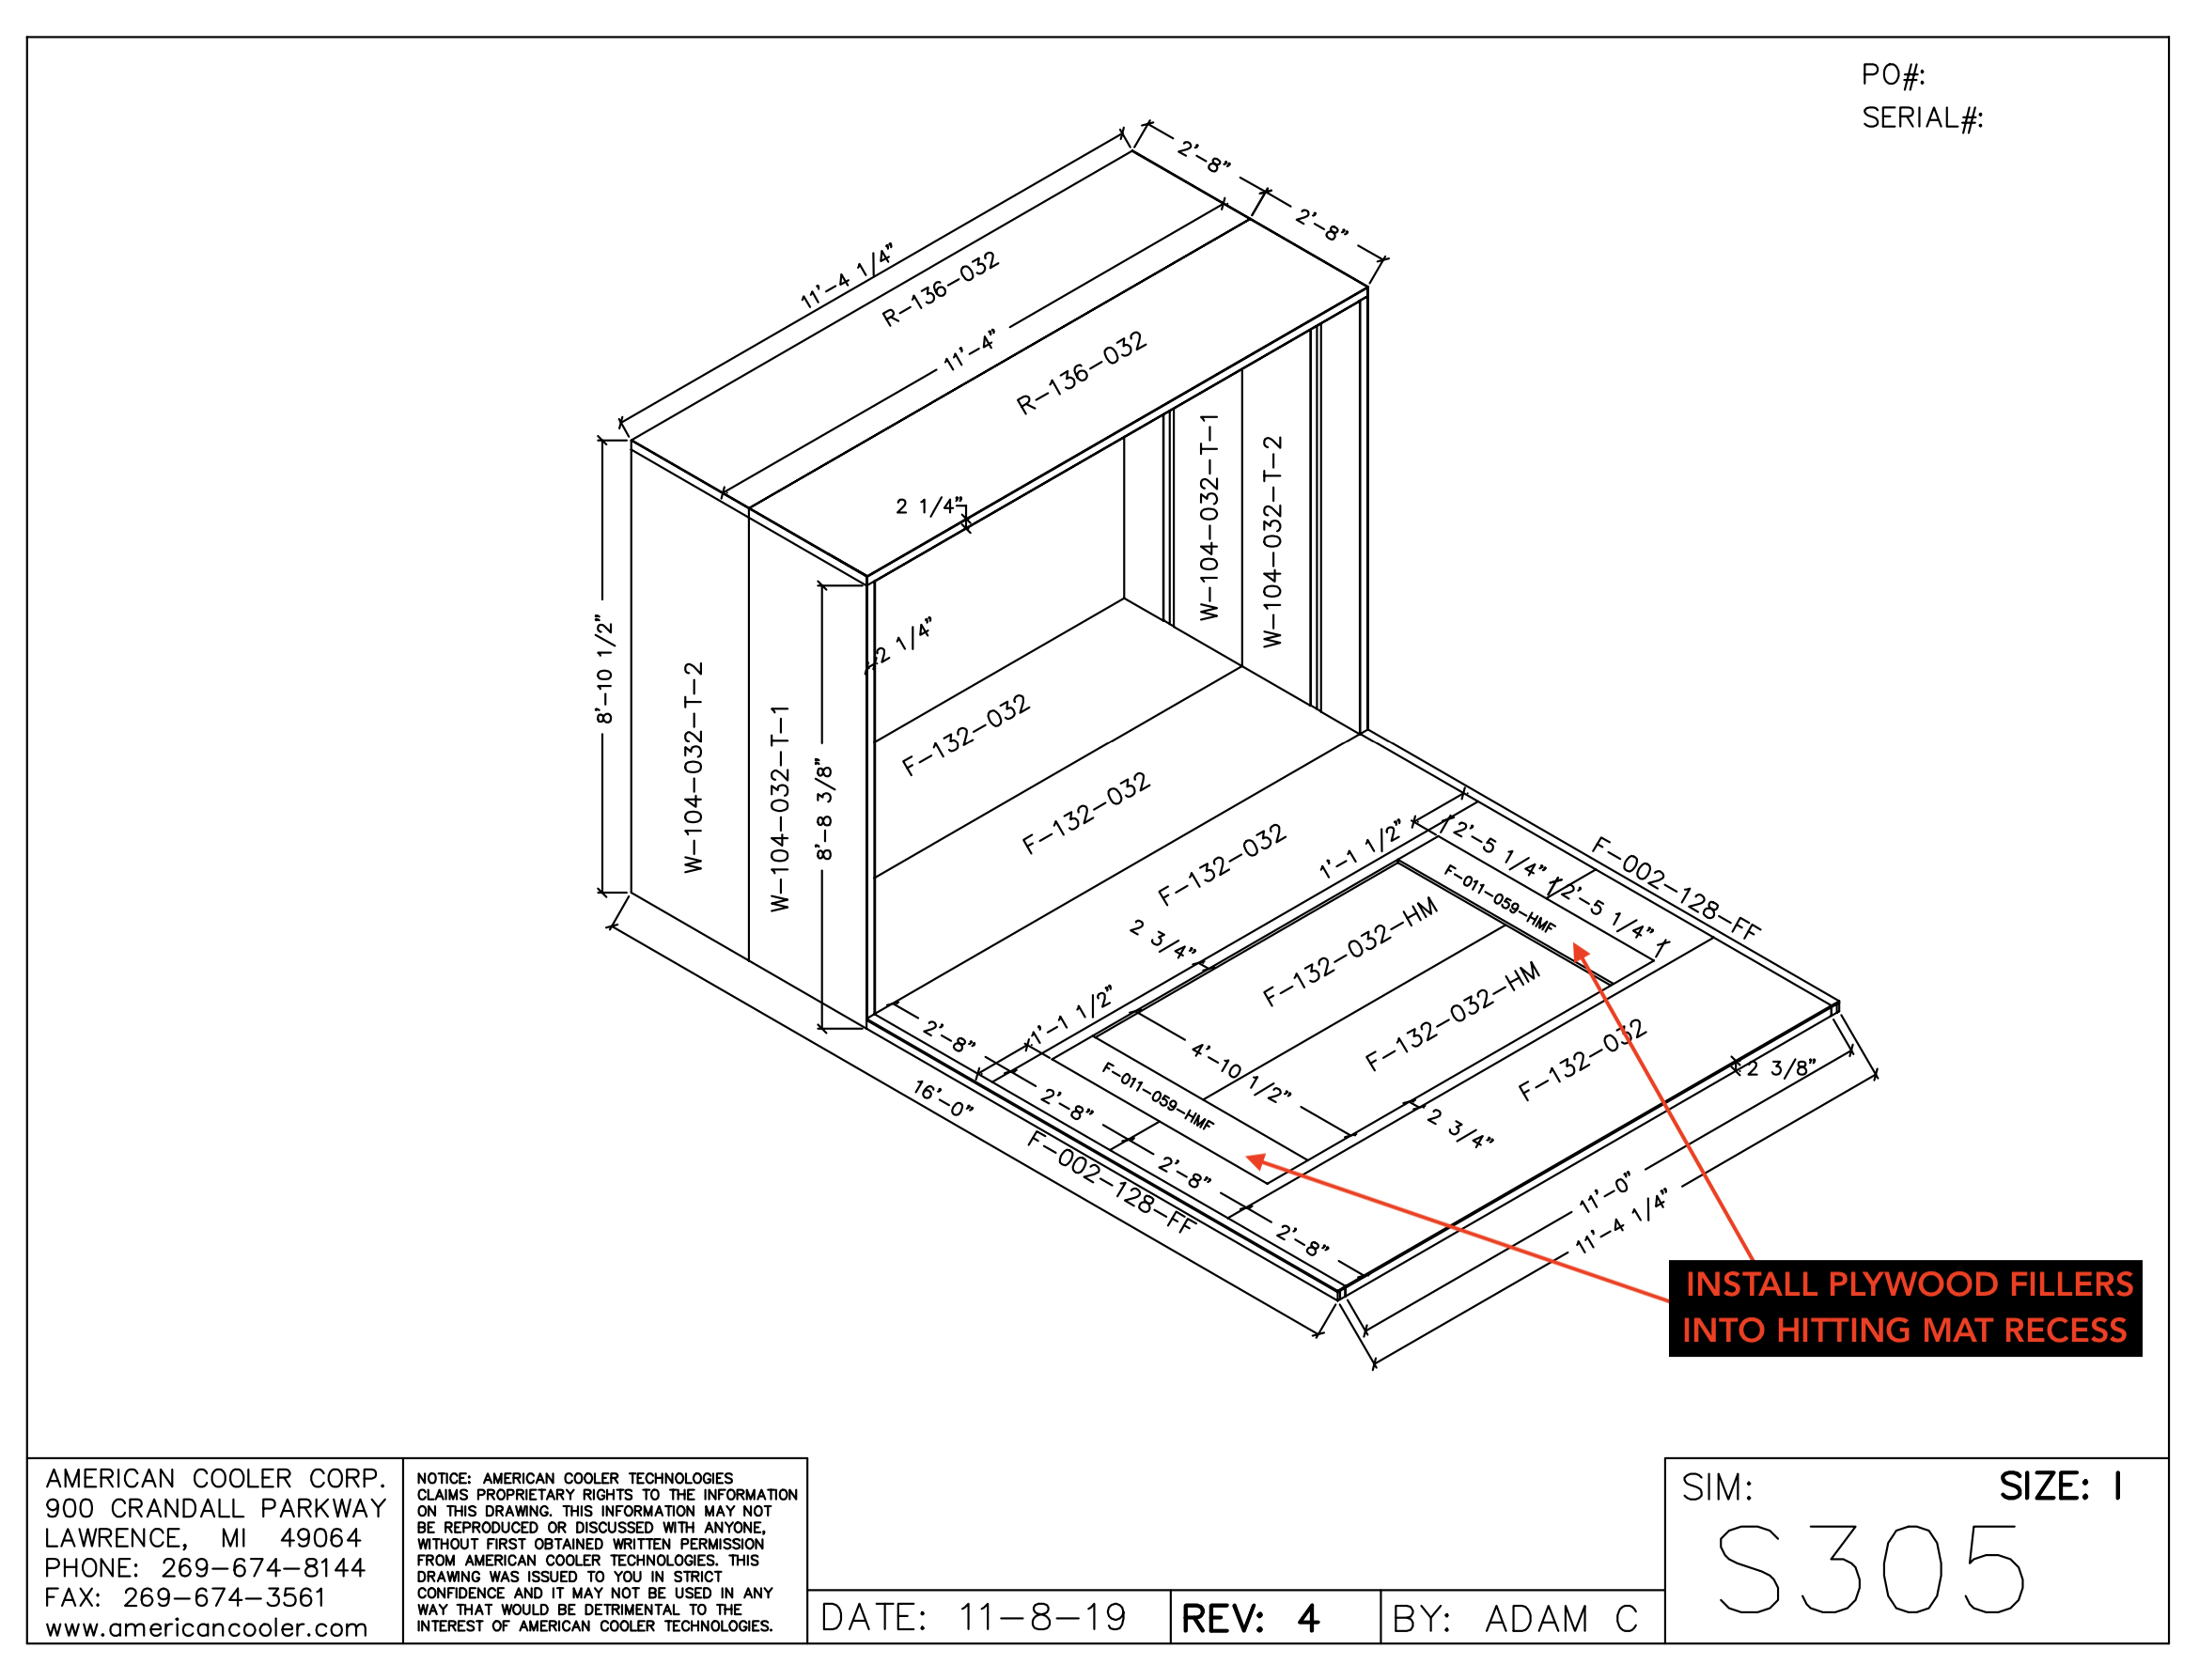
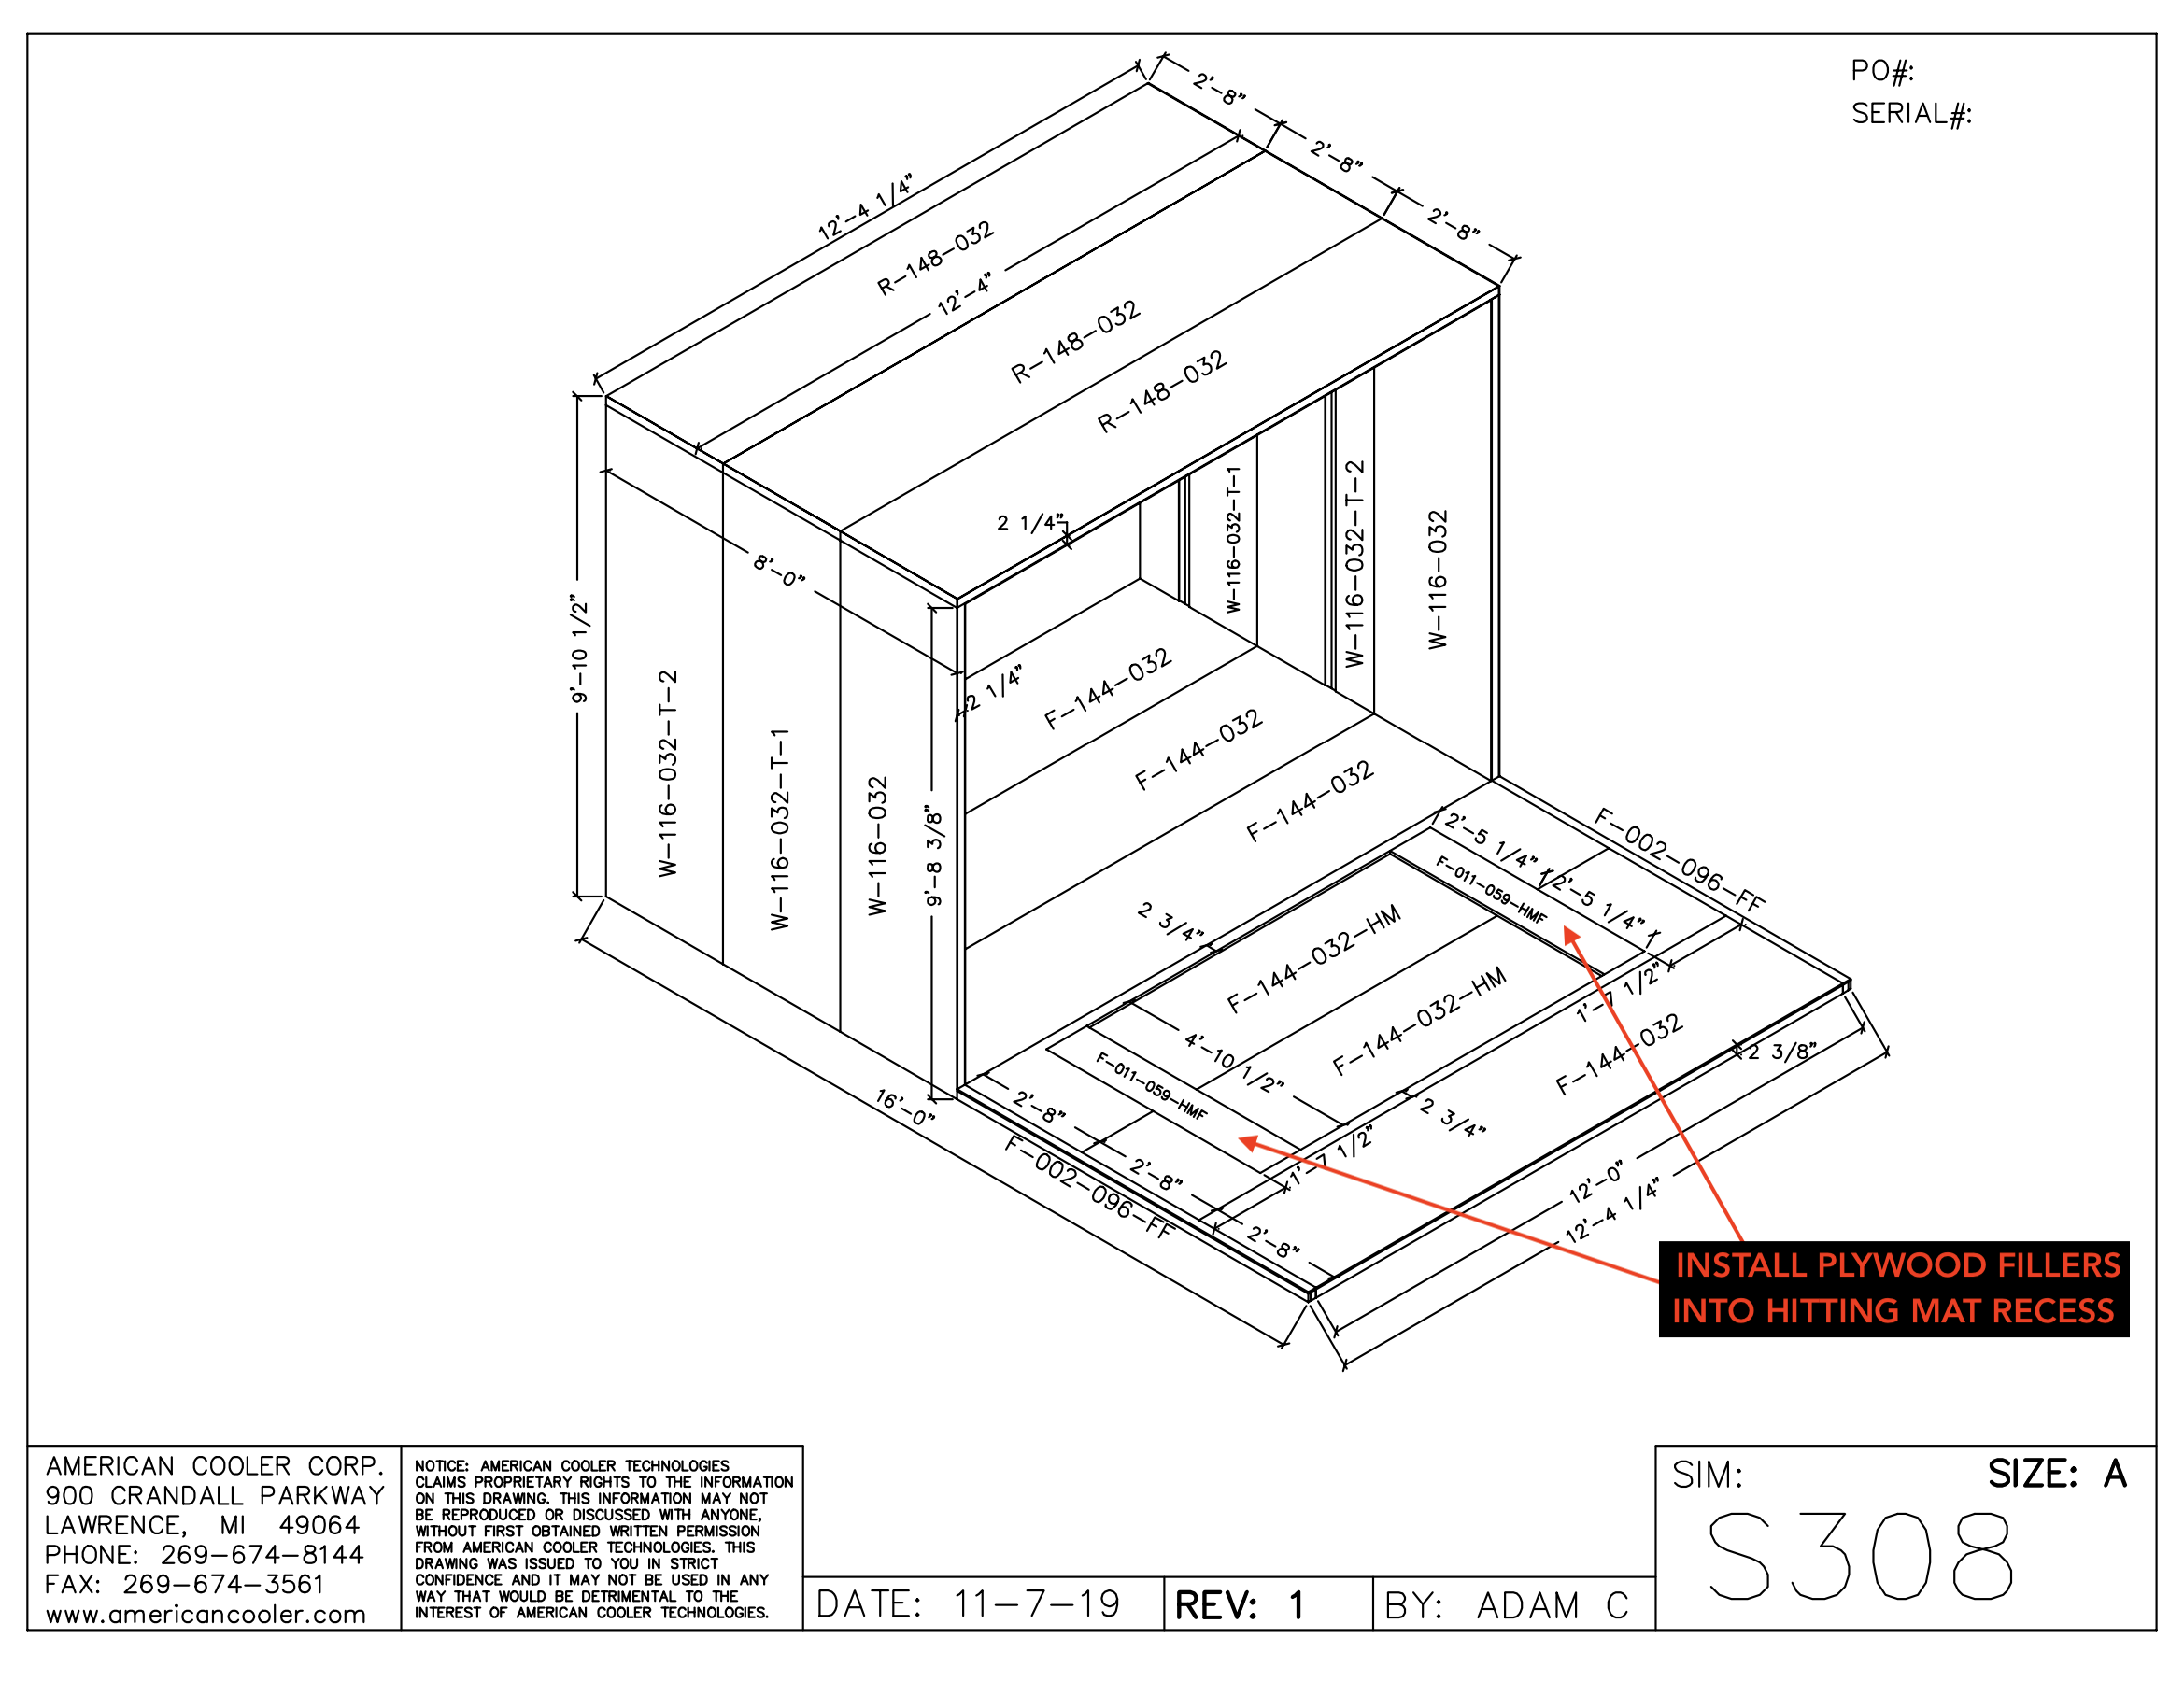
Save the 11″ x 58.5″ plywood pieces that are packed with the booth. These must be installed in the hitting mat recess to reduce the width to 83″ as shown in the diagrams below.
WIDESCREEN ROOF PANEL ASSEMBLY: The roof panels for the Sport/Pro 3 Widescreen booths require a new installation method to help reinforce the entire roof. Please click here for detailed instructions.
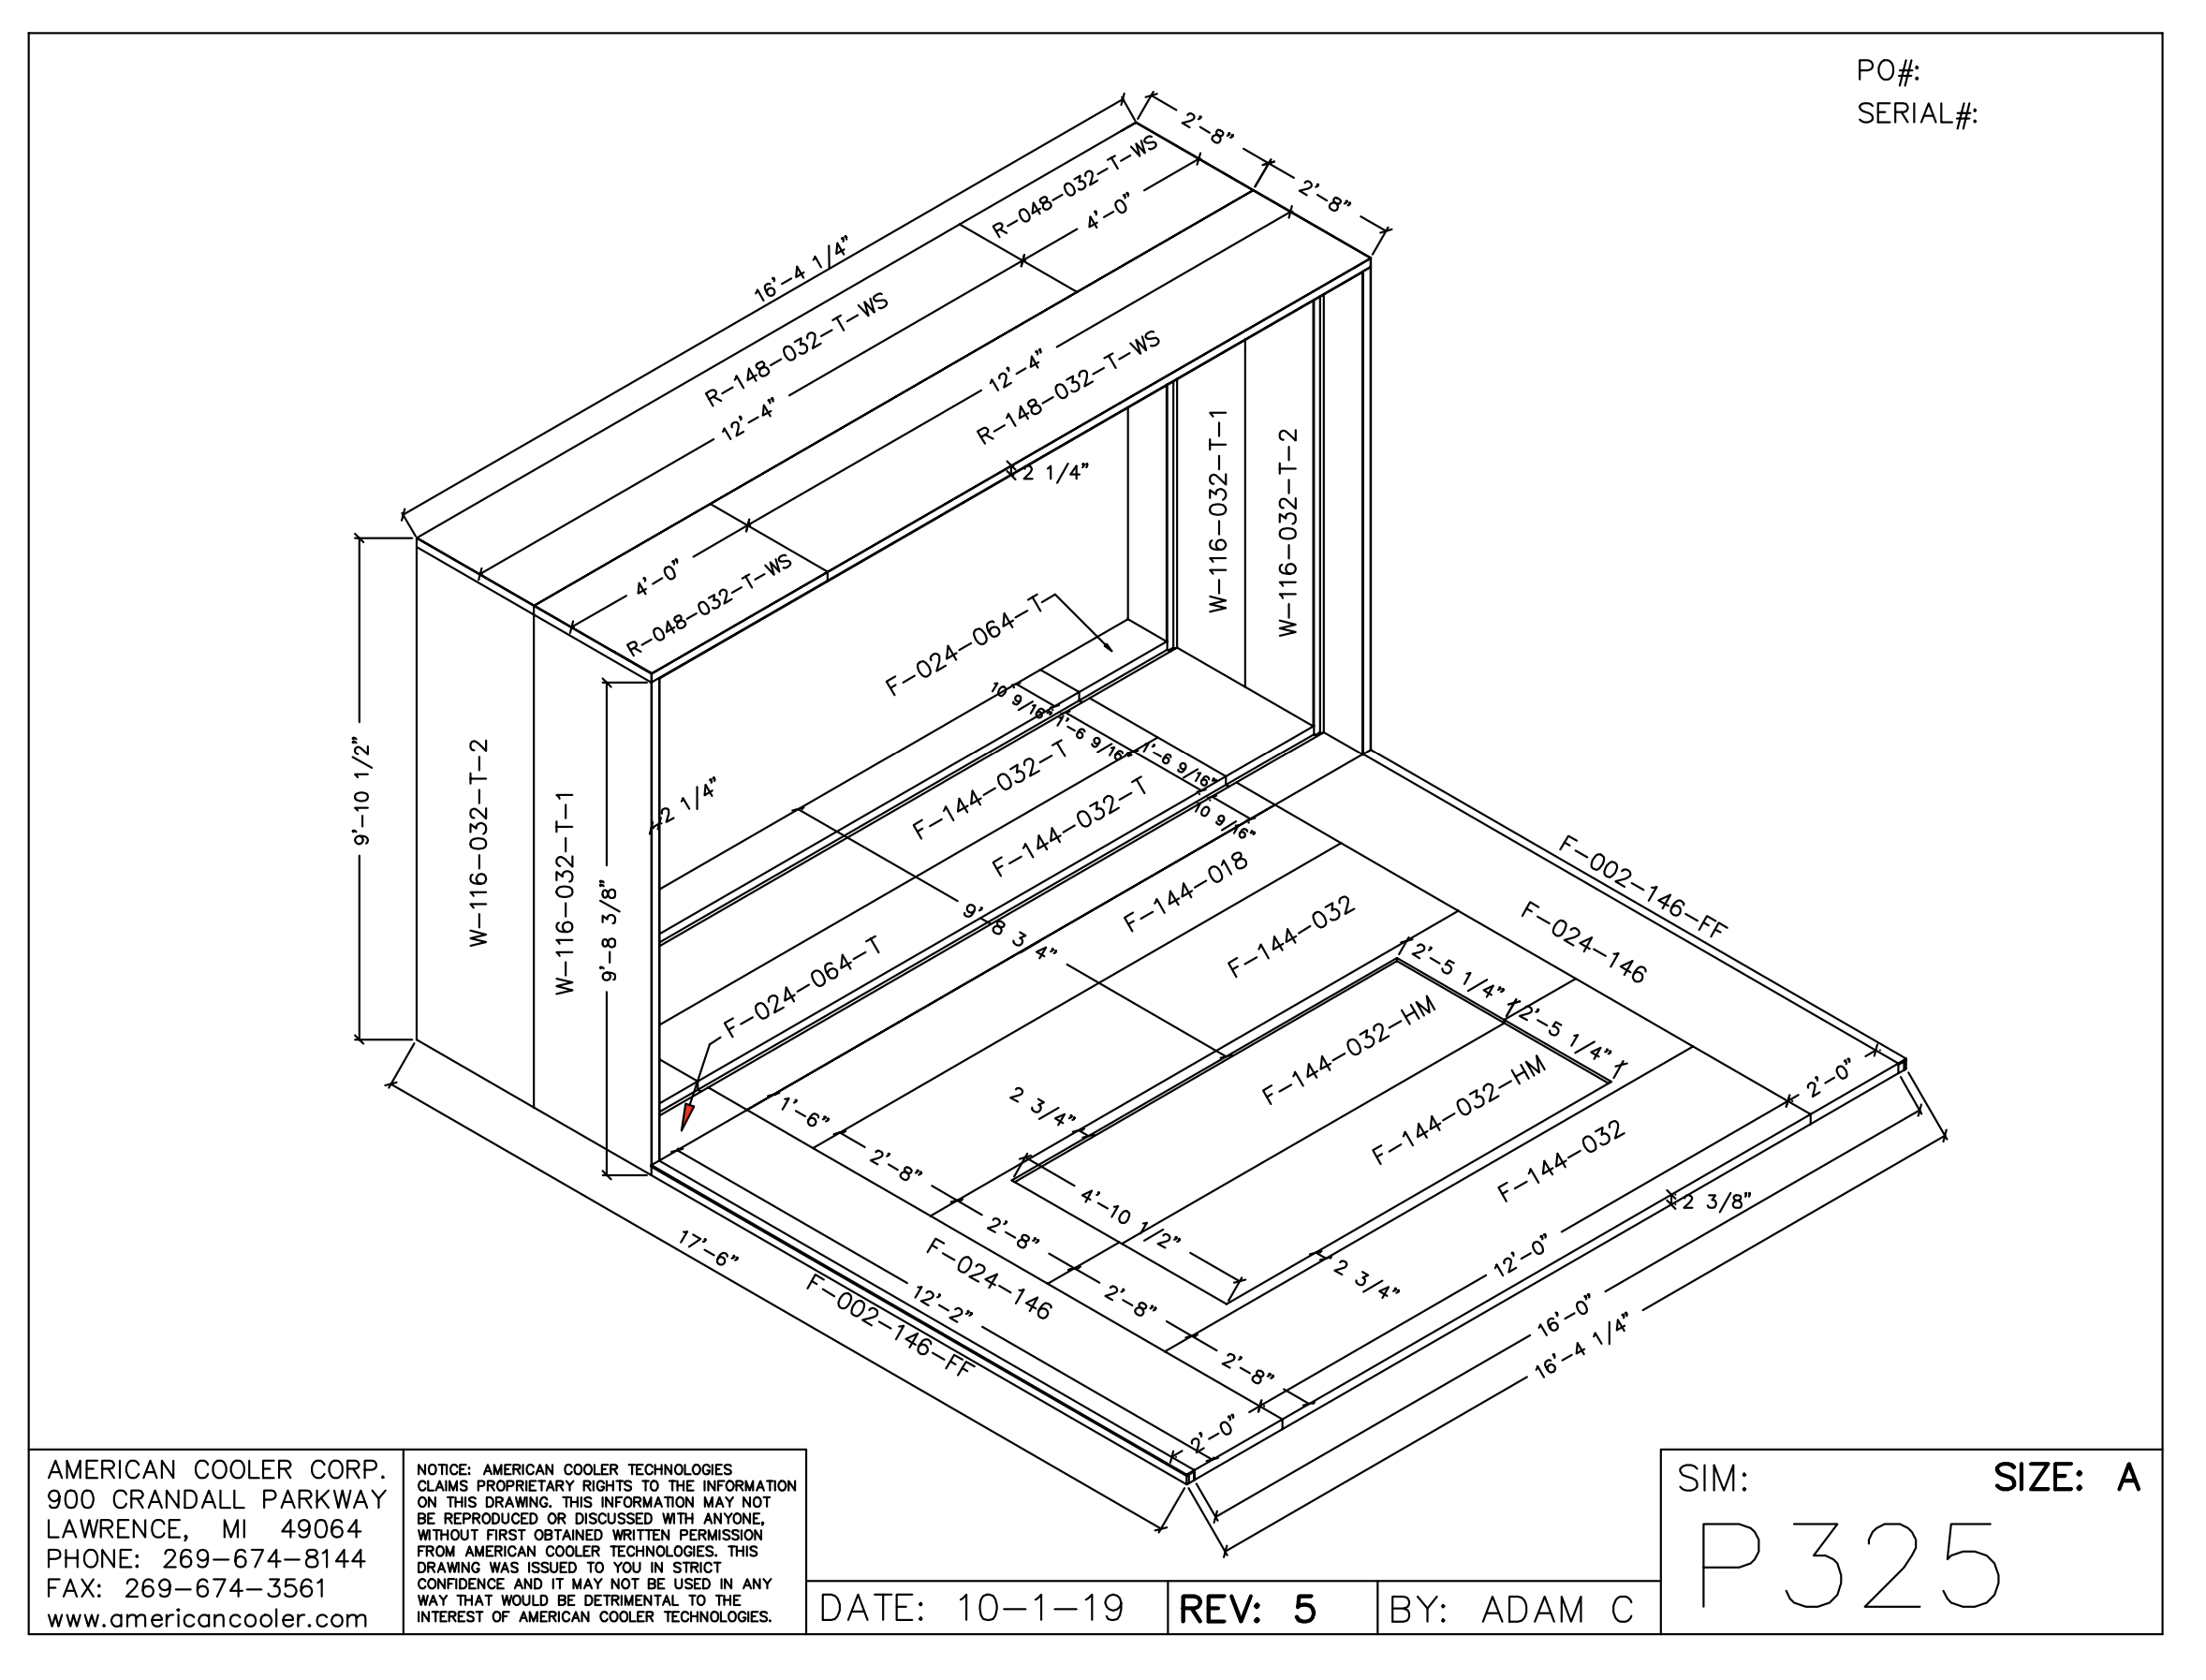
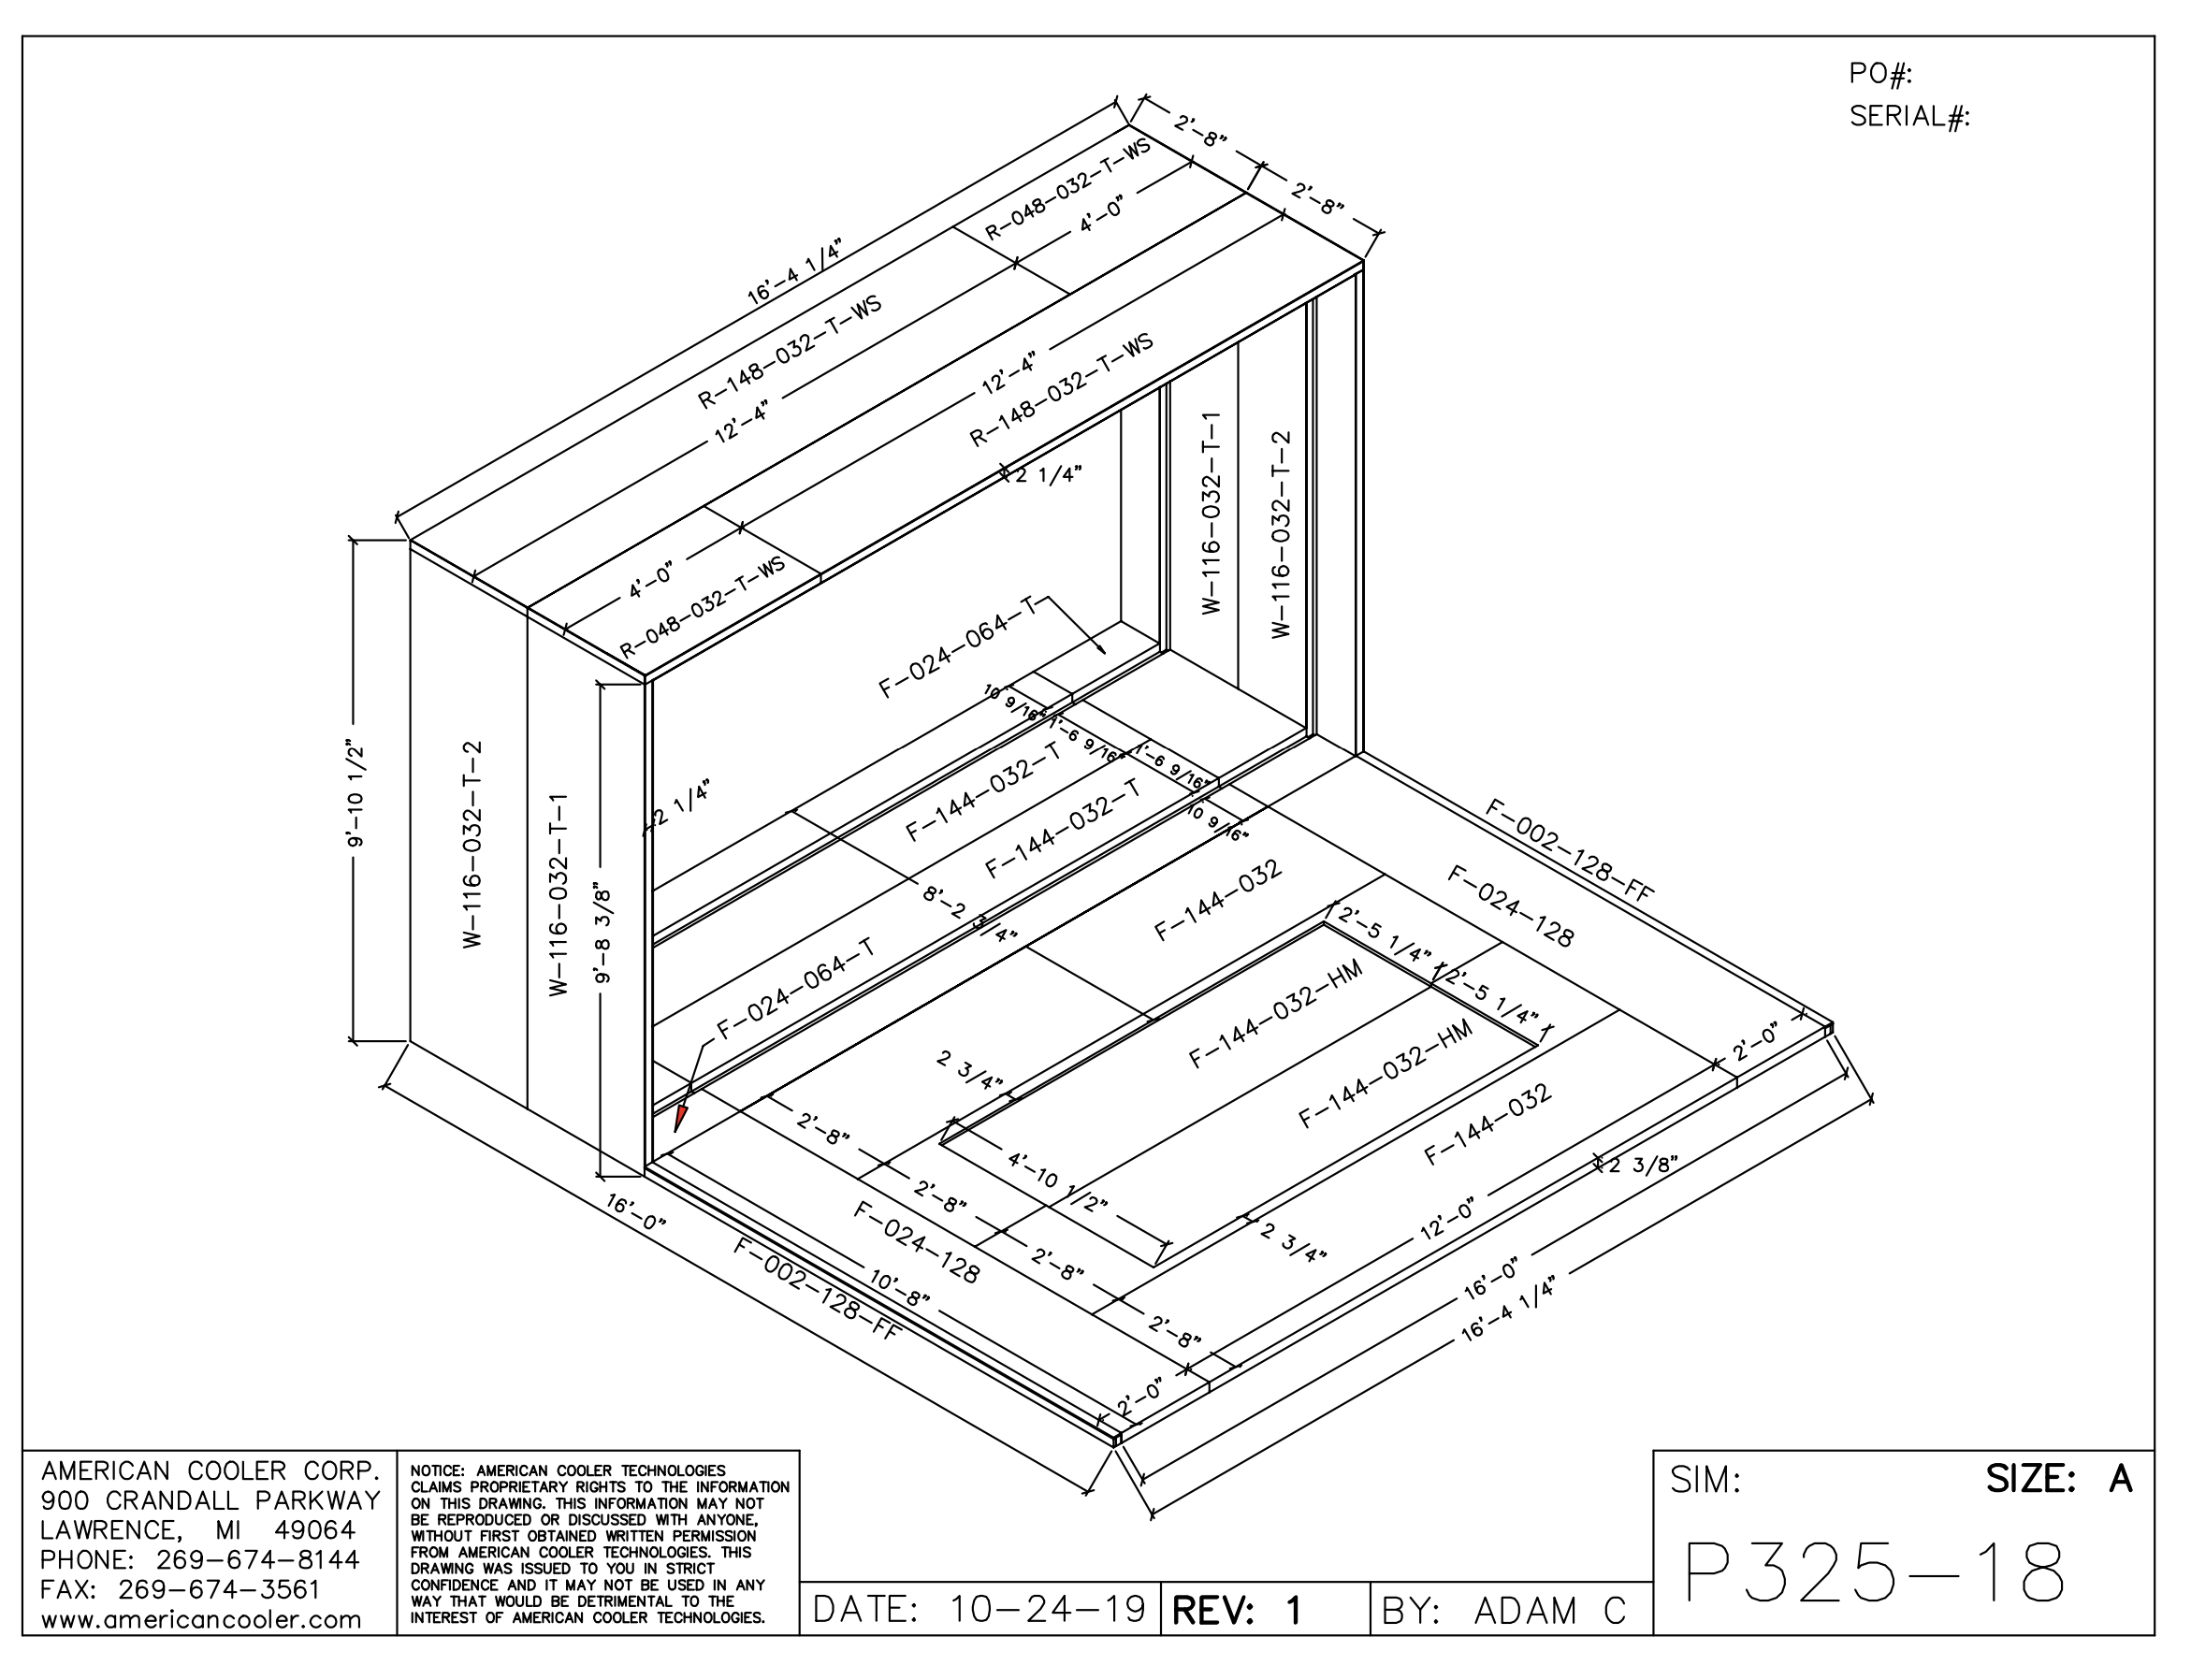
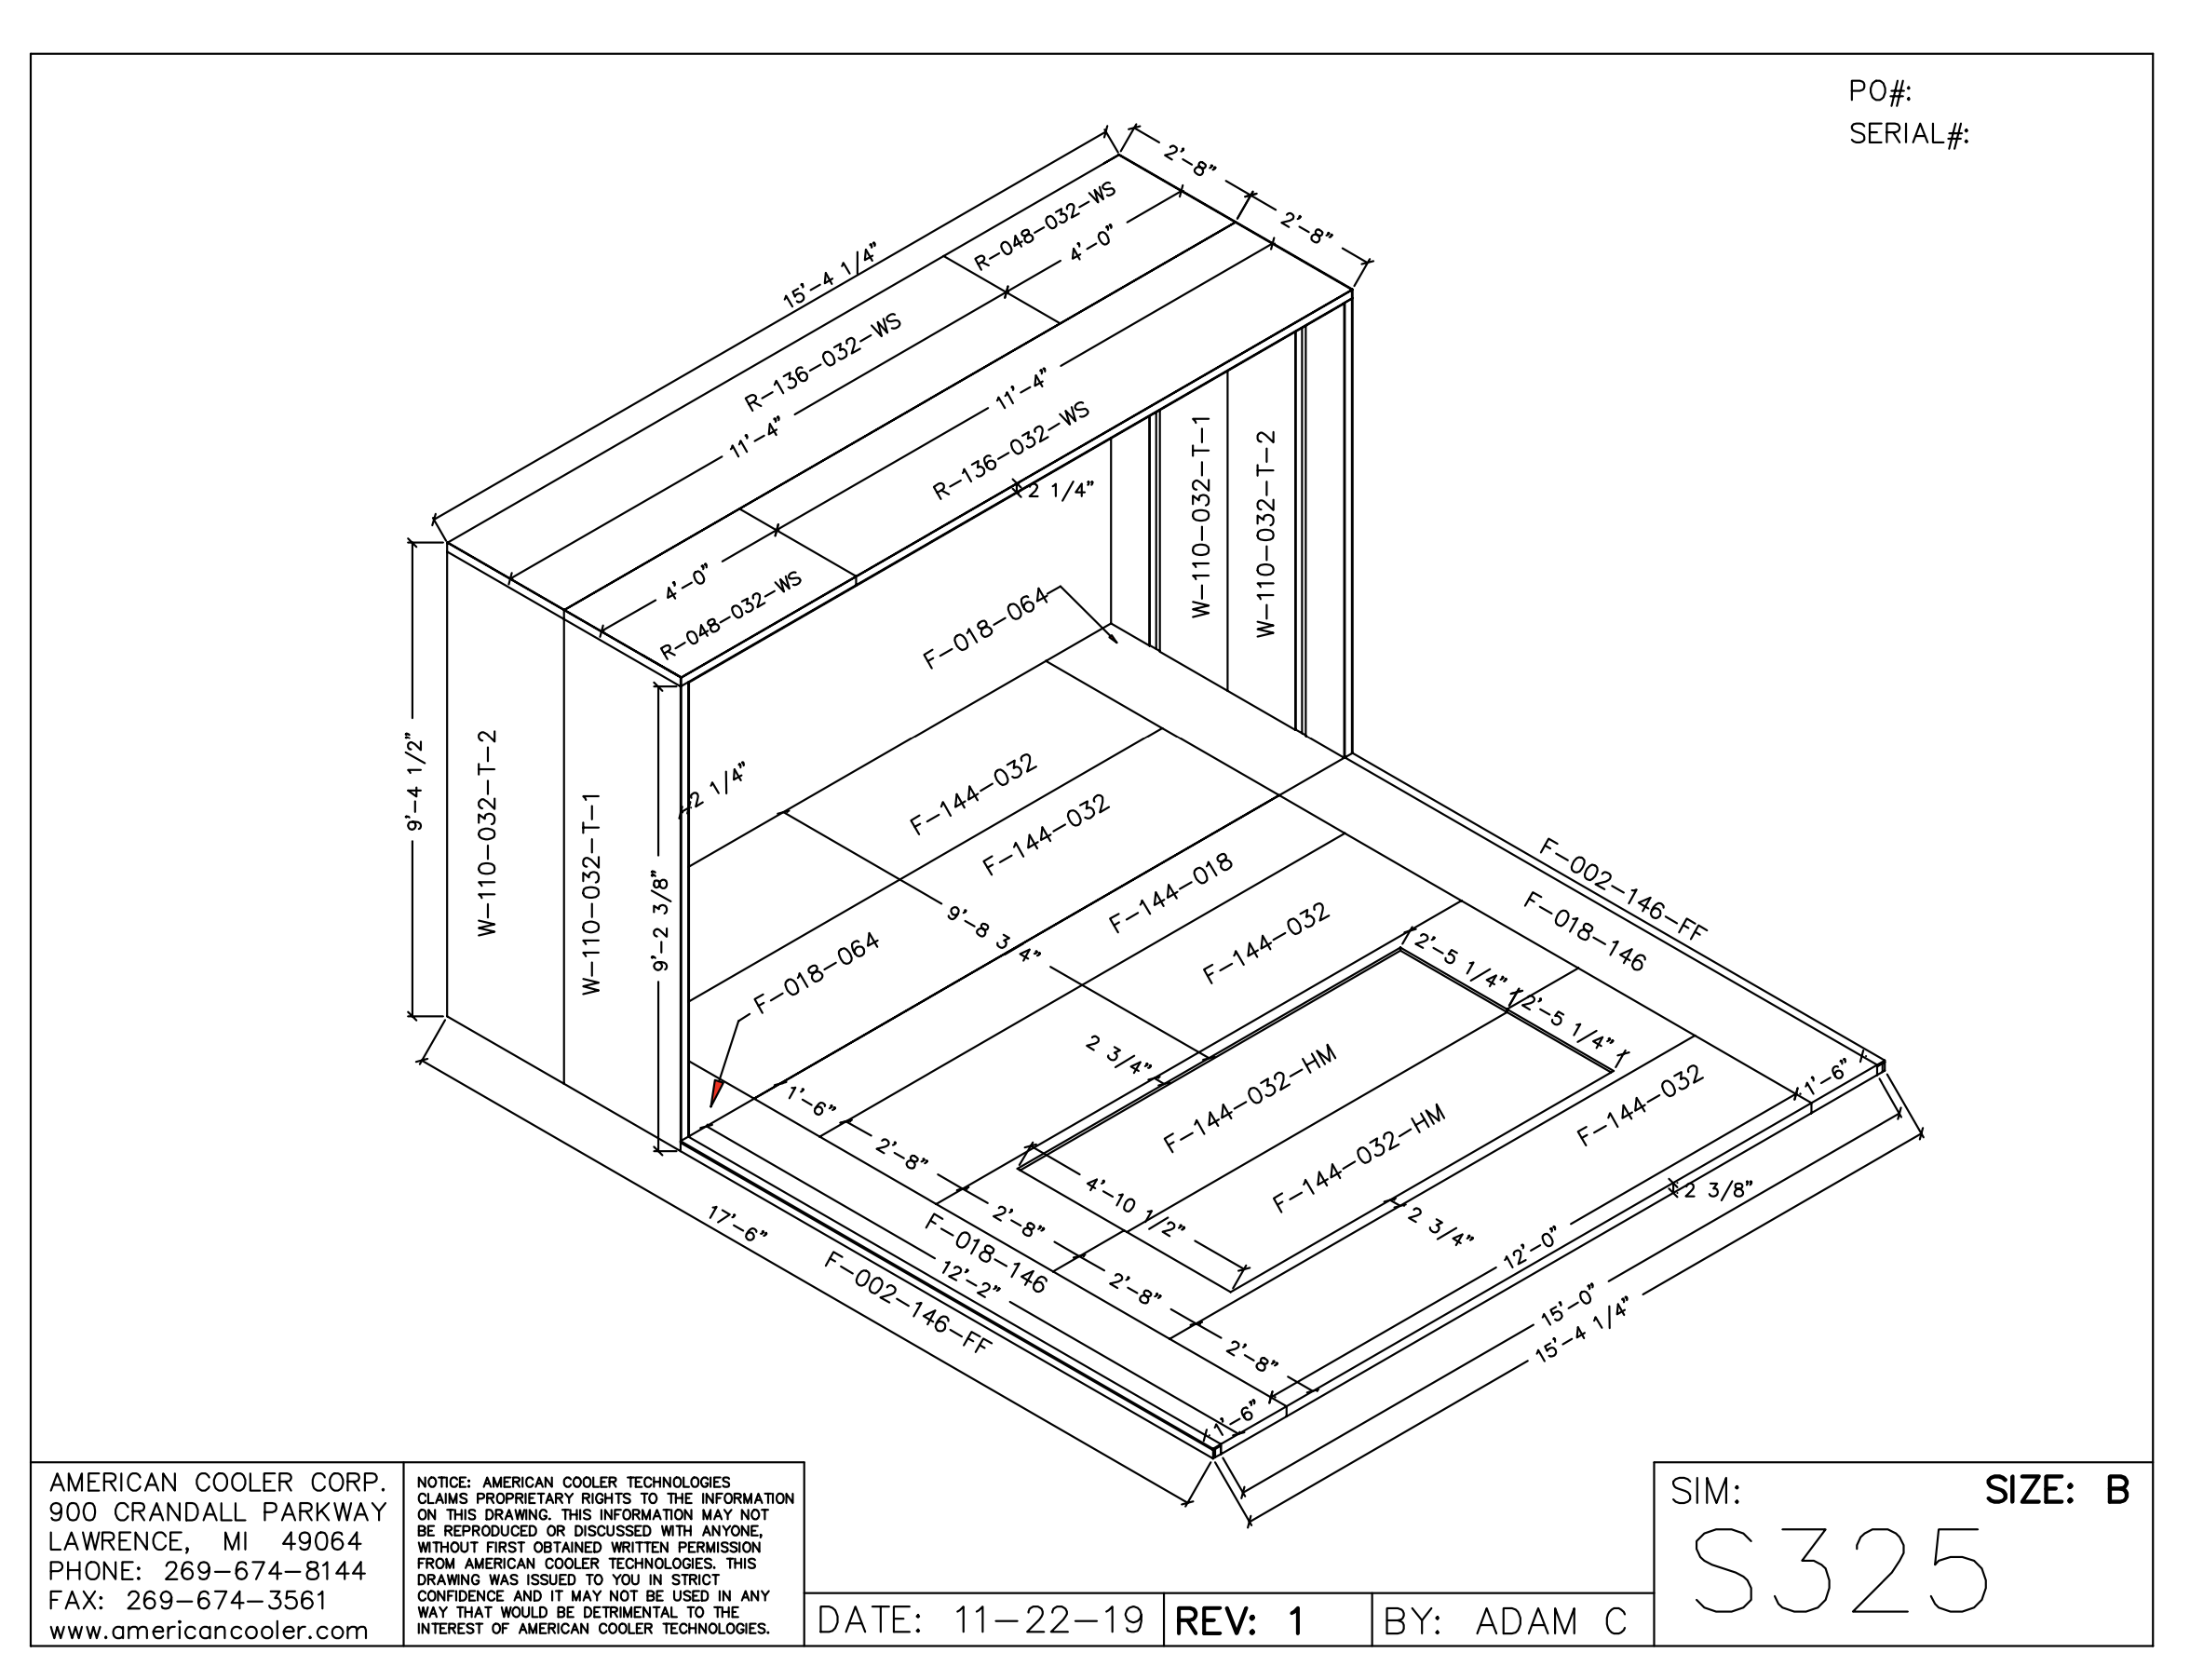
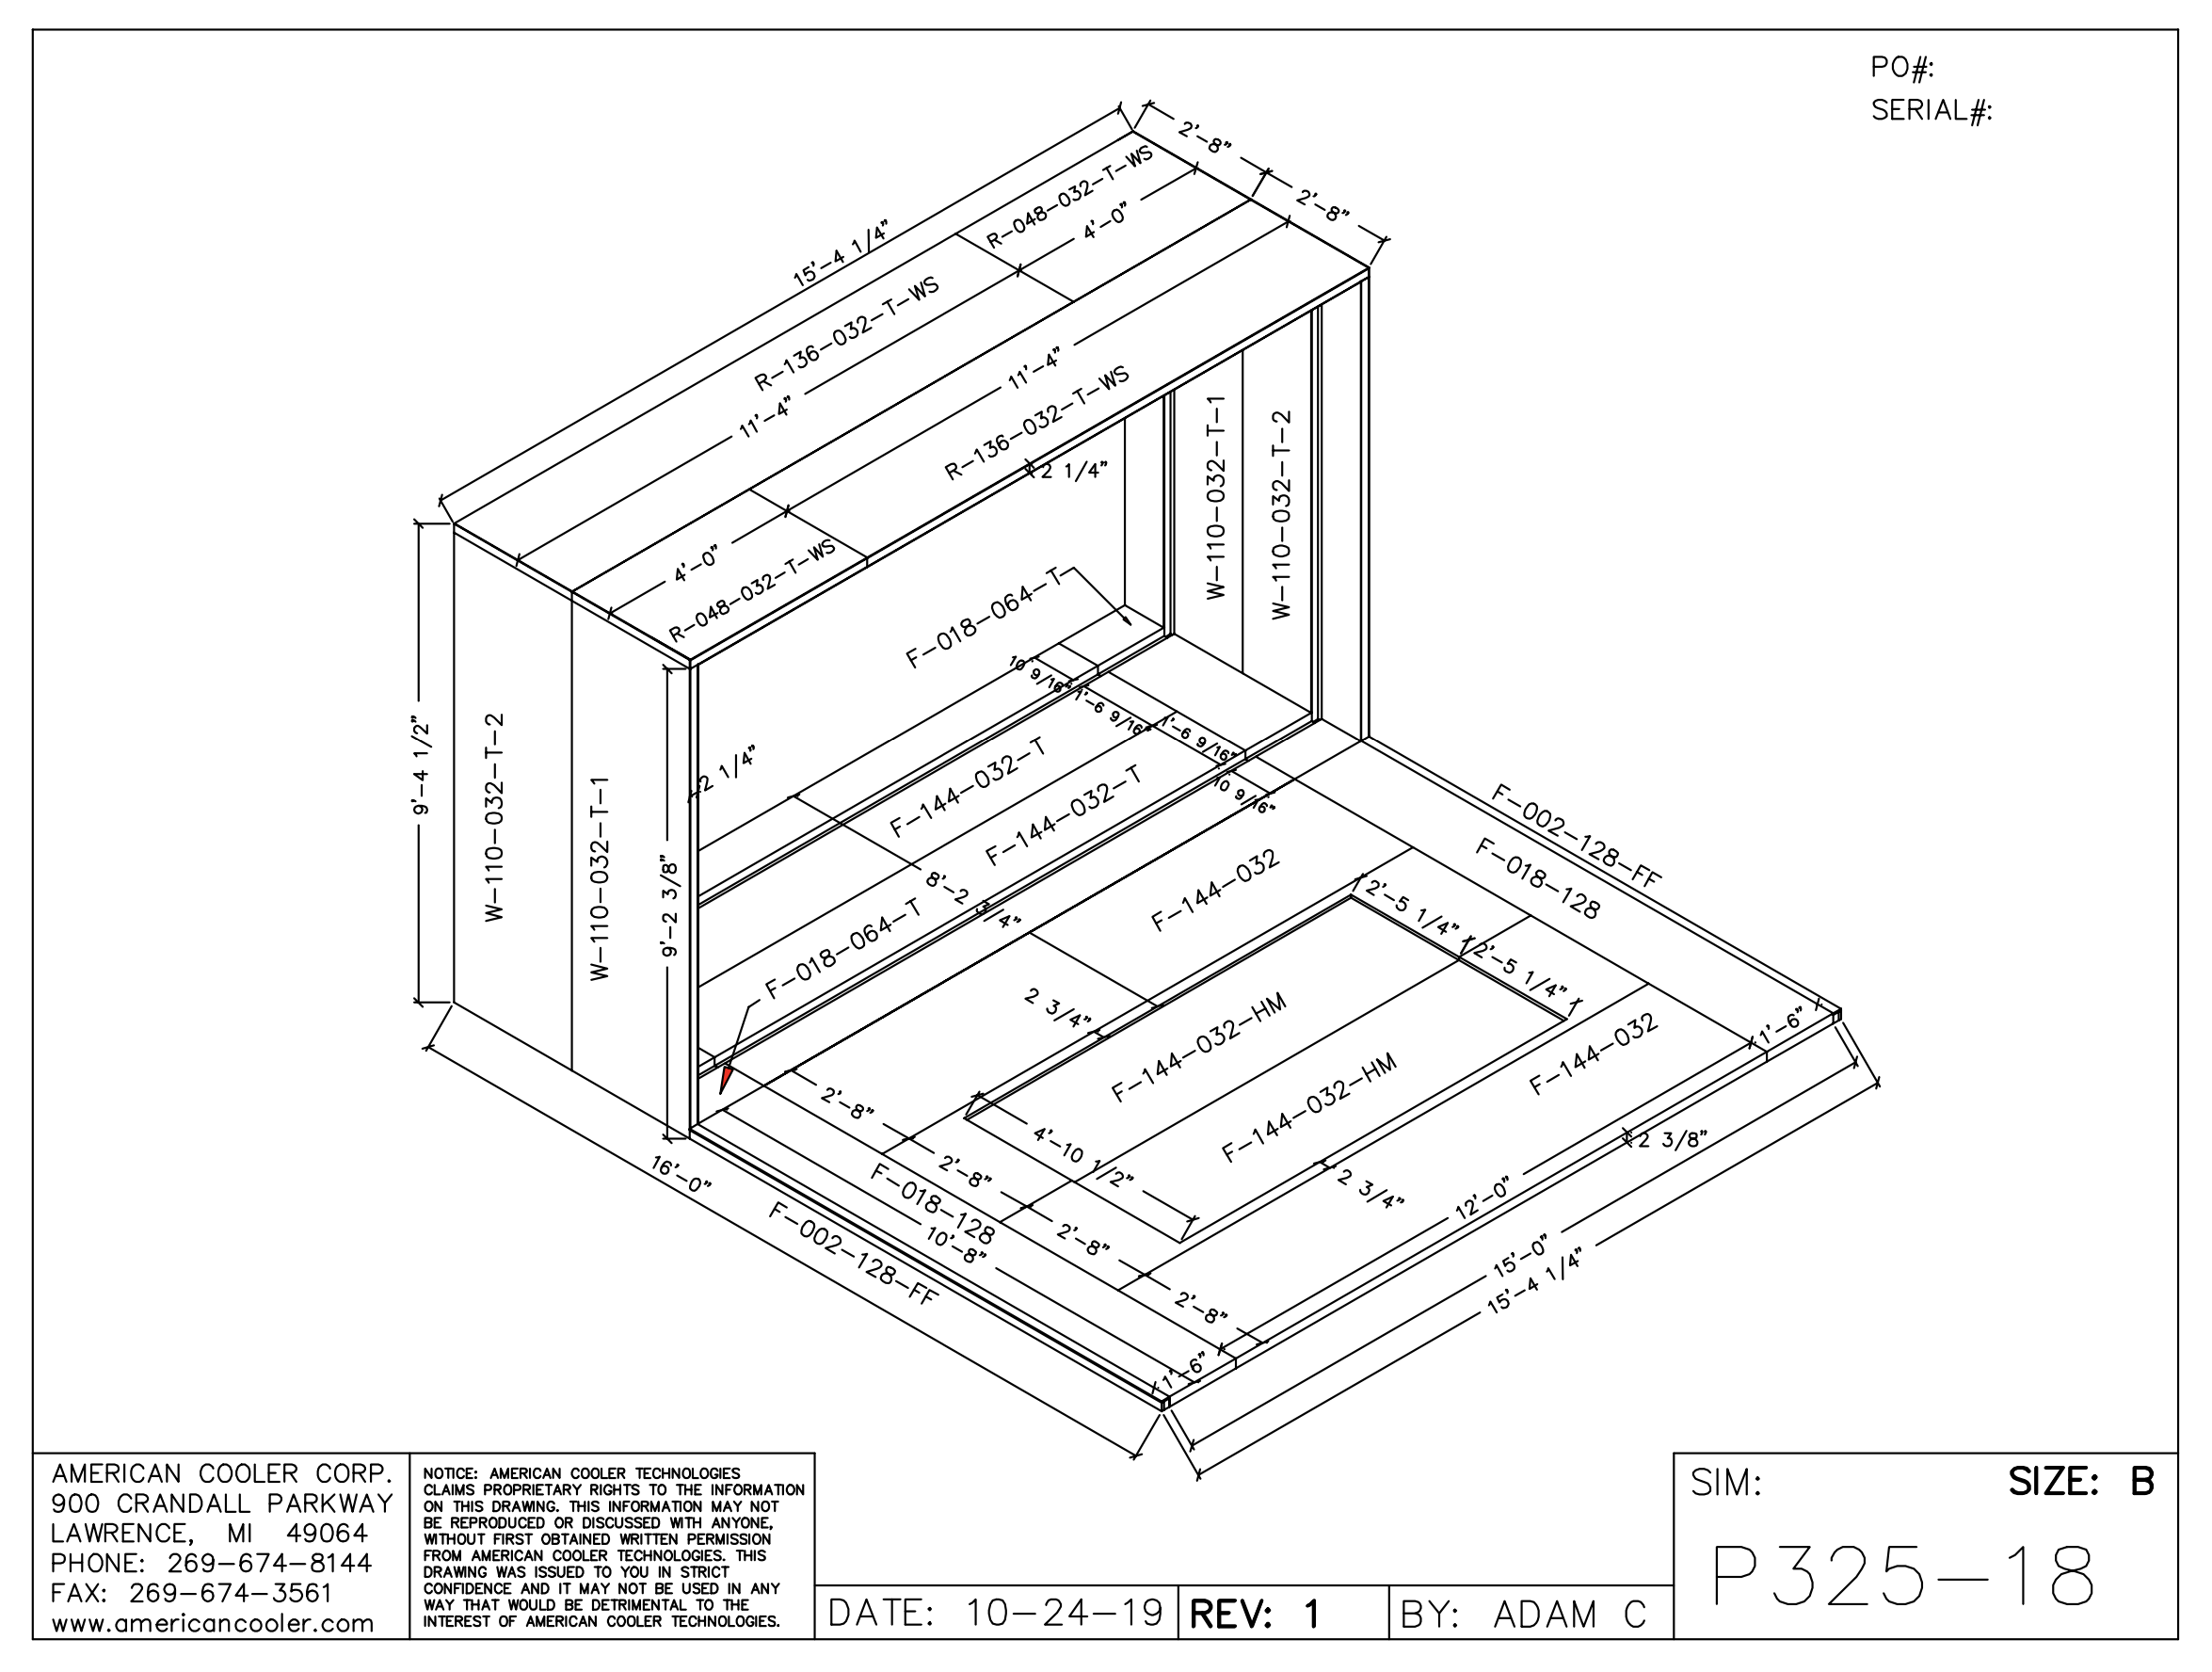
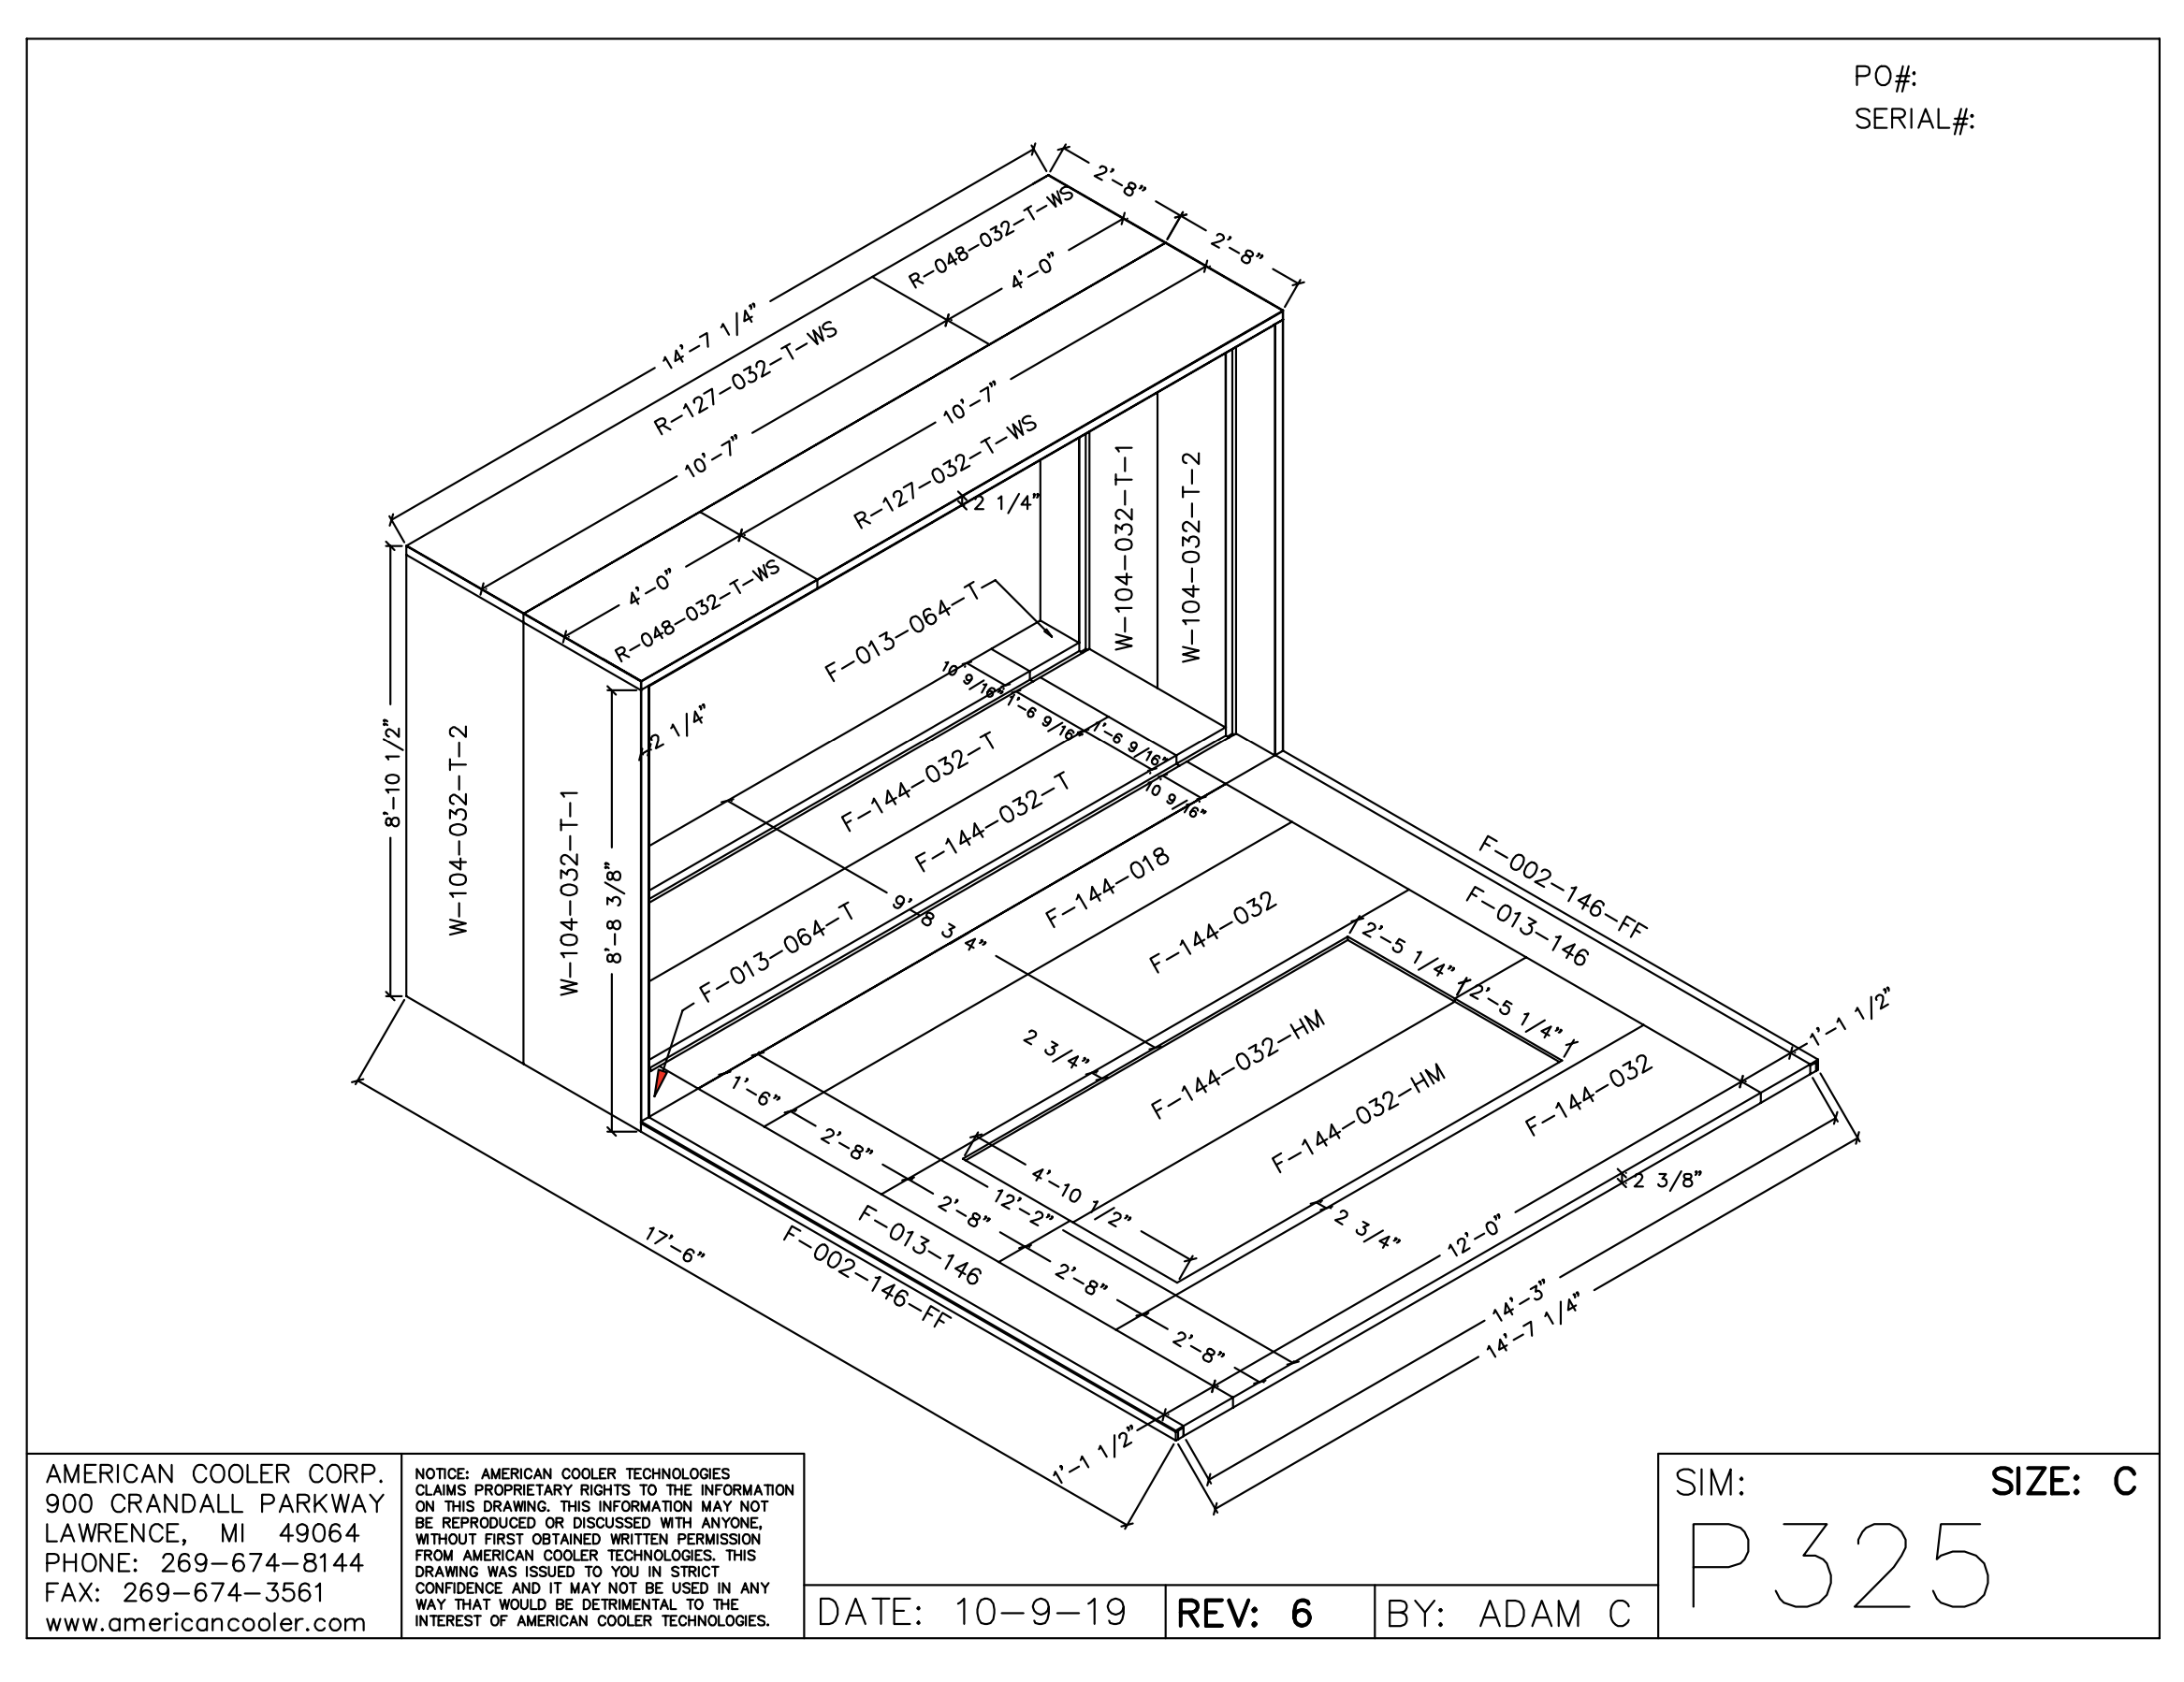
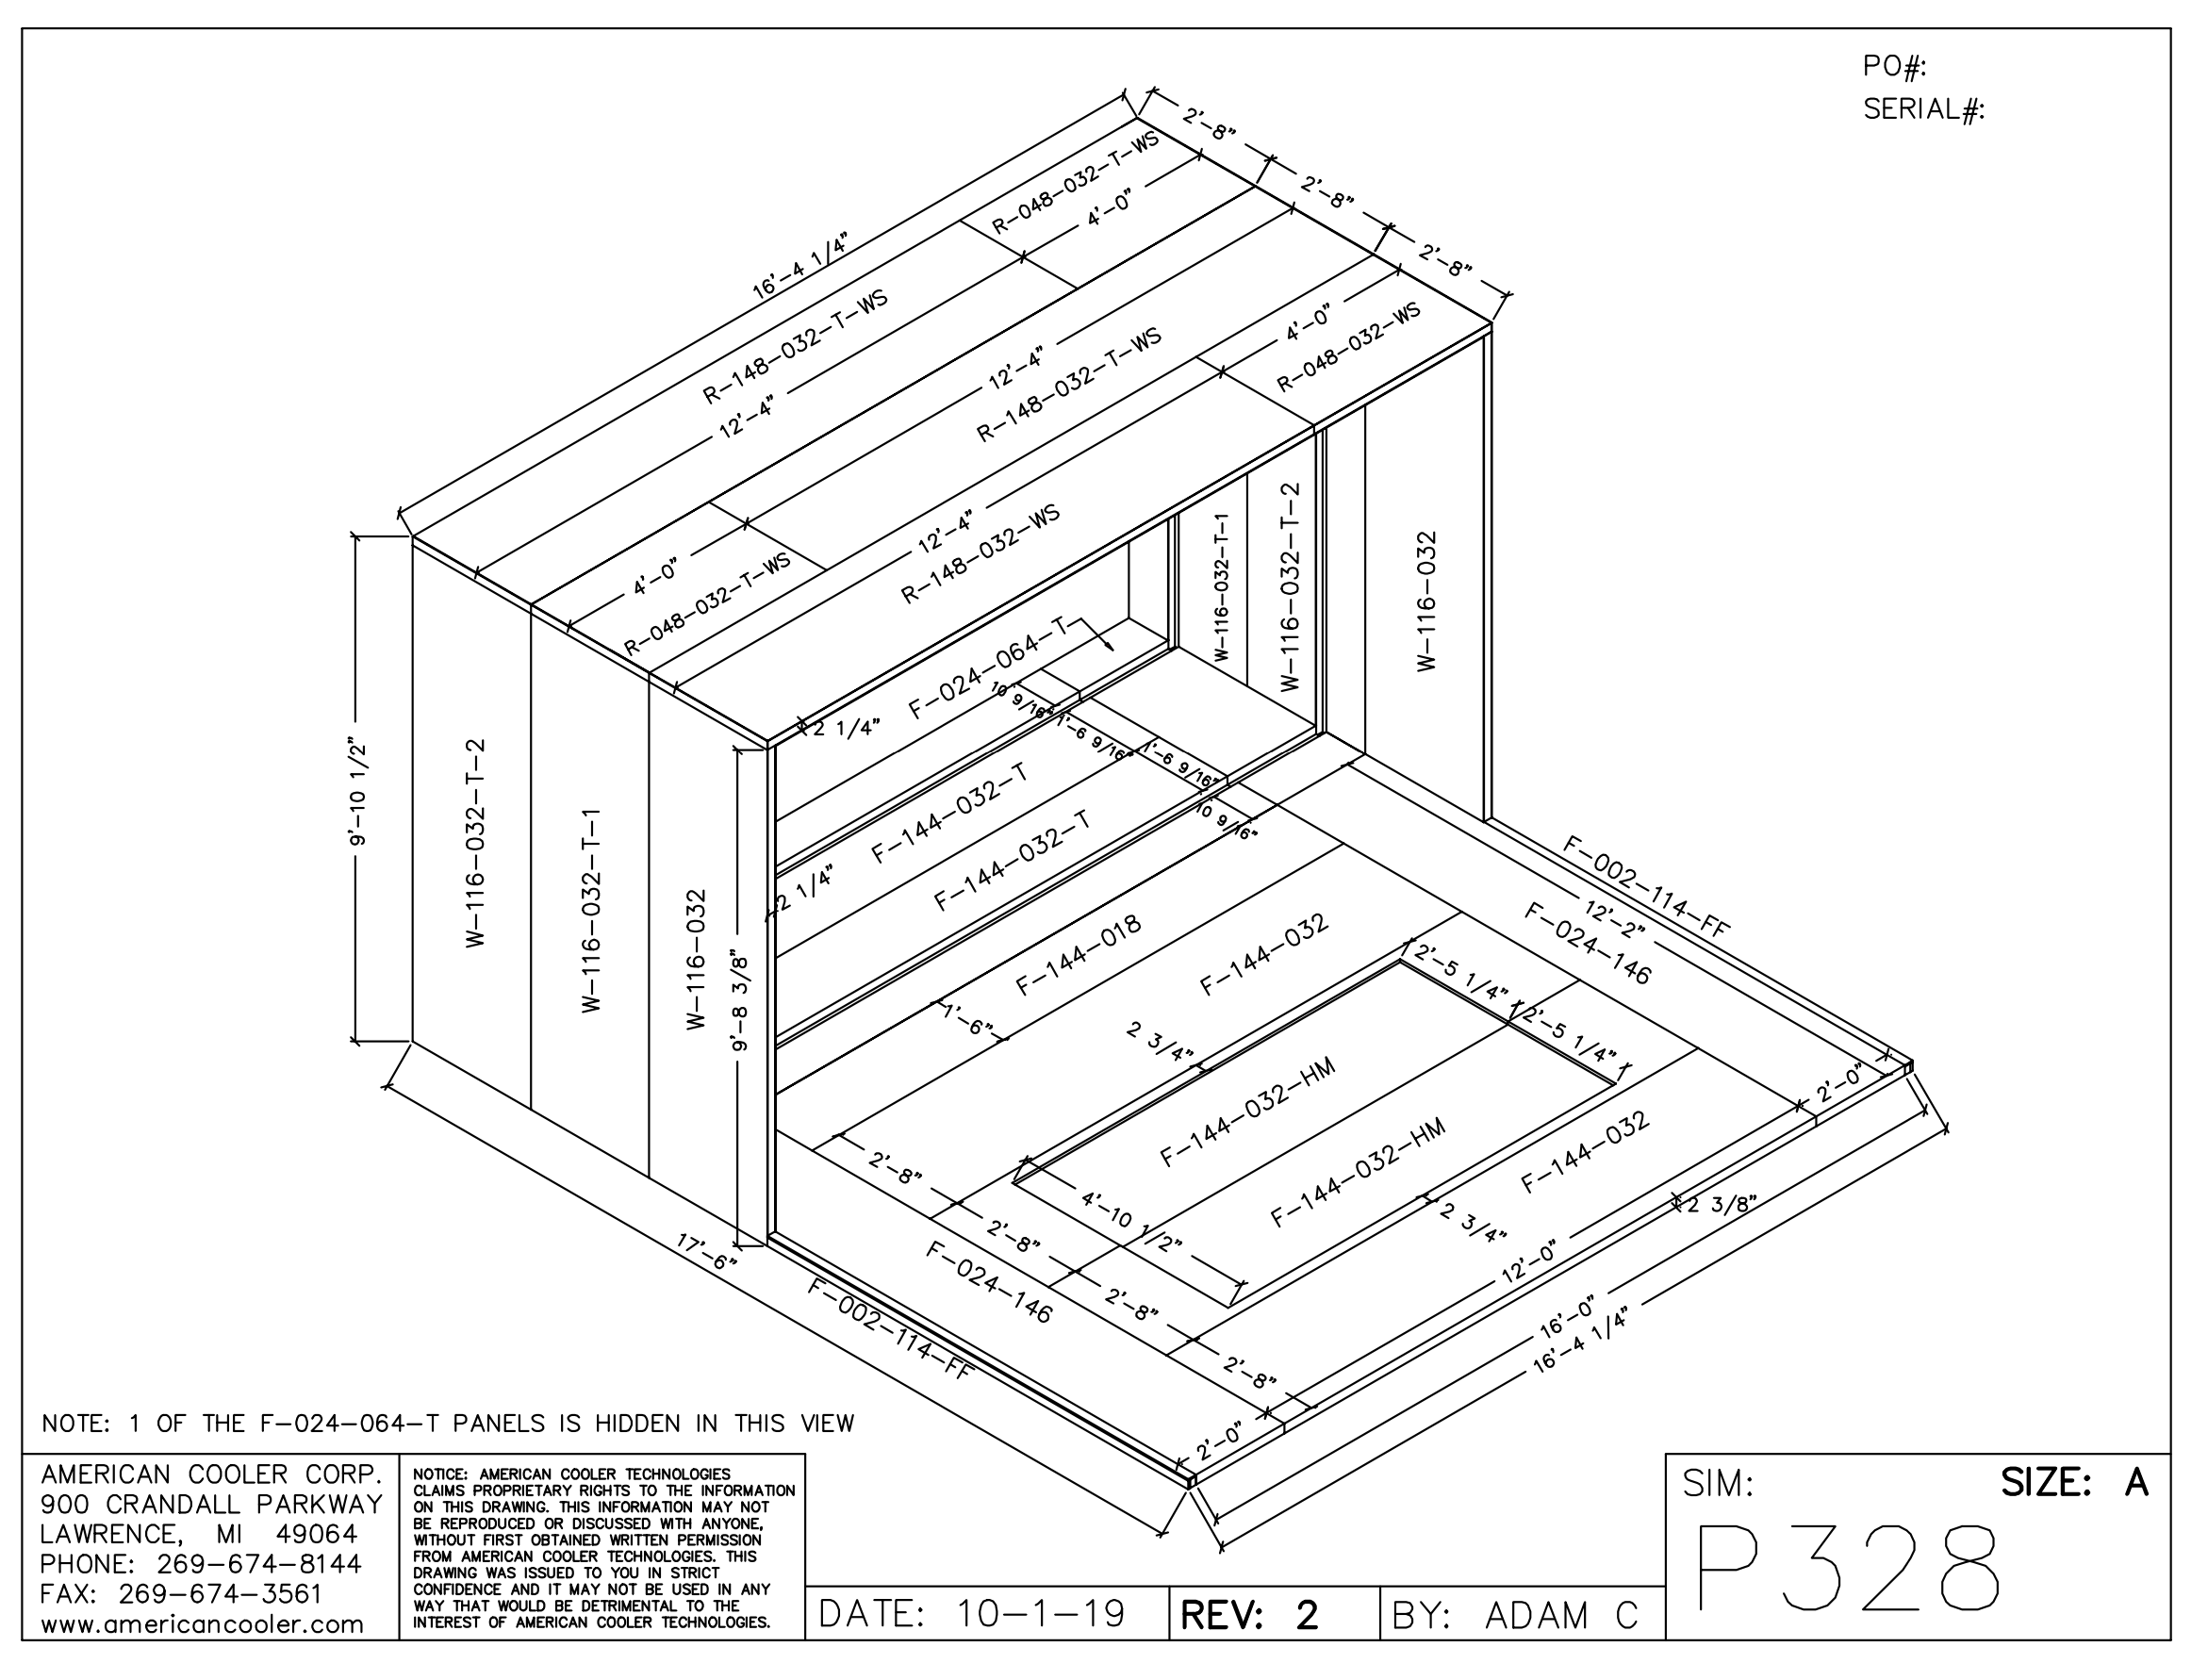
Save the 11″ x 58.5″ plywood pieces that are packed with the booth. These must be installed in the hitting mat recess to reduce the width to 83″ as shown in the diagrams below.
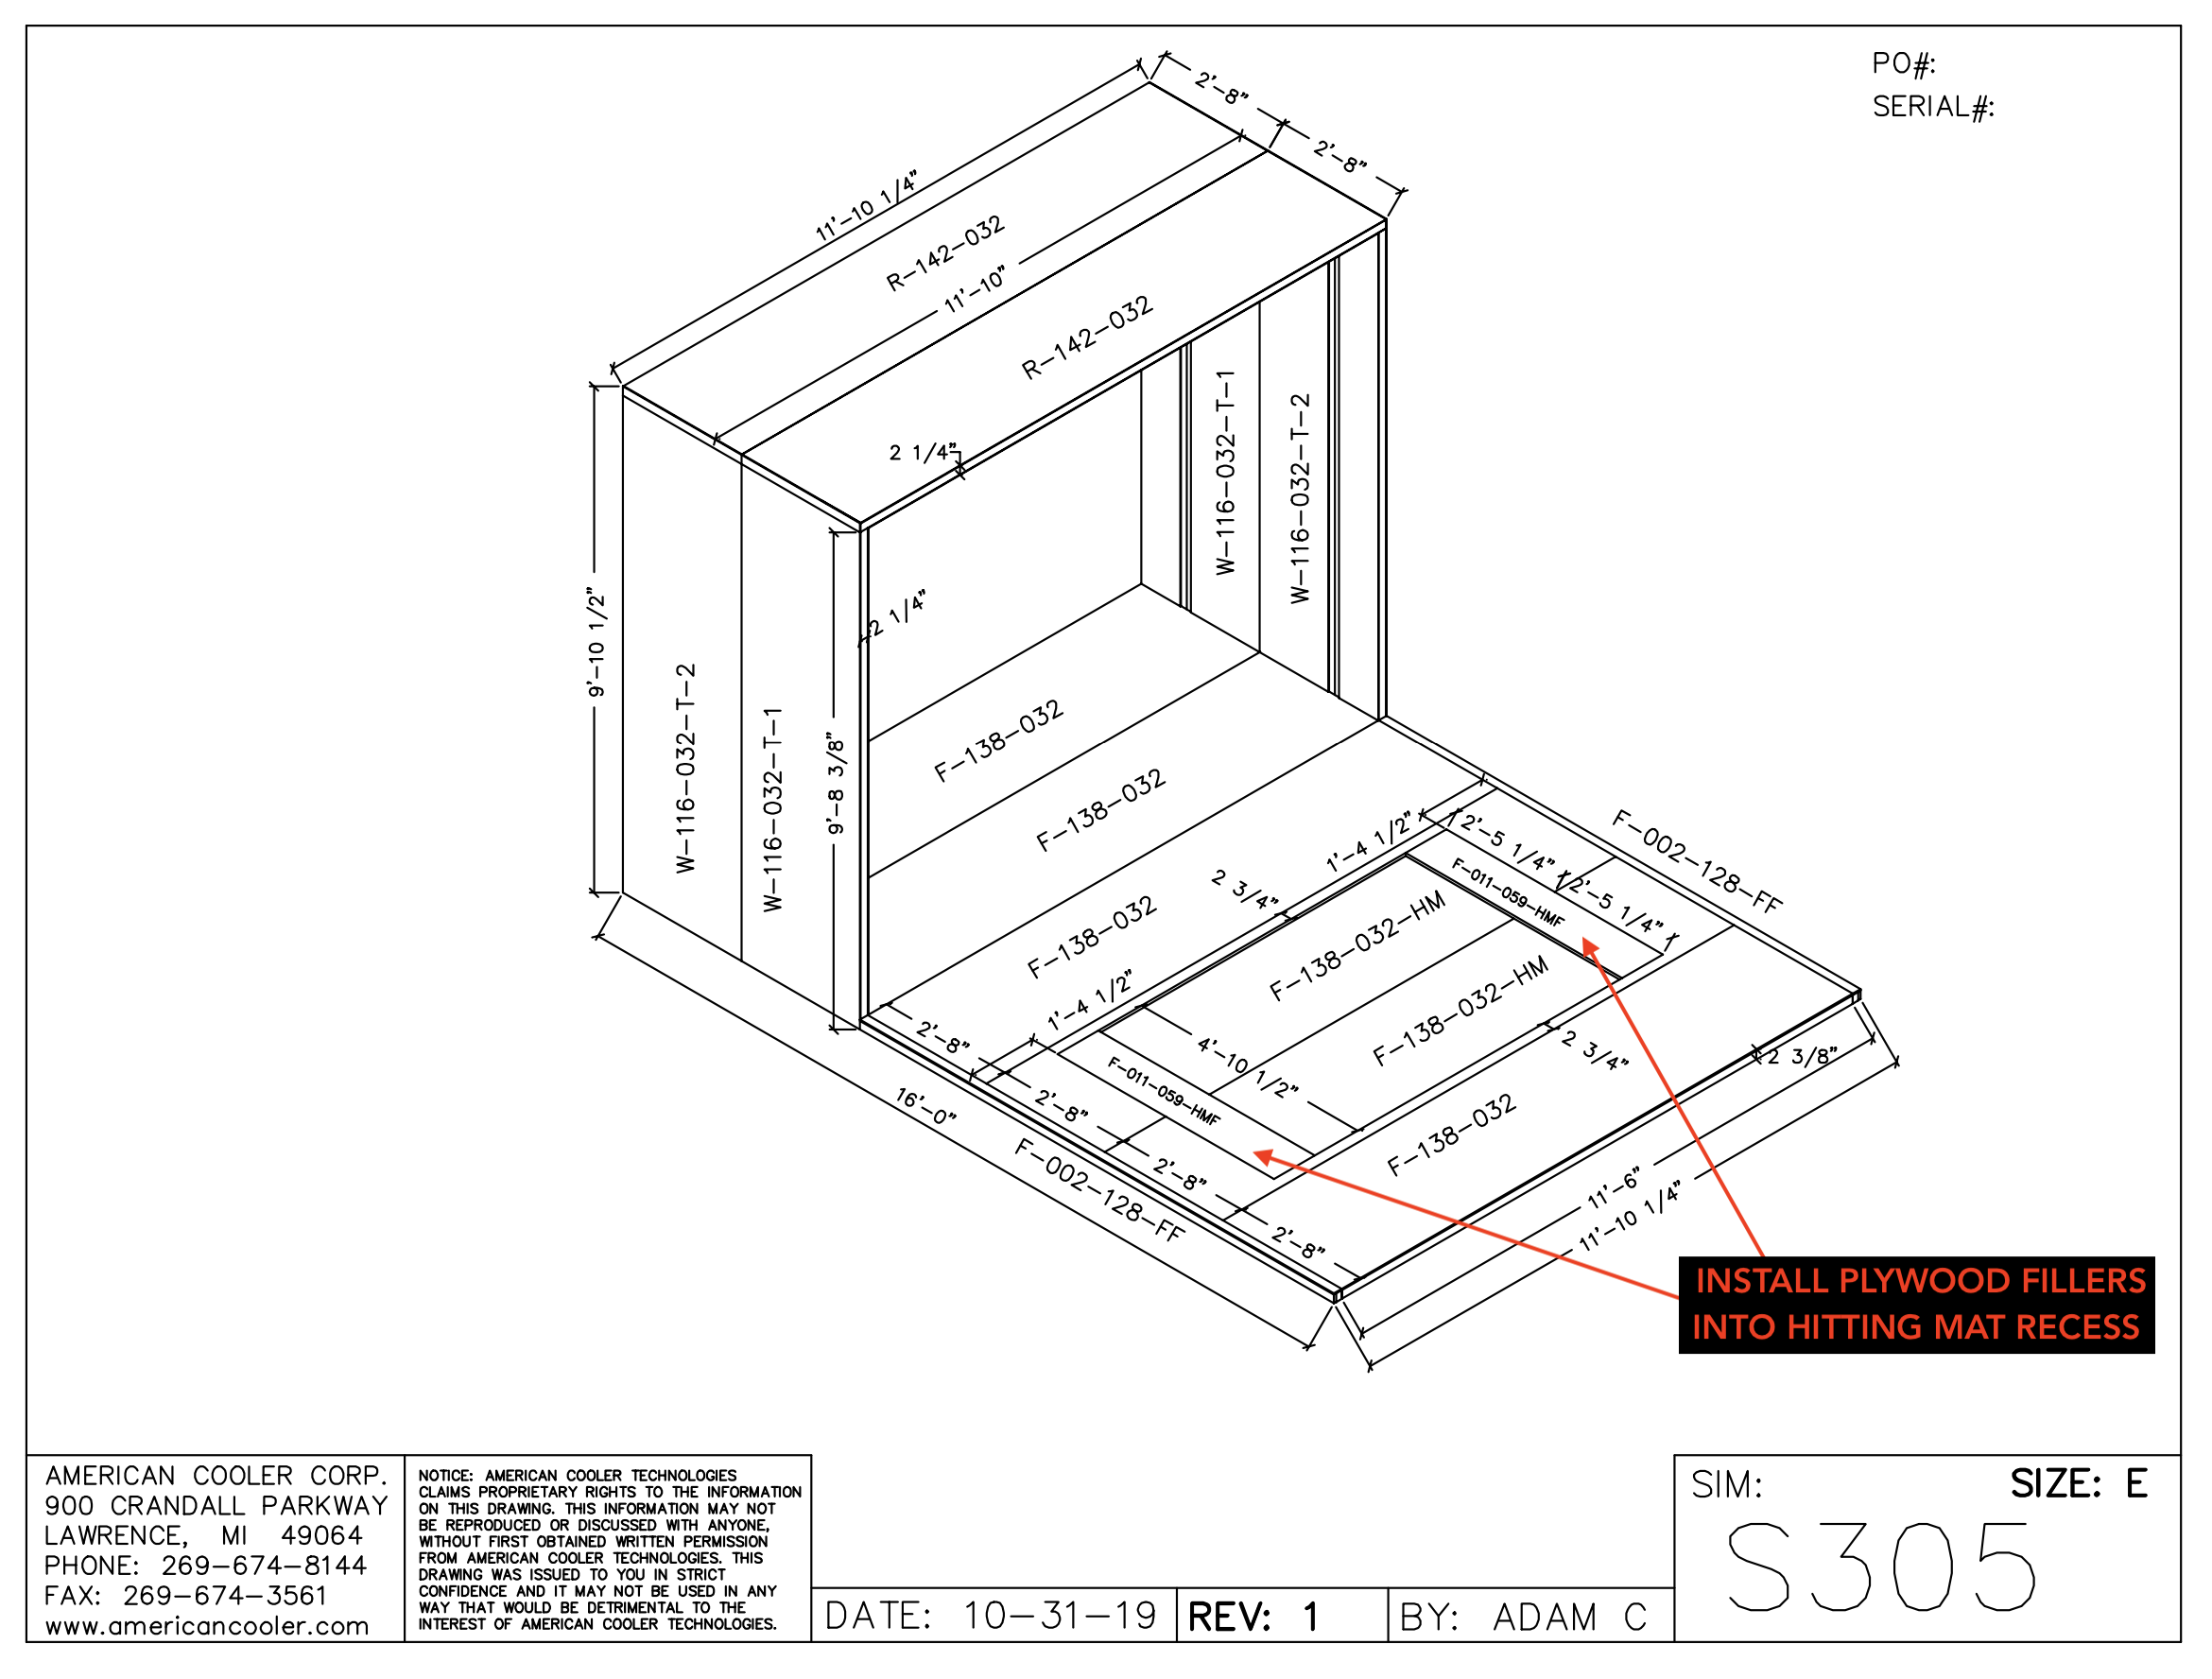
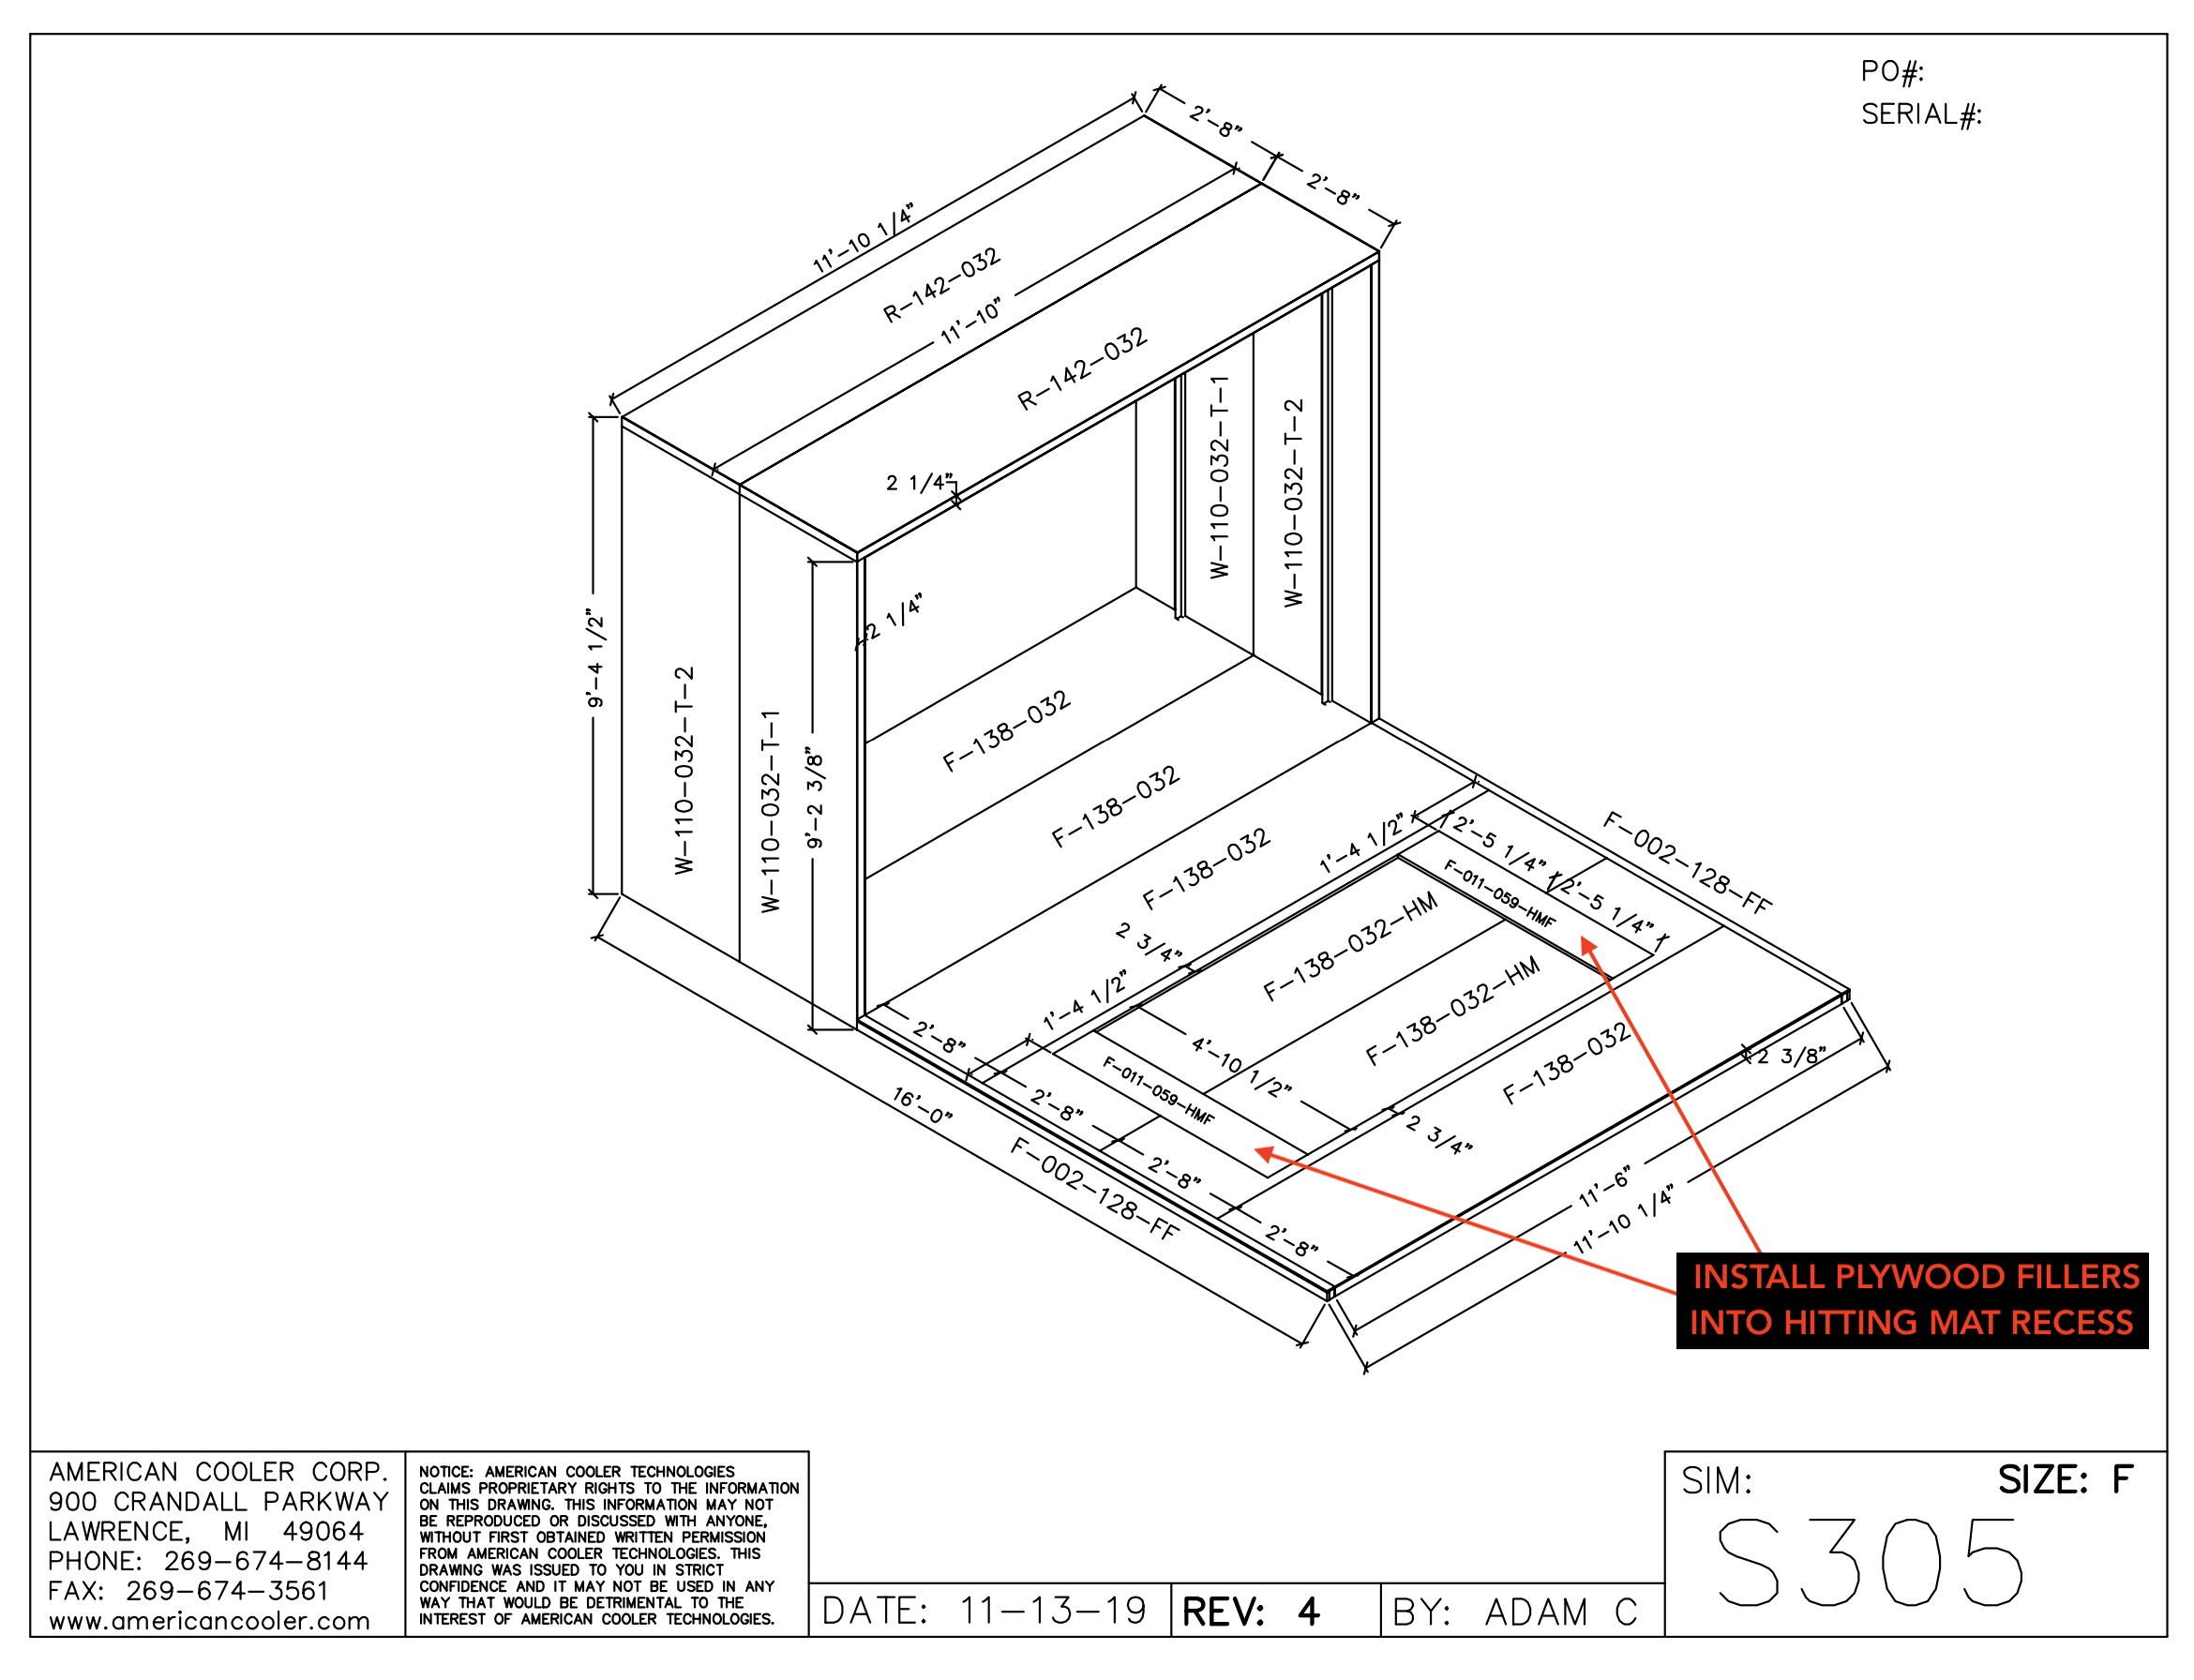
WIDESCREEN ROOF PANEL ASSEMBLY: The roof panels for the Sport/Pro 3 Widescreen booths require a new installation method to help reinforce the entire roof. Please click here for detailed instructions.
